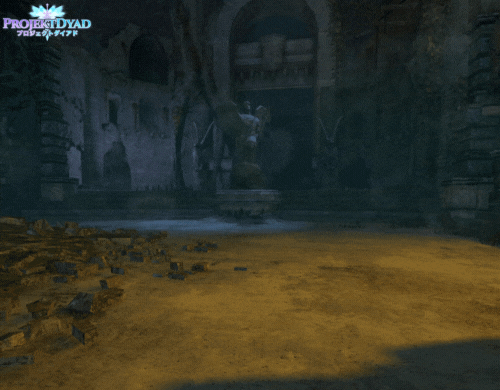
Ascalonian Catacombs Dungeon
Get ready to explore the underground network of tunnels and crypts with Ascalon.

Explore the Catacombs of time past, and experience rich lore from Guild War’s history
Story Mode (Level 30)
Starting Area/Gate Guardian Napa

Open the coffins and fight against ghosts, continuing until you find Gate Guardian Napa. He isn't the toughest, but stun break him, and slow him down so he doesn't knock you down with his hammer.
Once you get him down, you'll get a key that you can use on the door. Be careful though when opening, as there will be some traps. You can disable these with a switch that is nearby.

Ascalonian Captain
Fight through some waves of trash mobs, and head up the stairs, where you will find an empty area with traps. There will be a lever to turn these traps off, but the Ascalonian Captain is guarding it.

Use the lever, and dodge her attacks.
Grab the boulder to the left, and place it on the glowing area to open the door in the room prior that you came from, the panel will have a slight shimmer, use Weapon Swap to drop it on top of the panel.
Traps
Behind the door there will be a fire trap! Wait for it to go off, and then quickly run past. Be careful as there will be spikes and a lot more fire traps, you can either kill them or just run past again.
Once you have got through the traps, go straight instead of the stairs to the left.
Ascalonian Captain and Eir
Time to fight another group of 3 trash mobs before getting to Eir. You will also fight another Ascalonian Captain with the same mechanics, defeat her before Eir joins you.

Ascalonian Lieutenant

First boss, will be at the top of the stairs. He will spawn tons of adds when you first approach him. One of the easier ways to kill them is having one person trigger the event, and then hide behind a pillar, killing them off.
Ascalonian Lieutenant will be ready to fight you and your group, he will be similar to Gate Guardian Napa, so stun and slow him before he knocks you down.
Master Nente
From the central room, head west in the Hall of Murals. Several Ascalonian ghosts will try and stop you.

Fight these enemies in a big area, so you have more room dodging the AoEs. Master Nente will be at the top of the pillar, climb up the small board to get to him.
When he hits 75%, he will teleport and summon a wolf pet to aid him. Kill the wolf, and Nente will teleport back to the pillar once he hits 50%. At 25% he will teleport again, and summon another wolf. Once again, kill the wolf.

Killing Nente will also spawn Murals Waypoint.
Kasha Blackblood
From the central room, head east, then north. Kill the minions as quick as you can, as Kasha Blackblood will leech life from them and heal up. Use tons of AoE damage, as you can hit her minions. Make sure to stay away from the top of the stairs, as there is a fire wall that will damage you.

Pick up the boulder and drop it on the glowing area of the south gate, enter The Lover's Crypt.
Ralena and Vassar

Time for the duo, Ralena and Vassar. Separate them as they will deal more damage if close together. You can throw rocks at them to knock them down, or have someone kite one of them.
Ralena will summon lightning, and confuse you. Vassar will summon little adds, put a sheild up to reflect projectiles and have an AoE circle around her.
King Adelbern

Head back to Foefire's Heart, and fight Adelbern's champions. You can kill them again by having one person trigger the event, and then hiding behind a pillar.
King Adelbern will also pull you in at 50% so standing behind the pillar can help dodge this easier. If he does pull you in, quickly run back to where you were.
Explorable (Level 35)
All of the paths will have the same start.

Find the Priory Camp

A video will play after walking up to the Priory Explorer, and then the door will open. Allowing you to go to the next room, which has tons of traps. Jump on the stone coffins on the right to avoid these.
After passing, you will find a Graveling Breeder. Interrupt the screaming ability so more gravelings can't be summoned. Watch out for the traps on the floor!
A video will play, explaining the three paths upon reaching the Priory Camp. You and your group will be able to vote on which path you want to take.
Graveling Burrows/Traps

At the bottom of the stairs you will see a graveling burrow. You can either avoid it or kill it. You decide! Continue straight through the crypt area, and jump onto the left portion of the wall, avoiding nearby traps.
Destroy the flame traps, as these can cause tons of issues during the next fight. Jump down, and attack the mini spiders that will shoot poison clouds, block these and kill them. Once clearing a few spiders the boss will make her entrance.
Spider Queen
Of course, as she enters, more mini spiders will come falling down. Once again, block their attacks and kill them.

As for the Spider Queen, she will shoot out webs, and shrink allowing her to shoot poison clouds. Watch for when she glows, and dodge into a safe area. Best to spread out, and use ranged attacks.
Trap Hallway

This hallway has tons of traps, as well as four gravelings that will appear. Best way is to bring these enemies where you just fought the Spider Queen, so you can avoid the traps while doing so. You can disable these traps at the top of the tunnel with some chains.
*Champion Troll*
The Champion Troll can spawn here, and other areas of the dungeon as a bonus boss Avoid his ability fear buy watching for his animation, he will face a player, fold his hands and crouch. Reflect or block this.

Lieutenant Kholer

This fight is optional, but upon Kholer's defeat opens up a boss chest, and activates the Foefire's Heart waypoint.
Approach the boss from the west side of the room, hide by the pillar, and force Lieutenant Kholer and the two Ascalonian ghosts to come to your group. He will spawn two veterans every 75%, 50% and 25%.
Path One: Hodgins's Plan
Defend Hodgins
Head south after killing Kholer, into the Archive of the Resting. There will be fire traps, so jump onto the heads of the gargoyles and continue to go down avoiding them.

Defend Hodgins from the gravelings, destroy all the burrows (only two will be active at a time) There will be six of them in total.

Search the secret room for the Scepter

Head up the spiral stairs, onto a wooden plank, and across some wooden scaffolding. You will find a stone coffin, where you will find the first Flaming Scepter.
Find the Flame Scepter pieces
Use Forefire's Heart Waypoint to get to Rockfall Chamber. Here you will be greeted by enemies, and a trap! So watch out. Avoid the trap by turning left and going around the column after entering the Chamber or else oozes will spawn.

Have one person stay with Hodgins, and the rest of the party recover the 5 missing pieces while avoiding the gravelings, as it is best to just grab the scepter pieces.
Speak with Hodgins after all have been found, and a new Waypoint will spawn.
Explore the graveling tunnels

These are infested by gravelings, as expected. Skip these enemies and run past them if possible. Once hitting the final room, keep running north to lose aggro.
Kill the Howling King
Time to fight the last boss, who has two dangerous attacks, which you can avoid by walking behind Howling King. The fire AoE's on the floor can inflict damage to additional enemies, but also your party, so be careful. Try to fight the boss in the far east corner before these enemies arrive

Path Two: Detha's Plan
Flooded Temple

Head south into the Flood Temple. By the Altar of Death there will be five chains, interacting will active five spike traps(no damage to players). Pull the chains before the fight to see the locations of the traps.

Have four players on the chains, and one person who kites the enemies. Have the kiter bring these enemies over the traps, and the four players pull the chains when the enemies are over them.
Once down killing the gravelings, Graveling Breeder will spawn, which does not take damage from traps and has to be killed normally.
Use the Foefire's Hearth Waypoint then head north to Hall of Champions, where it will be filled wit gravelings and oozes, you can run past or kill them. At the top of the stairs, before the Hall, interact with a chain.
Ghostly Defense/Detha

Defend Detha from Ascalonian ghosts as she builds three traps for the next fight. Each time she goes to build, new ghosts spawn, so make sure to kill them and defend her. These will disappear after she finished building the traps.
Ghost Eater

There will be a shield that protects the Ghost Eater from all damage, he will also spawn ectoplasmic oozes when hit. The traps Detha built will remove his shield, but they must be charged.
To charge these, pull the ectoplasmic oozes to the traps by using the "Anti-Spectral Ordnance gun" that will be near the traps. Skill 1 lifts the ooze, skill 2 will pull the ooze. Have one player use skill 1 to lift an ooze up, while another player uses skill 2 to pull the ooze over to the trap. Once the ooze is in the trap, it will consume them and gain charge.

Once the trap is charged, the Ghost Eater is pulled to the trap, the trap will fire and remove the boss' shield, this will show by the boss no longer being ethereal. Drop the guns, and attack!

Path Three: Tzark's Plan
The Lovers Crypt

Head east to The Lovers Crypt, will be guarded by spiders, Ascalonian ghosts, and traps. You can avoid or kill the mobs.
You will defend two asuran beacons, from the gravelings. Graveling burrows will spawn, kill these burrows, before gravelings spawn.

You will be transformed into an Ascalonian ghost after, and the north door will open. Head to the Hall of Champions, where the path will be guarded by spiders.

Hall of Champions' Burrows

Five graveling burrows will spawn in the Hall of Champions, kill them. The fifth burrow will open the exit and unlock a waypoint. Head to the Rockfall Chamber after, and enter the Graveling Tunnels. Once again, you can kill the gravelings or run past them.
Colossus Rumblus
Colossus Rumblus will get on all fours, and swing it's arms as it goes in a circle. This will cause rocks to fall, and deal some big damage. NPC Warmaster Grast should throw a protective shield to destroy the rocks, make sure he stays alive.

More Guides