Visions of Eternity: The Only Way Mastery
The Only Way from Visions of Eternity will bring us to a new map to explore, new enemies to hunt, and of course new achievements to complete

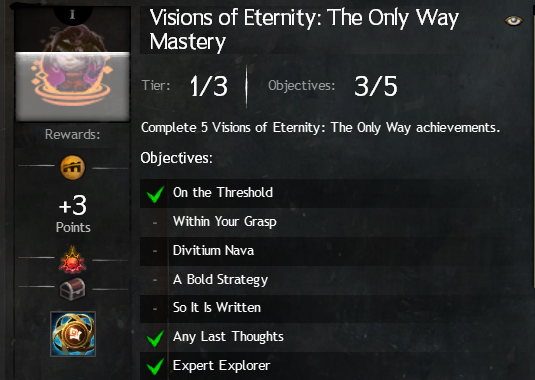
Visions of Eternity: The Only Way Mastery
Complete 19 Visions of Eternity: The Only Way achievements
Castoran Curse-Breaker
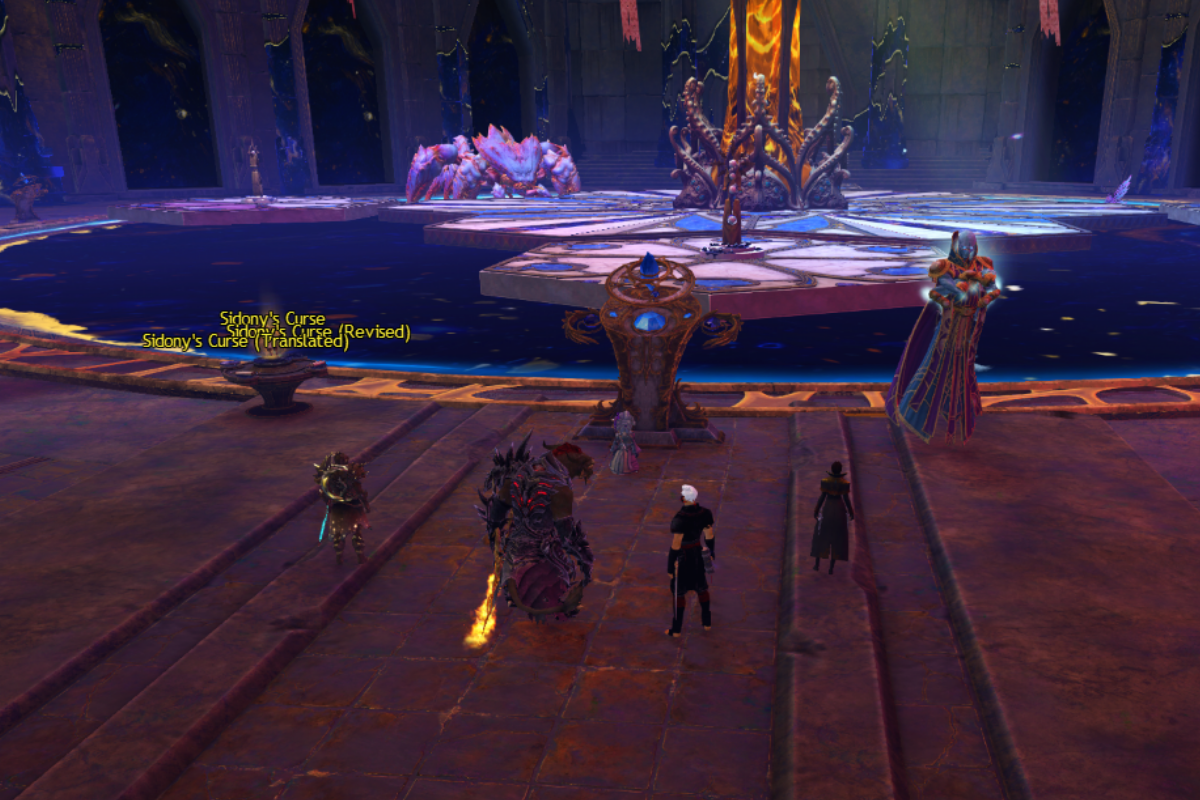
Locate clues and complete activities to break Sidony’s curse on Castora
Learn about lifting the curse of Isgarren

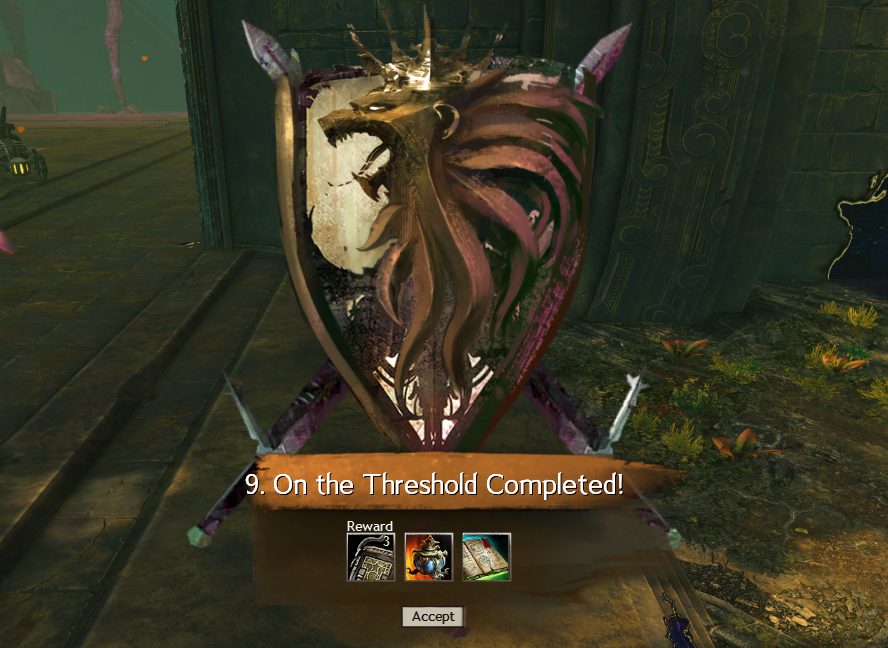
This will complete when you finish the story chapter On The Threshhold
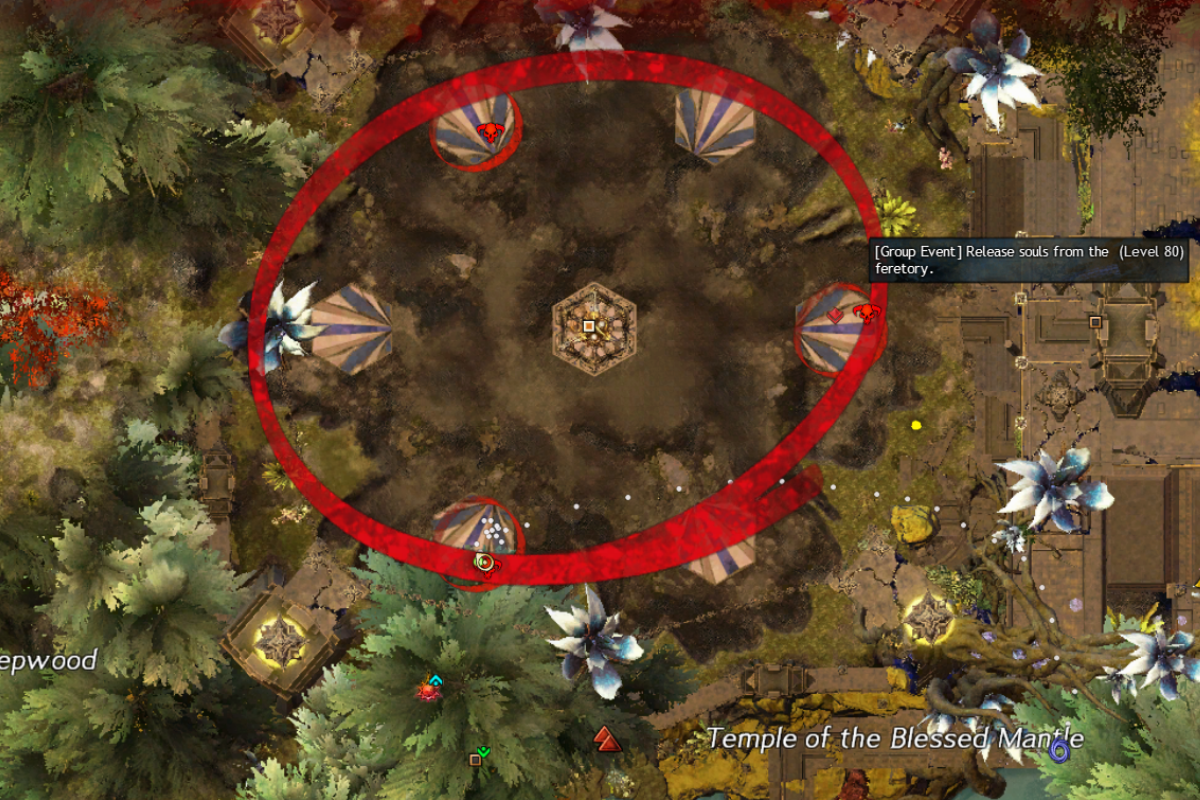
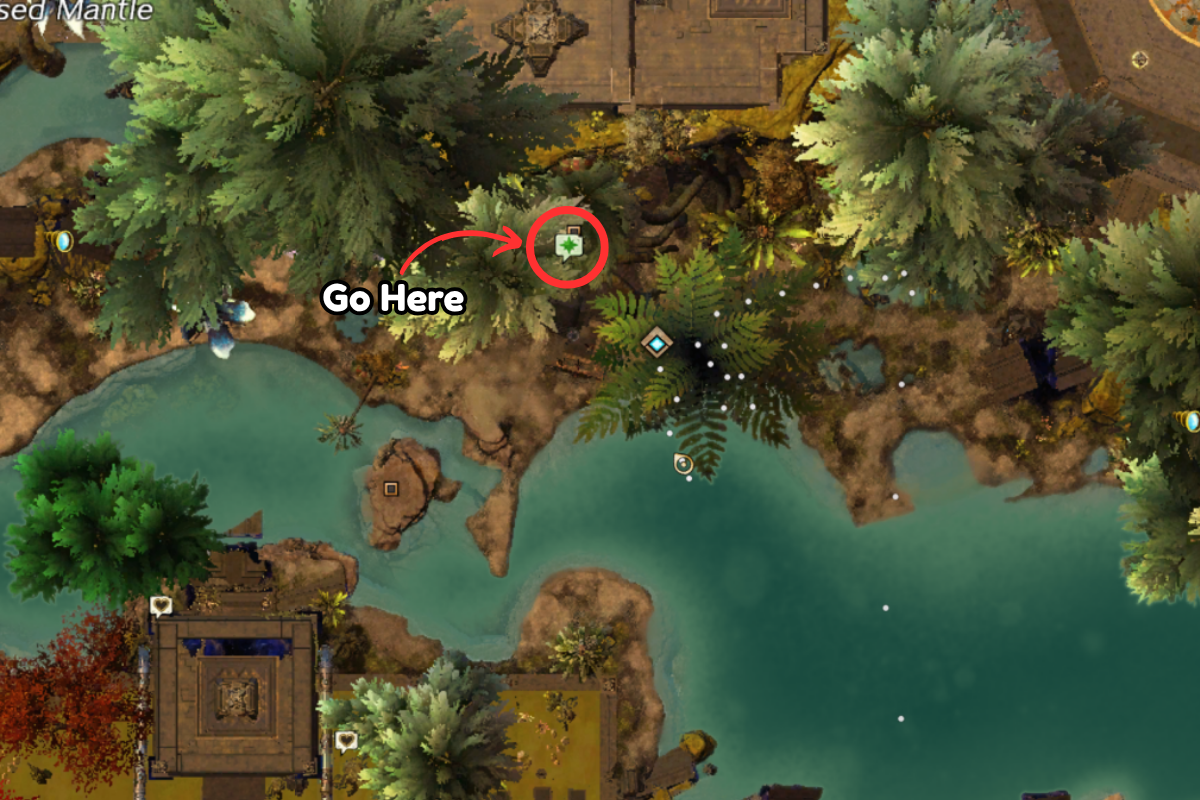
Locate the Ecsillim Isgarren somewhere within the Temple of the Blessed Mantle
You will find this by doing story - you will be sent to the room with this book during Within Your Grasp
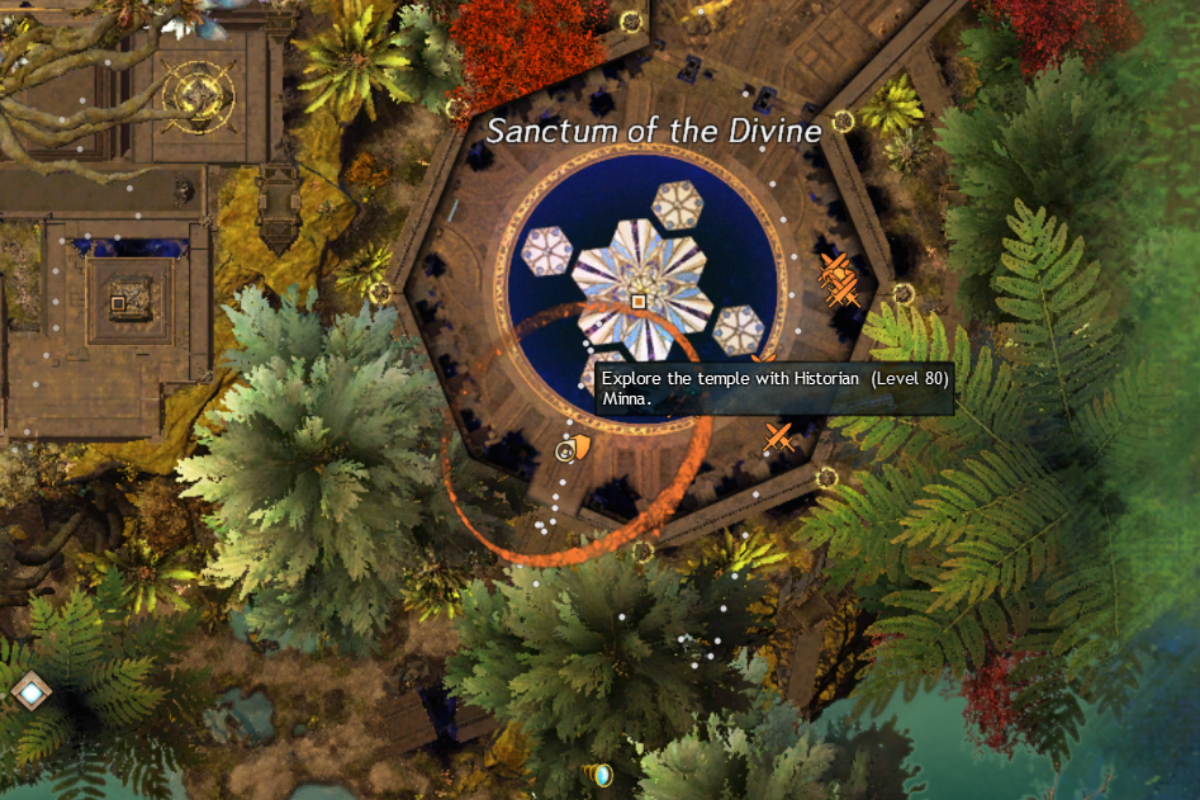
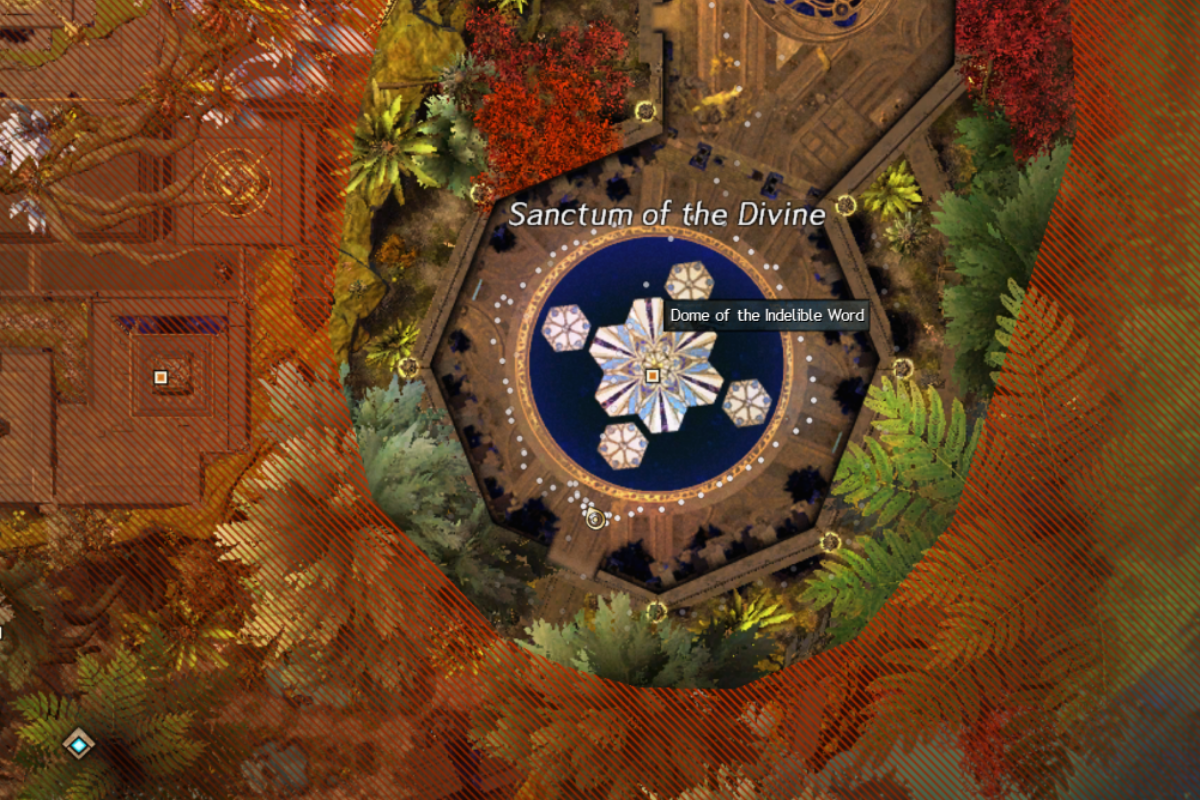
Locate the Sanctum of the Divine somewhere in Eternity’s Garden
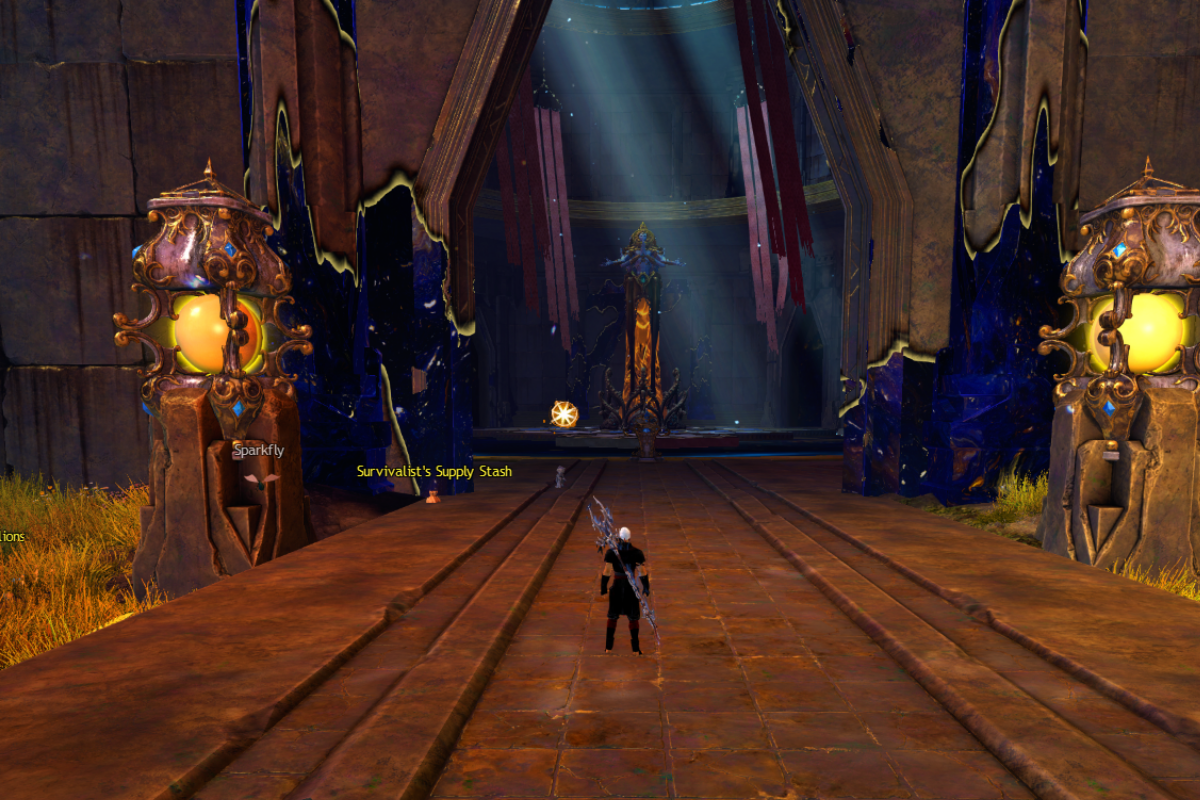
Go to the Dome of the Indelible Word Point of Interest — [&BP0PAAA=] and this will complete
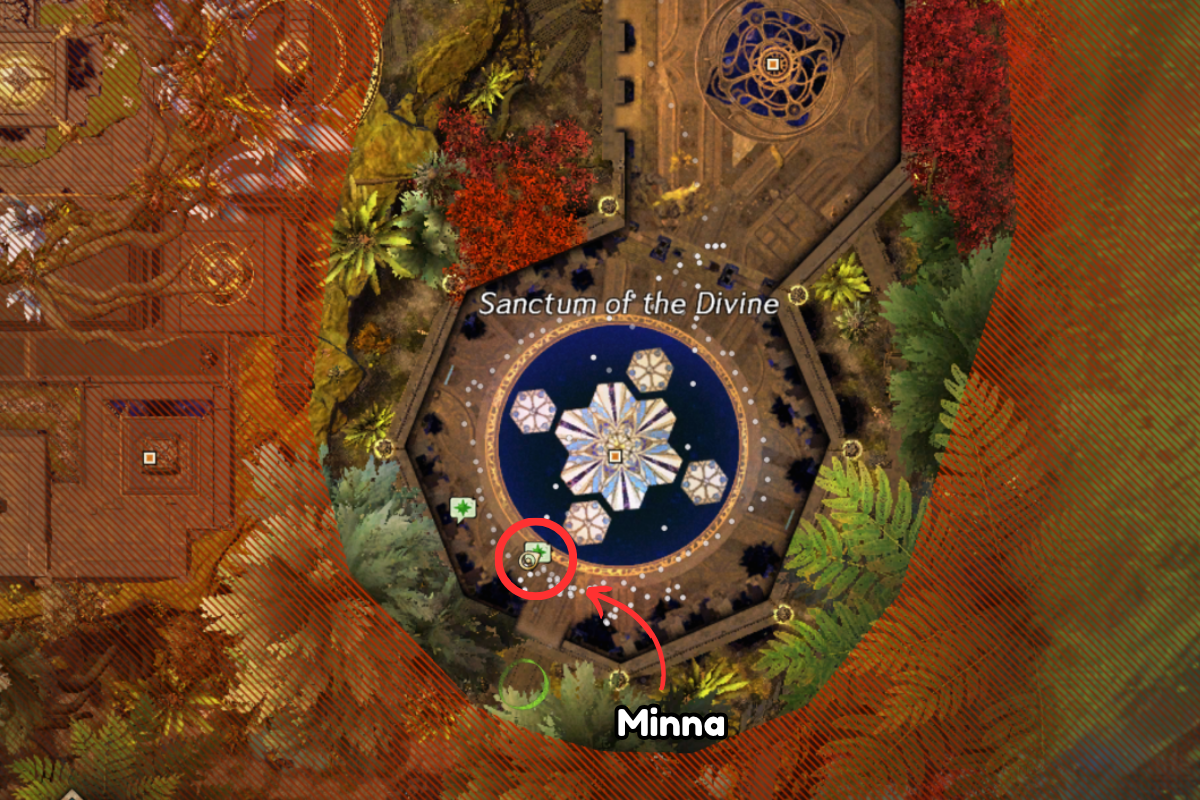
Participate in the cleansing ritual with Historian Minna
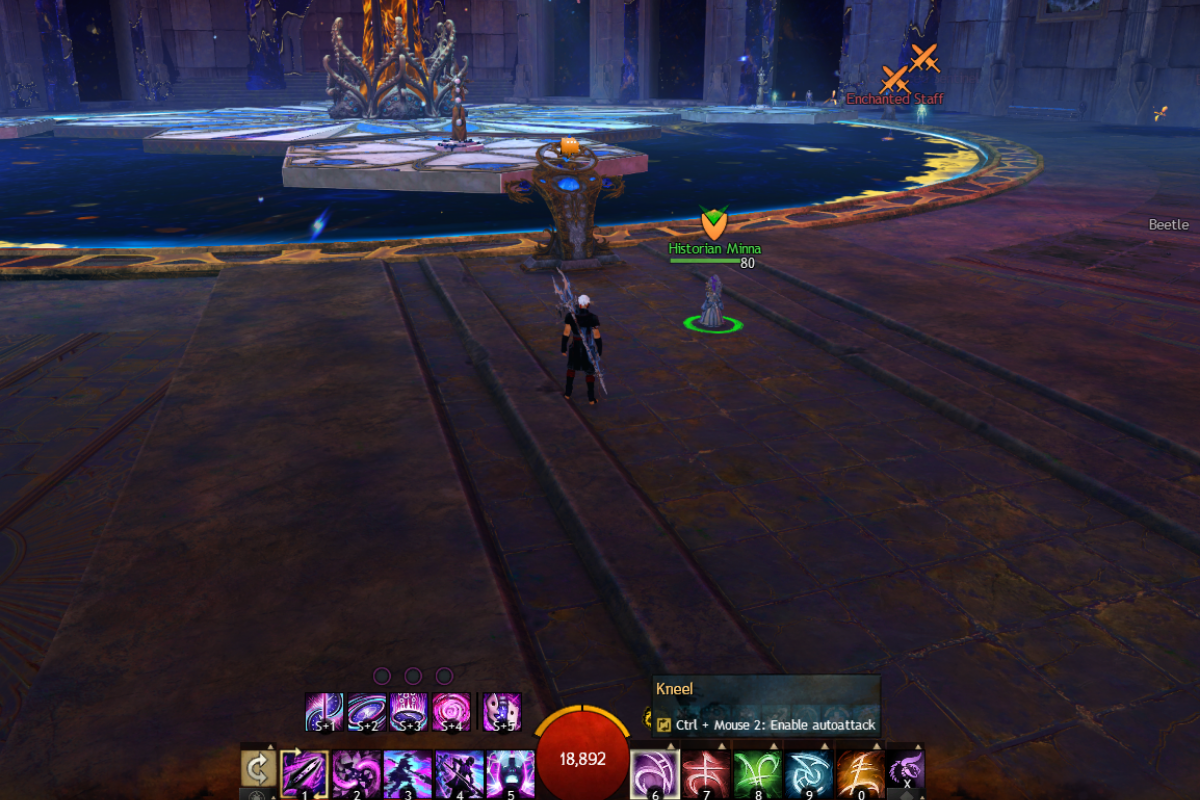
Complete the event Explore the temple with Historian Minna that takes place at the Dome of the Indelible Word Point of Interest — [&BP0PAAA=]
Help defeat the All Seer to free the Castoran seneschal

Complete the Shackles of the Ancients meta event in Eternity’s Garden
Complete all other steps, and then participate in the ritual to break Sidnoy’s curse on Castora
Complete the other steps then finish the Participate in the ritual to break Isgarren’s curse in the So It Is Written story step
On The Threshold
On the Threshold
Regroup and head further inland
Expert Explorer
Slice through the jungle only using a machete

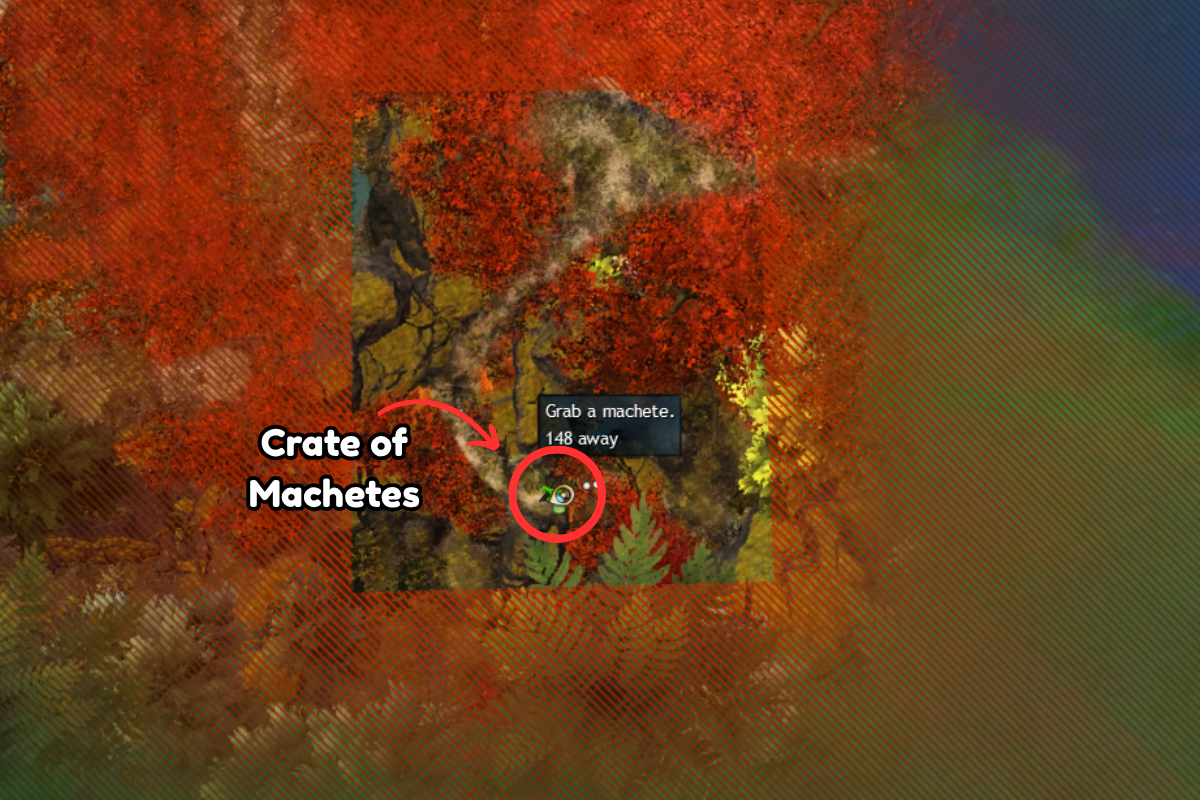
Grab a machete from the Crate of Machetes at the beginning of the instance and keep it equipped until the achievement completes - your allies will deal with the enemies or they will despawn as you move on
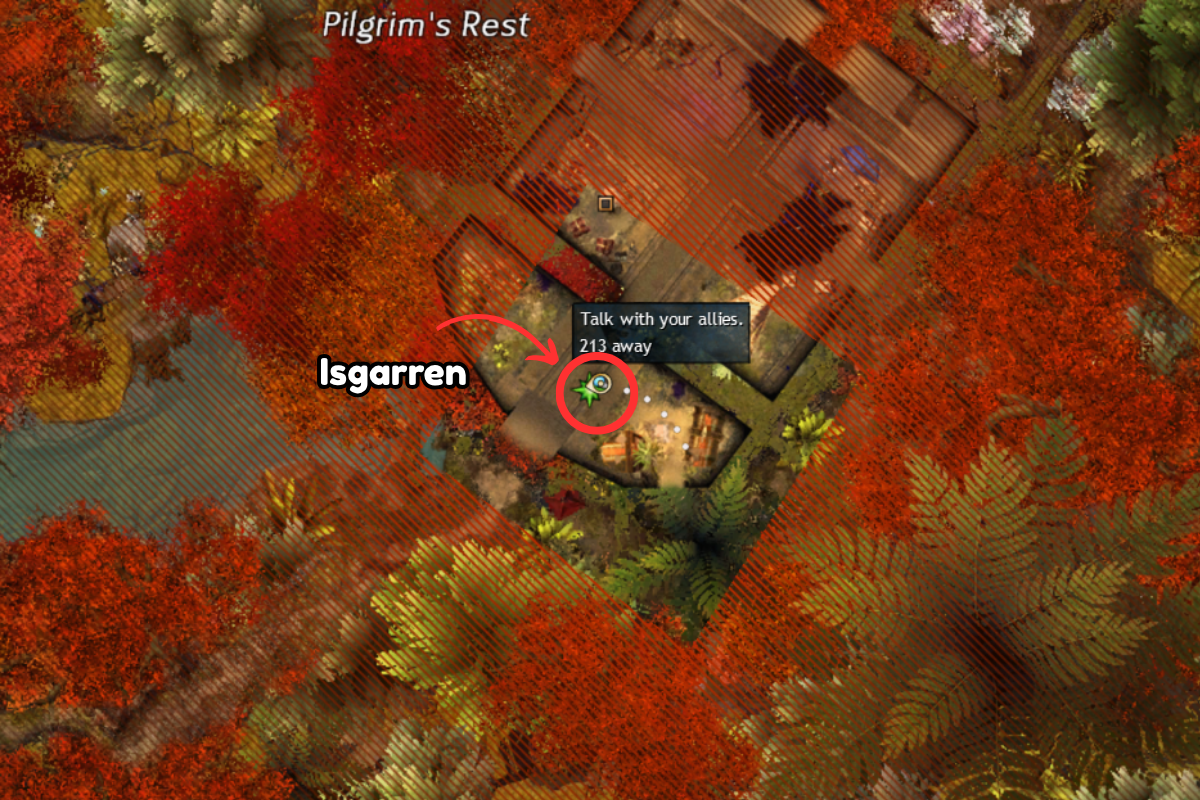
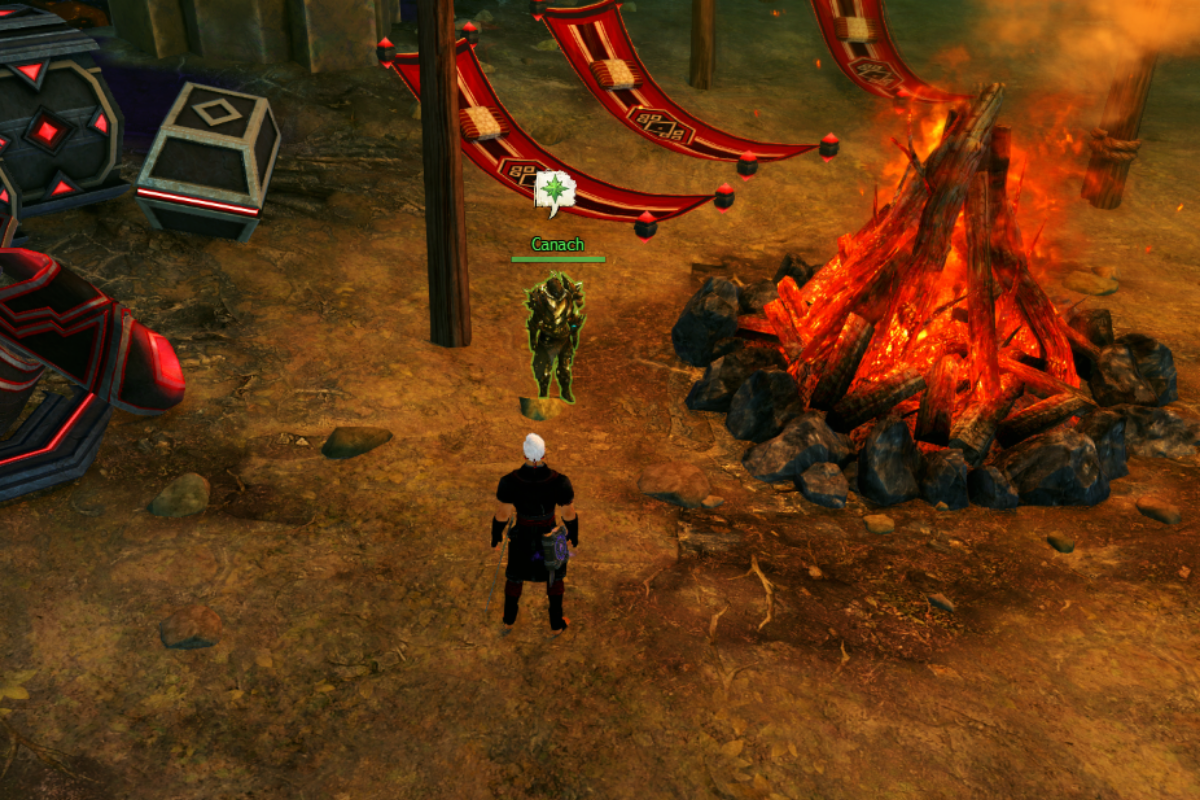
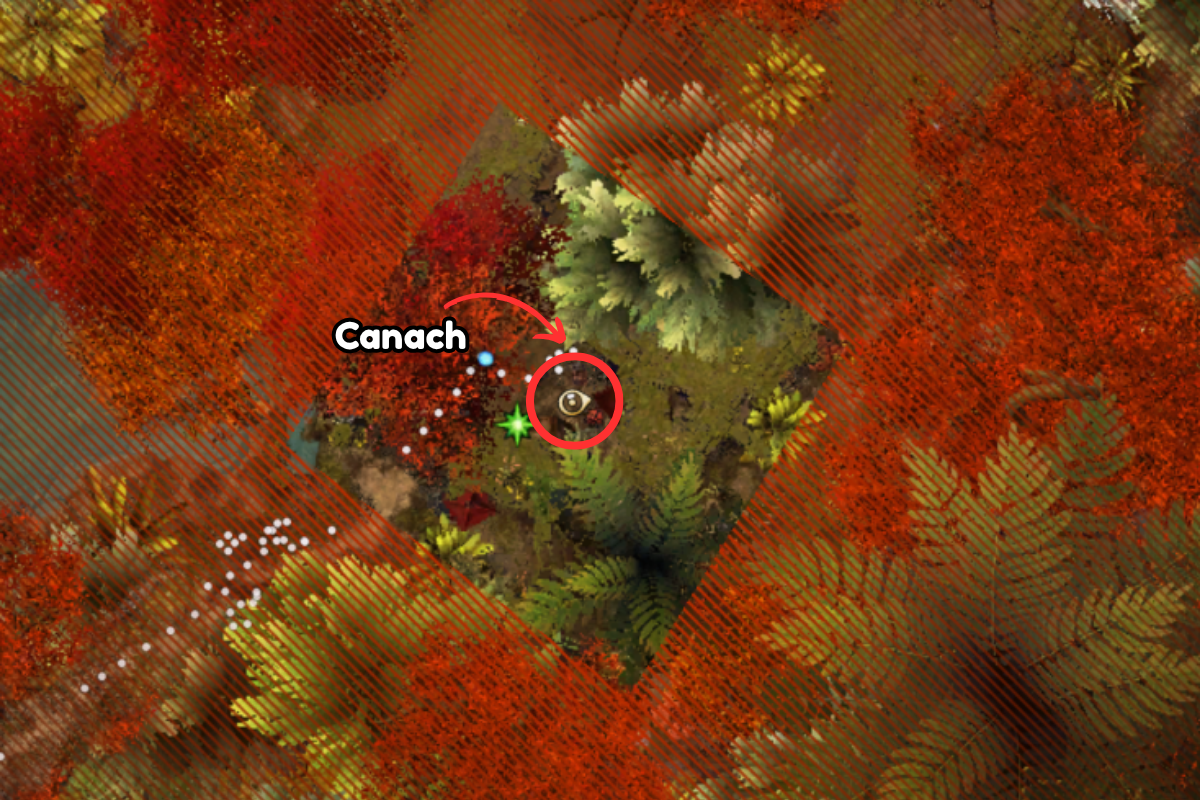
Any Last Thoughts
Check in with your friends after taking the Inquest Camp
Canach
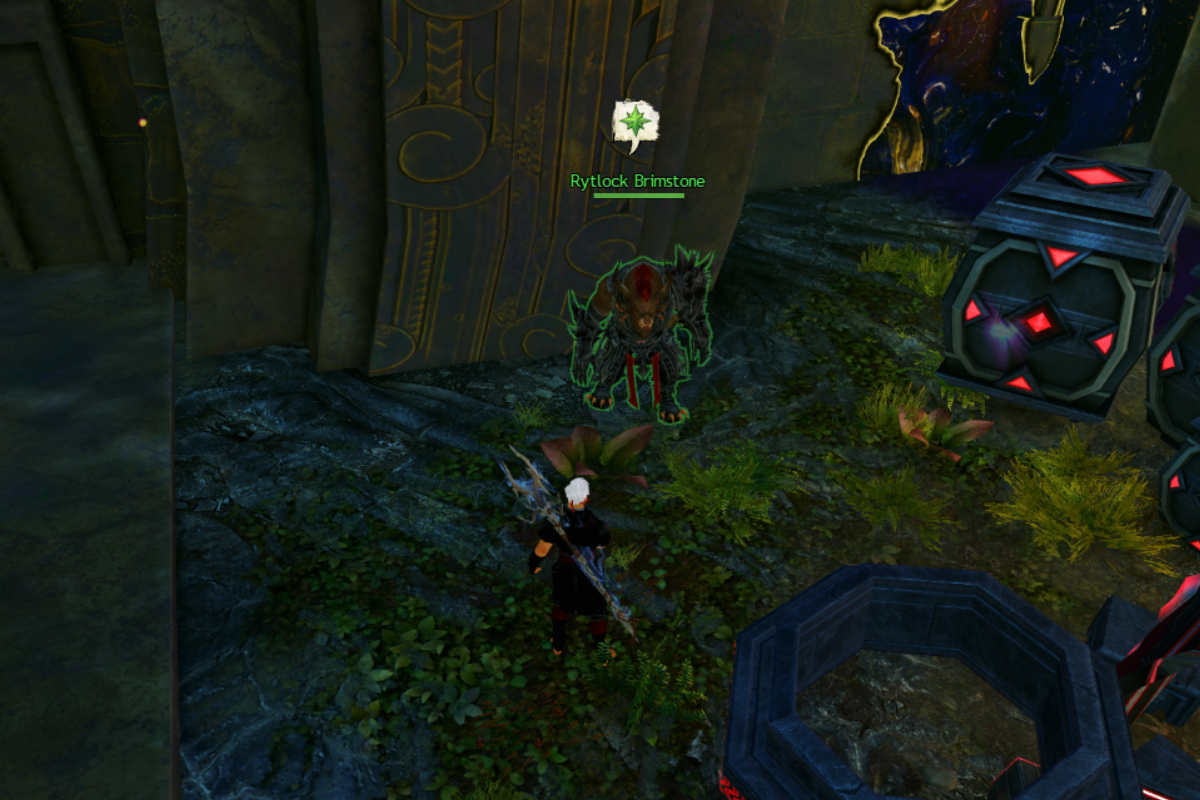
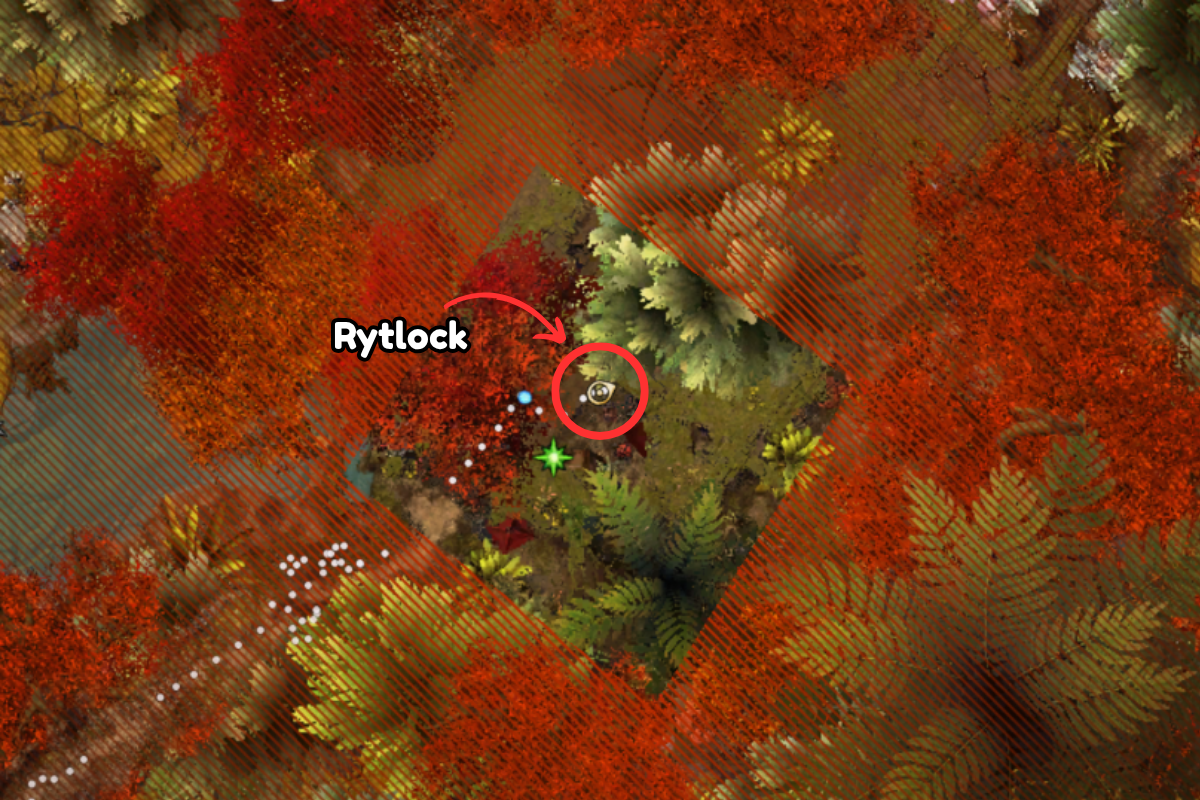
Rytlock
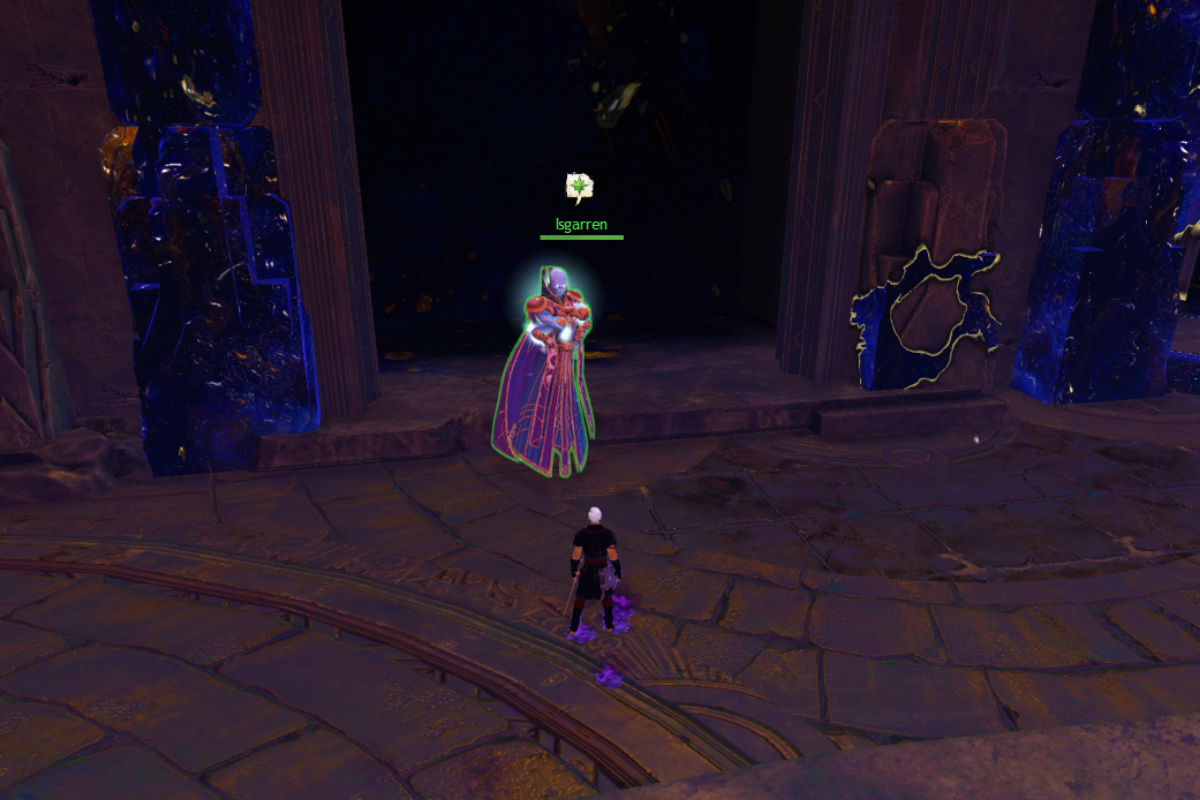
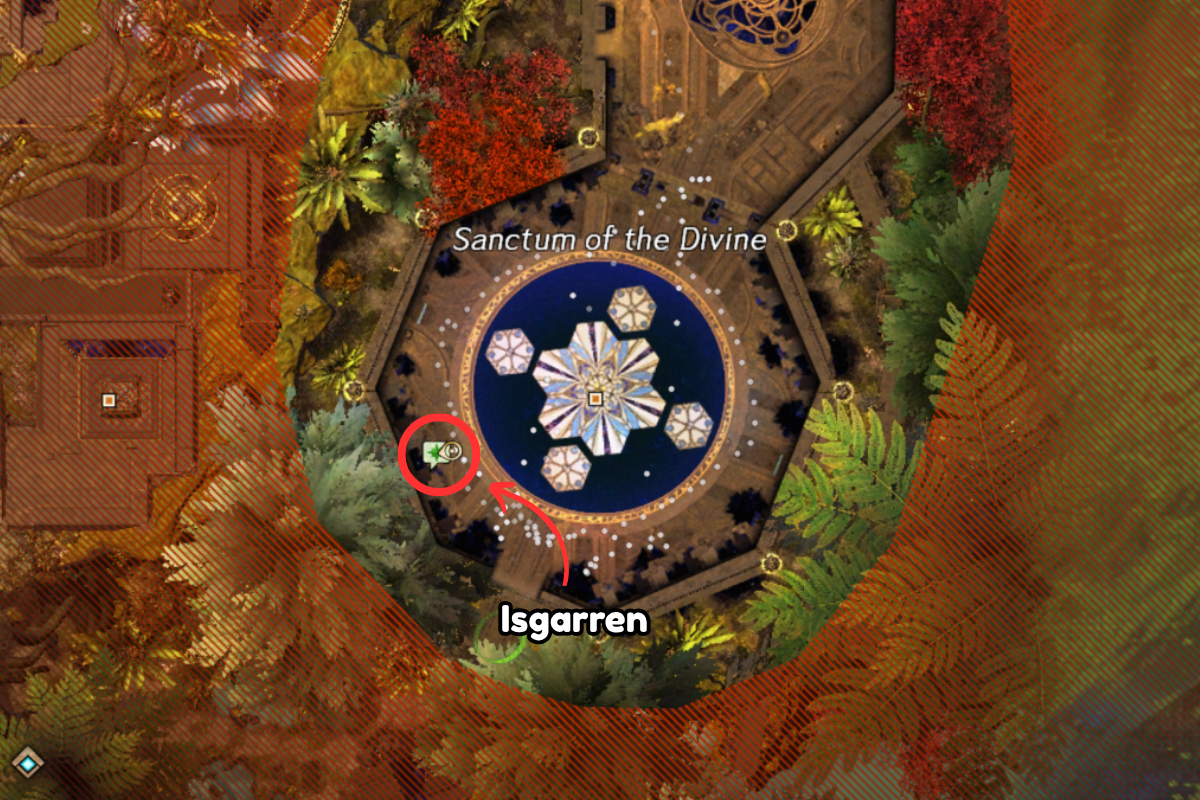
Isgarren
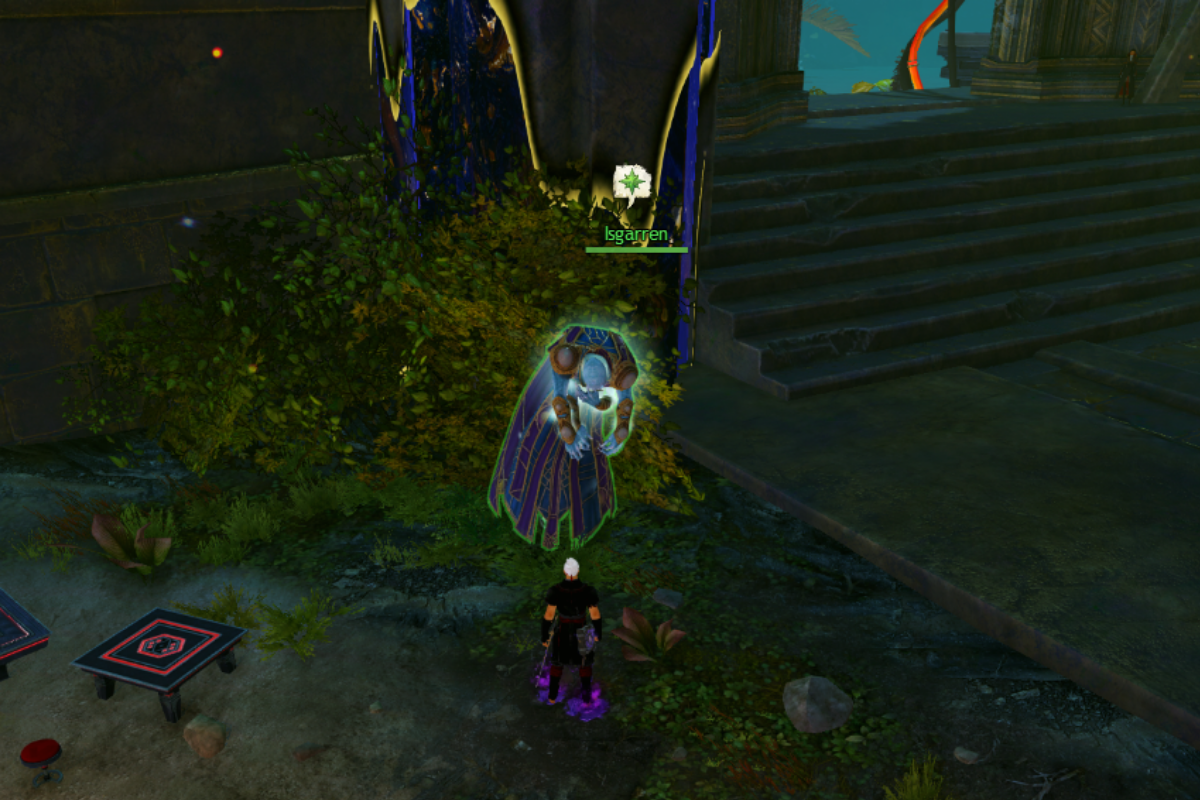
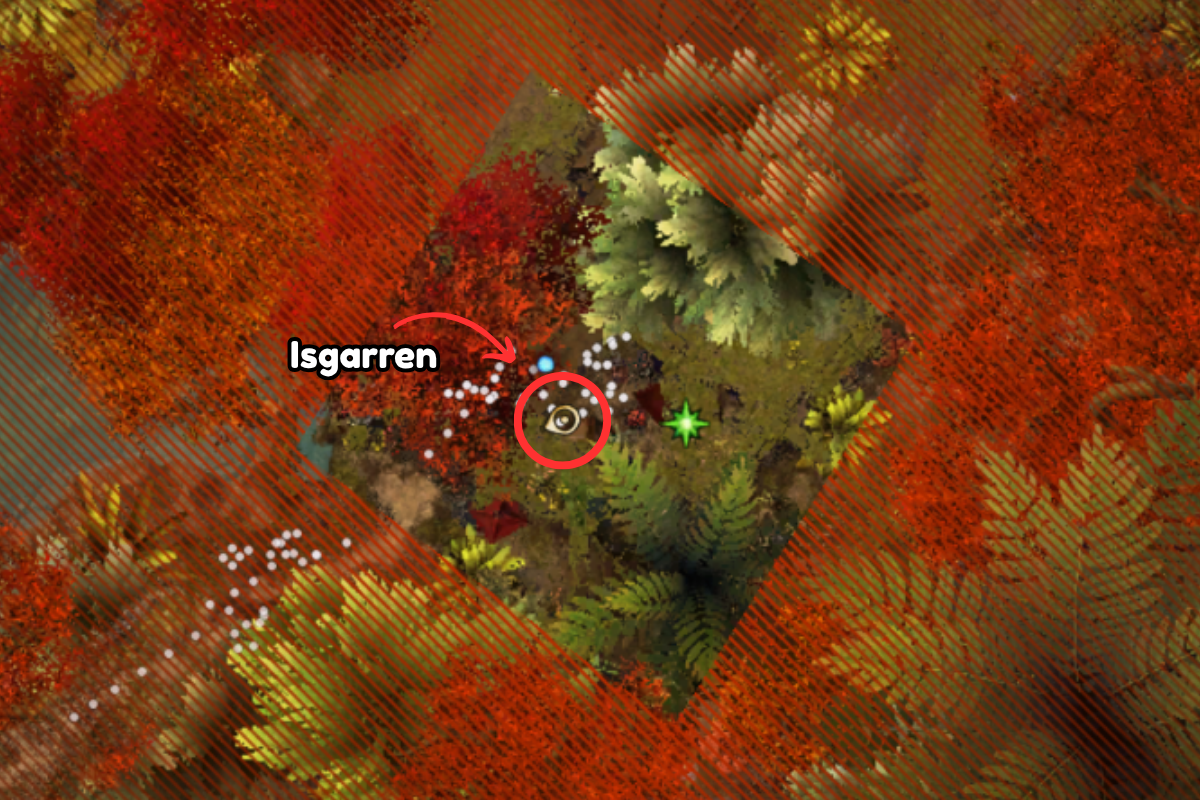
You will need to talk to him again after he talks for the story part
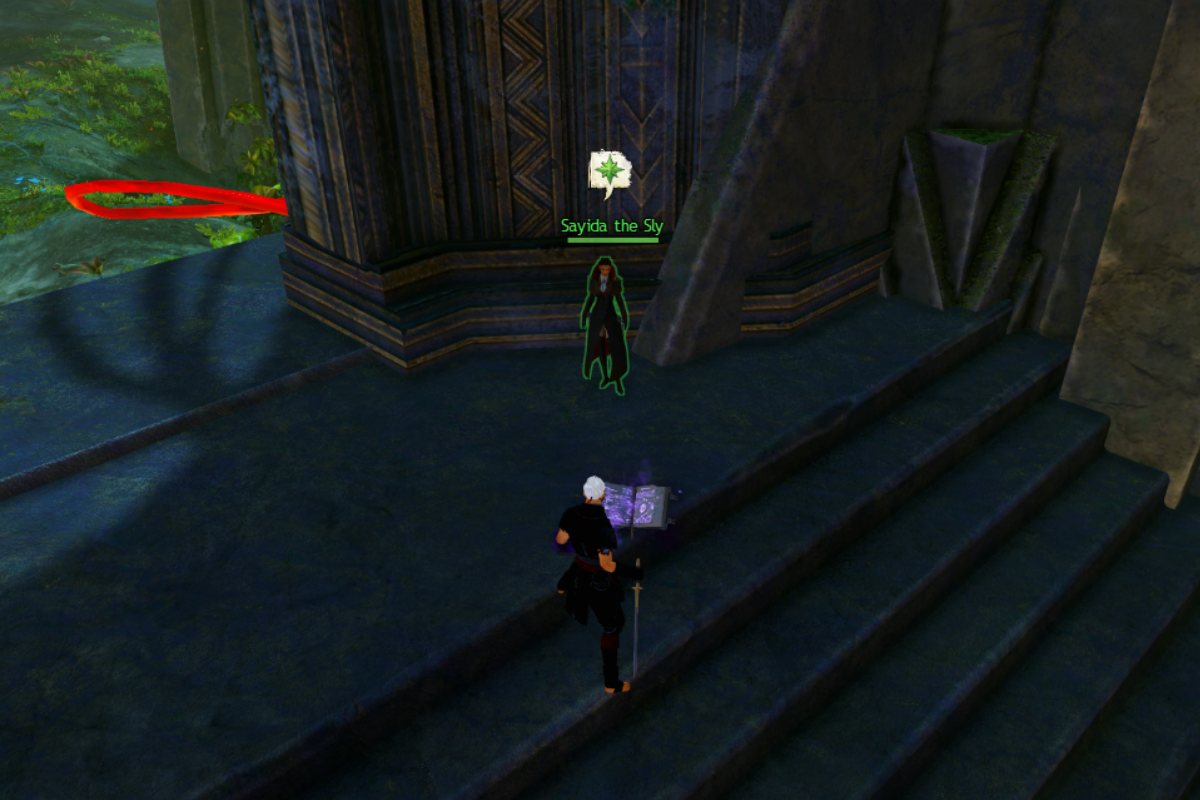
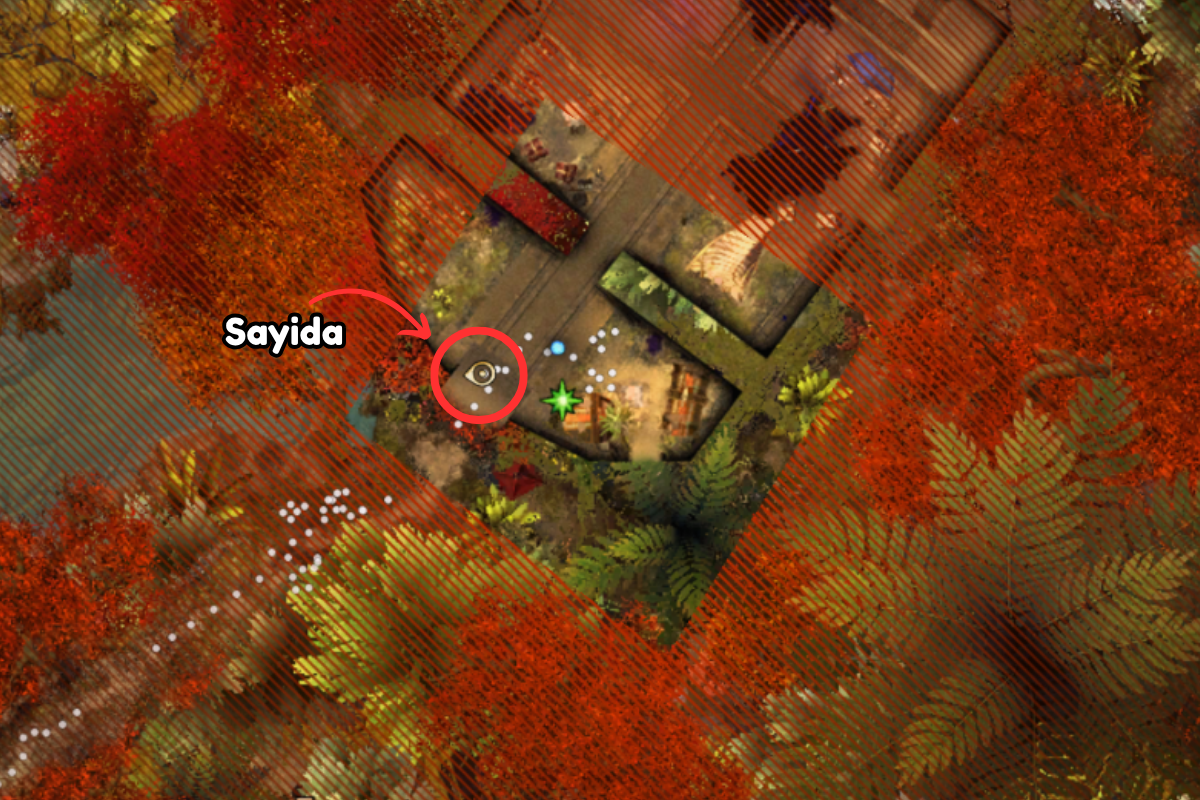
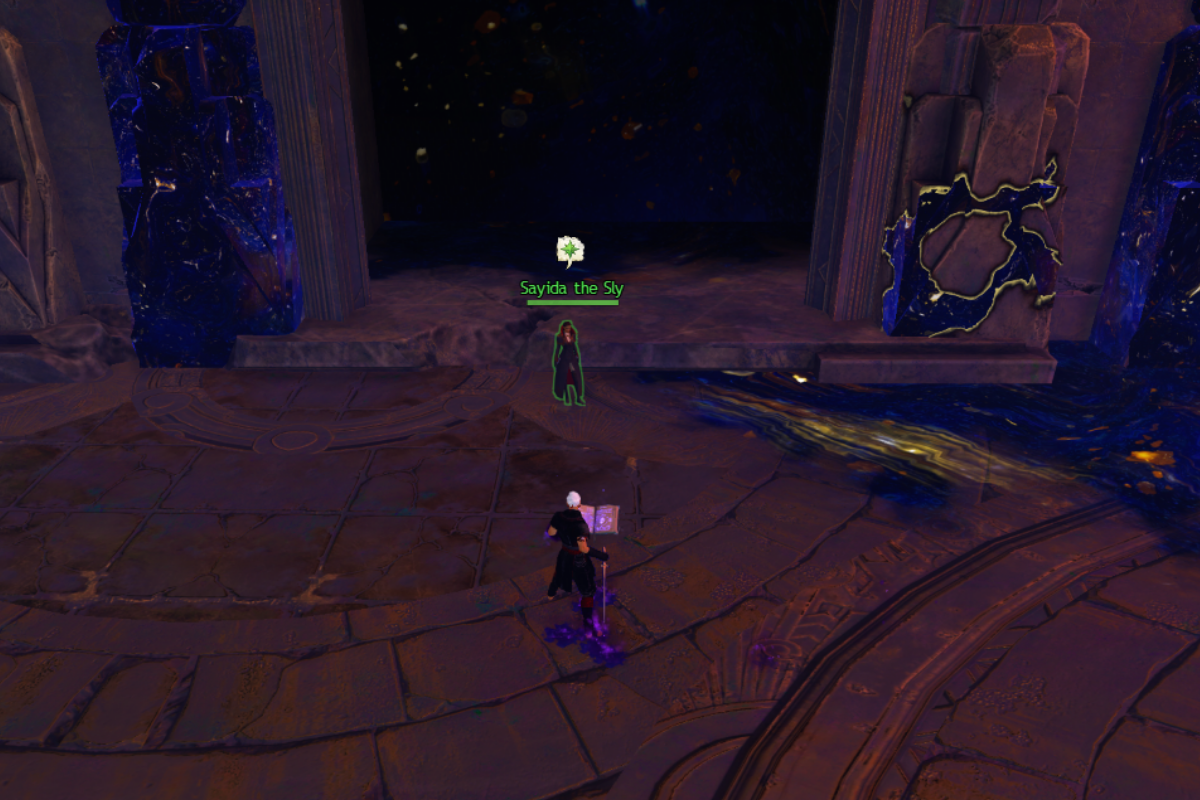
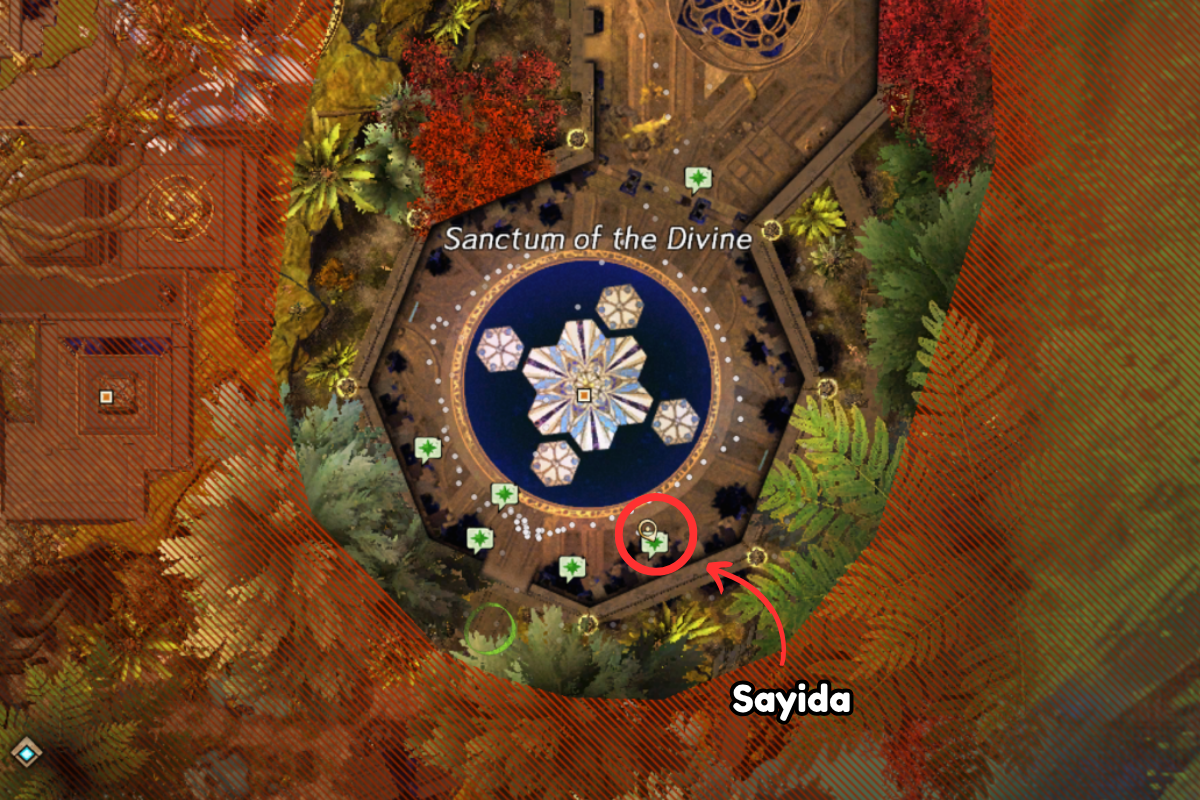
Sayida
Within Your Grasp
Within Your Grasp
Track the Inquest
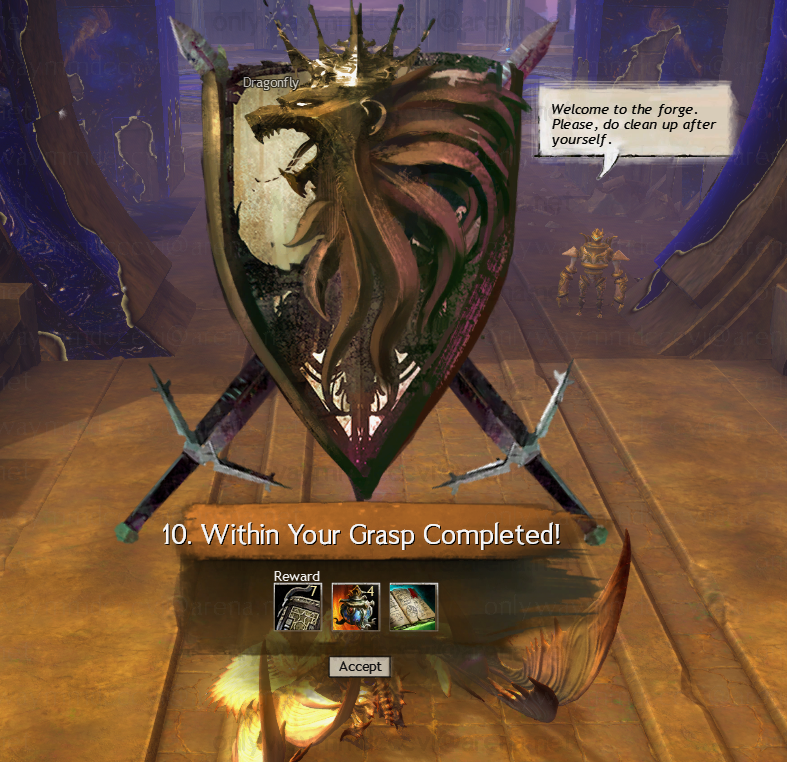
Complete the story chapter Within Your Grasp
Alliance Supporter
Help the Tyrian Alliance in every other sector of Eternity’s Garden before calling your allies to the temple
Investigate reports of a strange seer artifact in the Deepwood
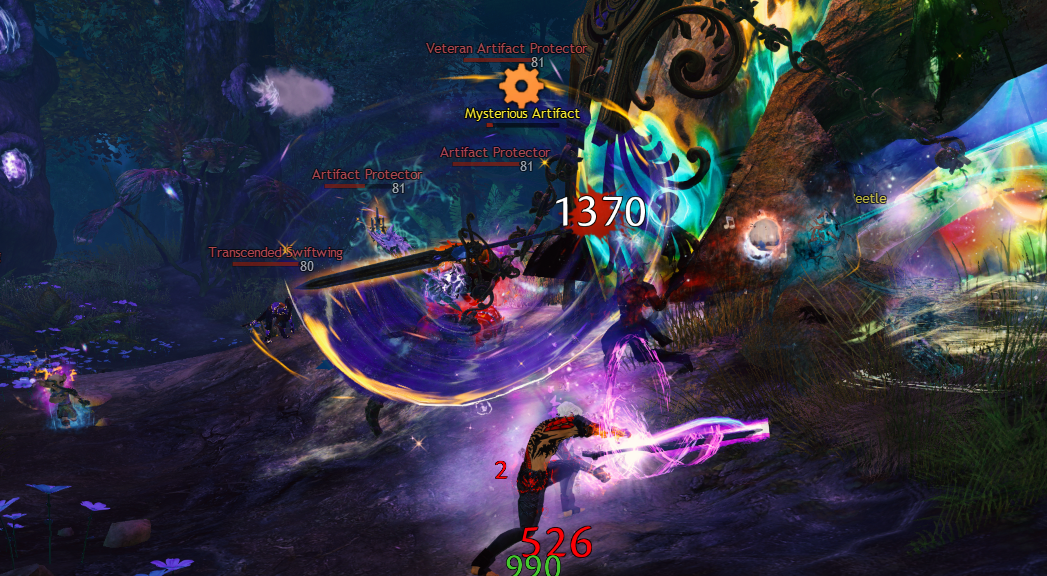
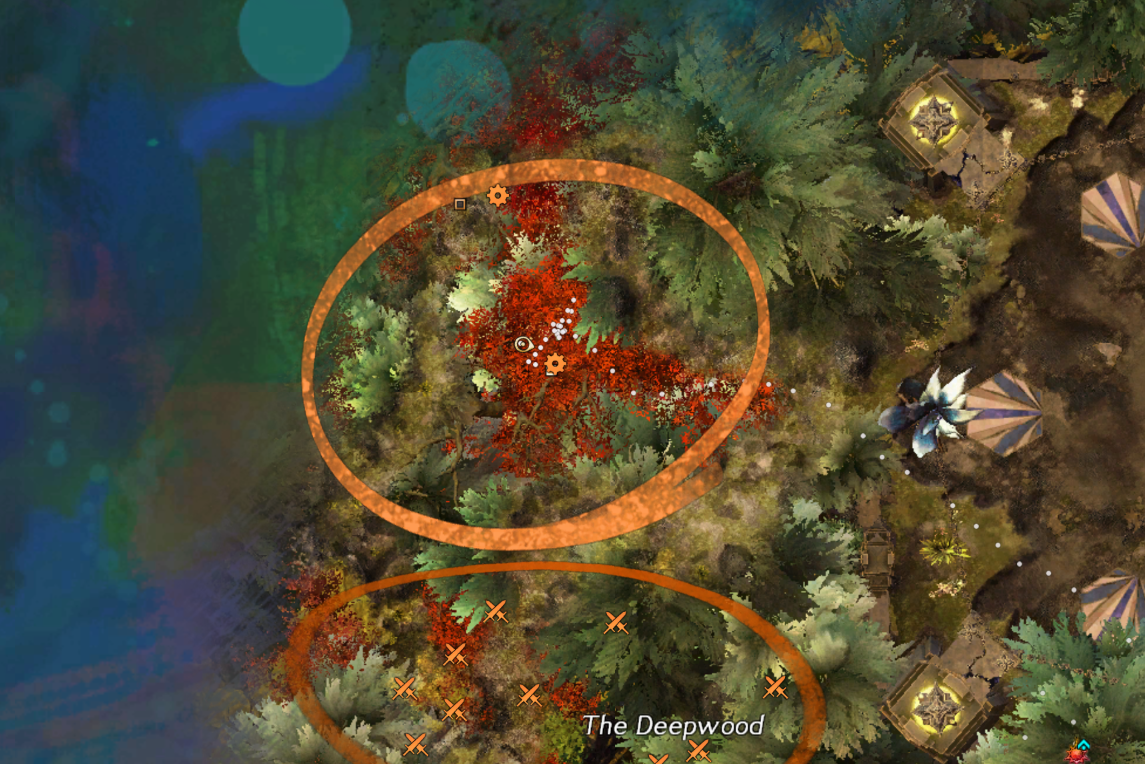
Walk next to the artifact at Whispering Artifact Point of Interest — [&BAYQAAA=] or participate in the Destroy the mysterious artifact event
Locate the ruins of the Sanctum of the Divine
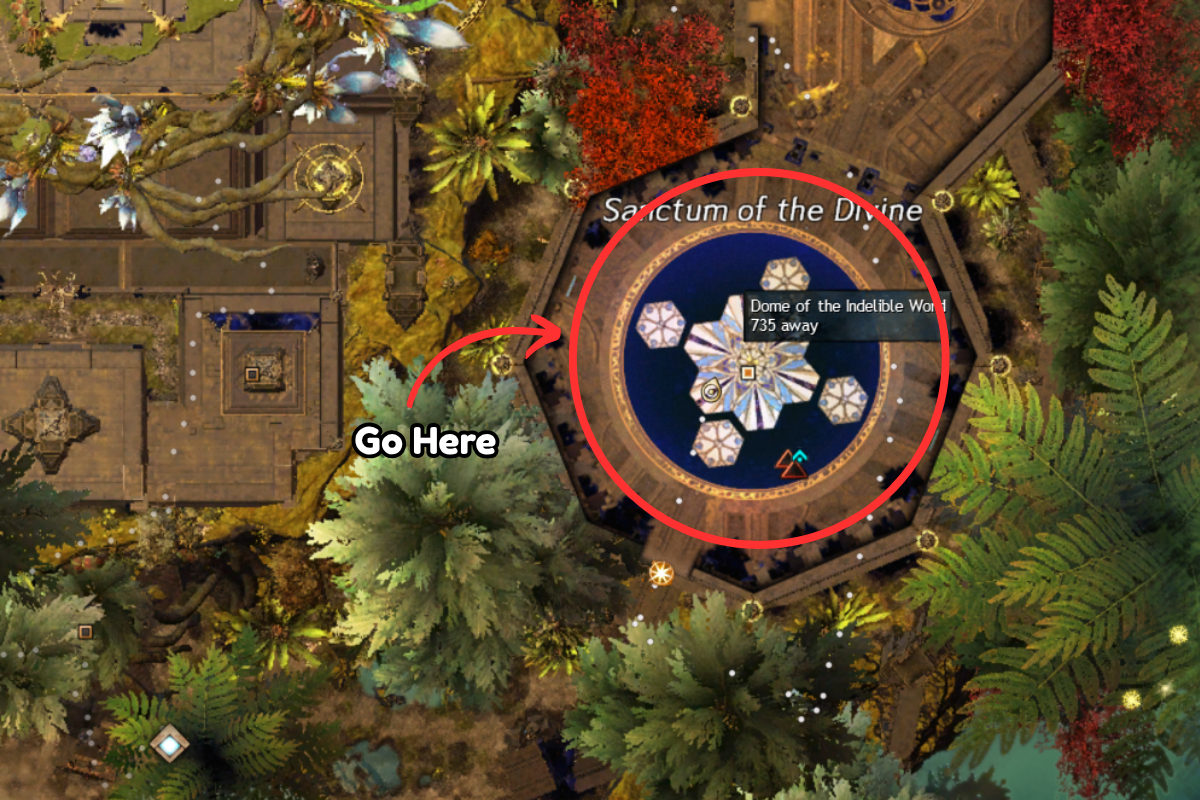
Go to the Dome of the Indelible Word Point of Interest — [&BP0PAAA=] and this will complete
Help the alliance secure the seer chambers in the Temple of Abnegation
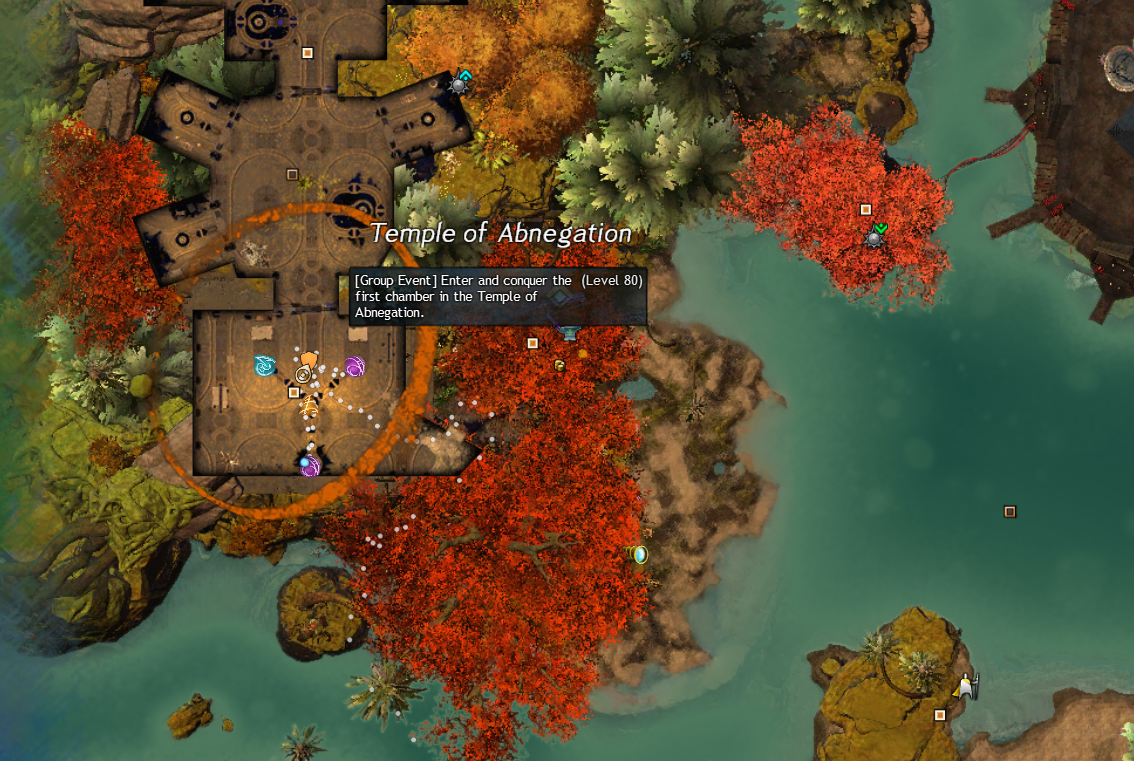
Complete Enter and conquer the first chamber in the Temple of Abnegation - this event is at the Serene Nursery Point of Interest — [&BO4PAAA=]
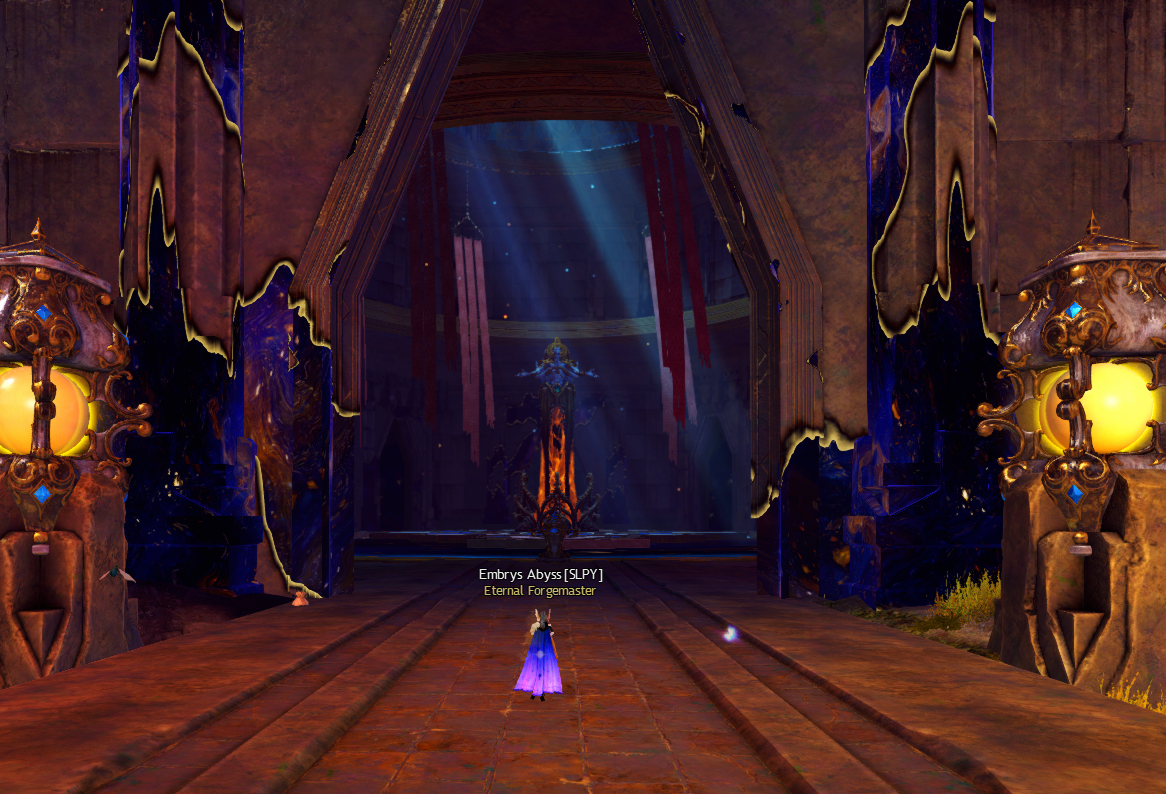
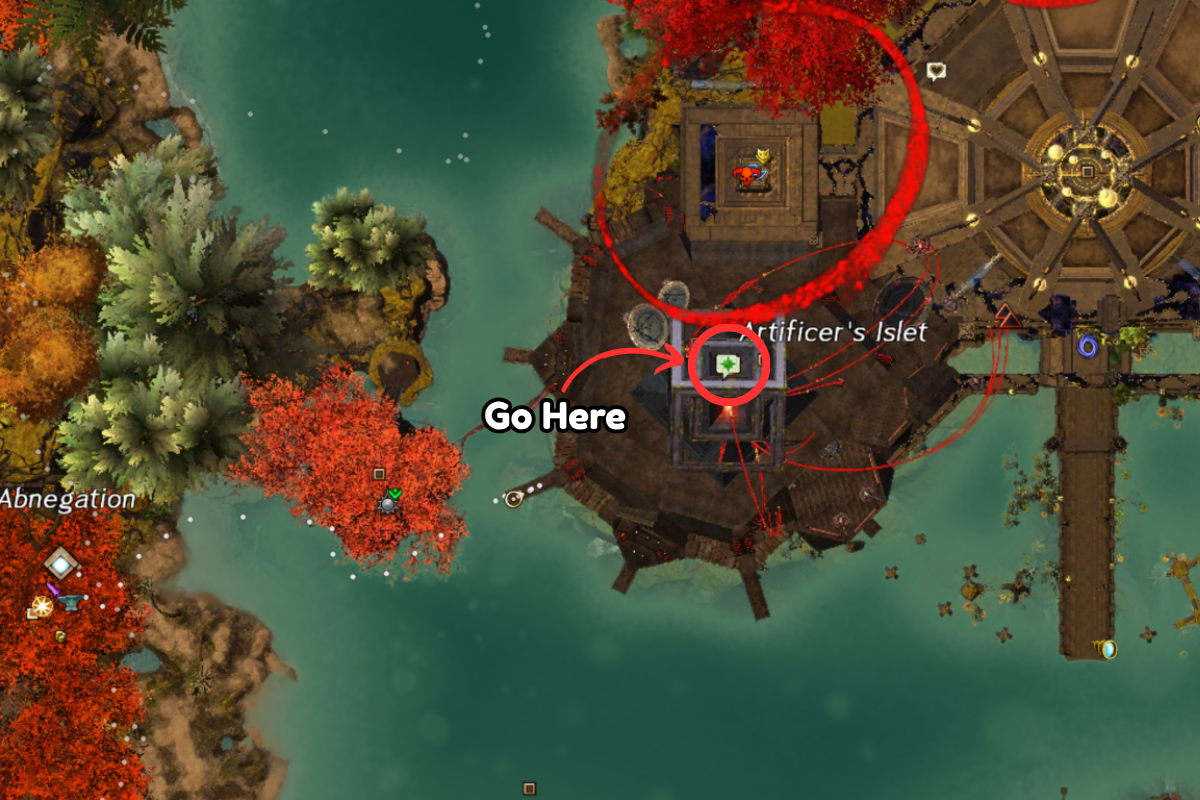
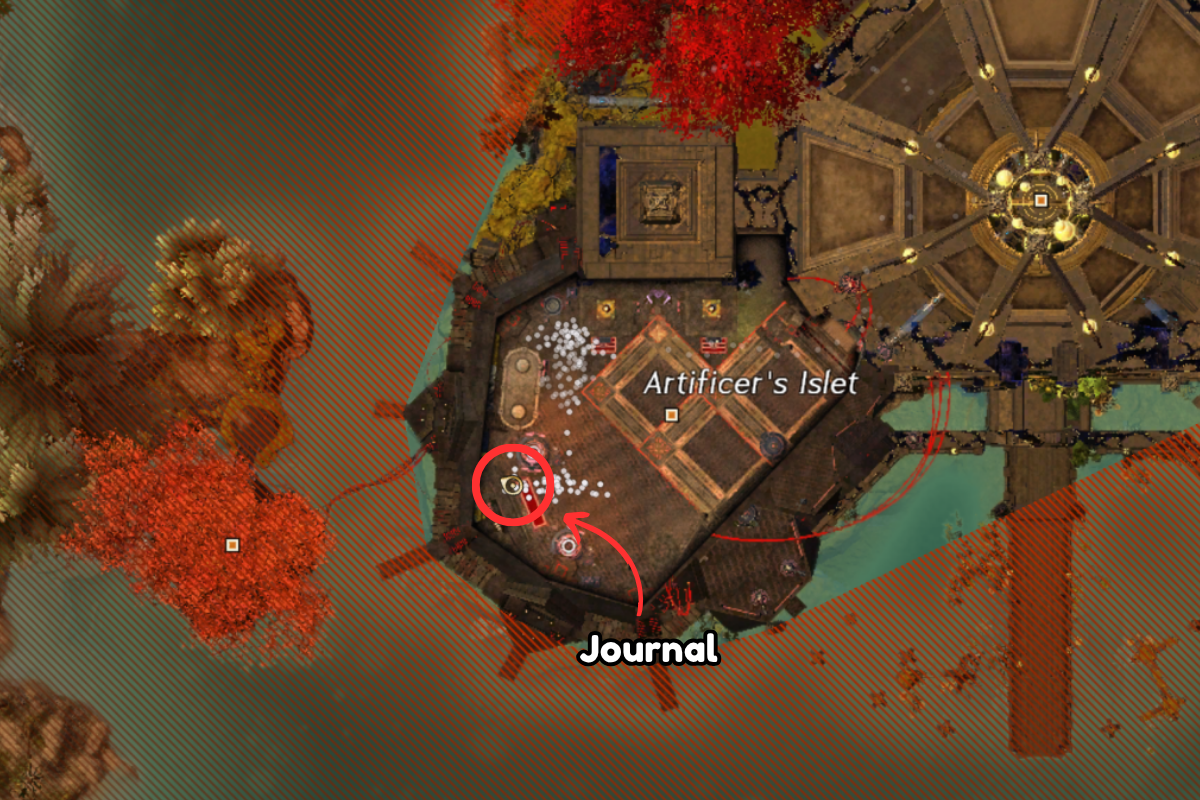
Complete tasks for Steward Brizio in the forge on Artificer’s Islet
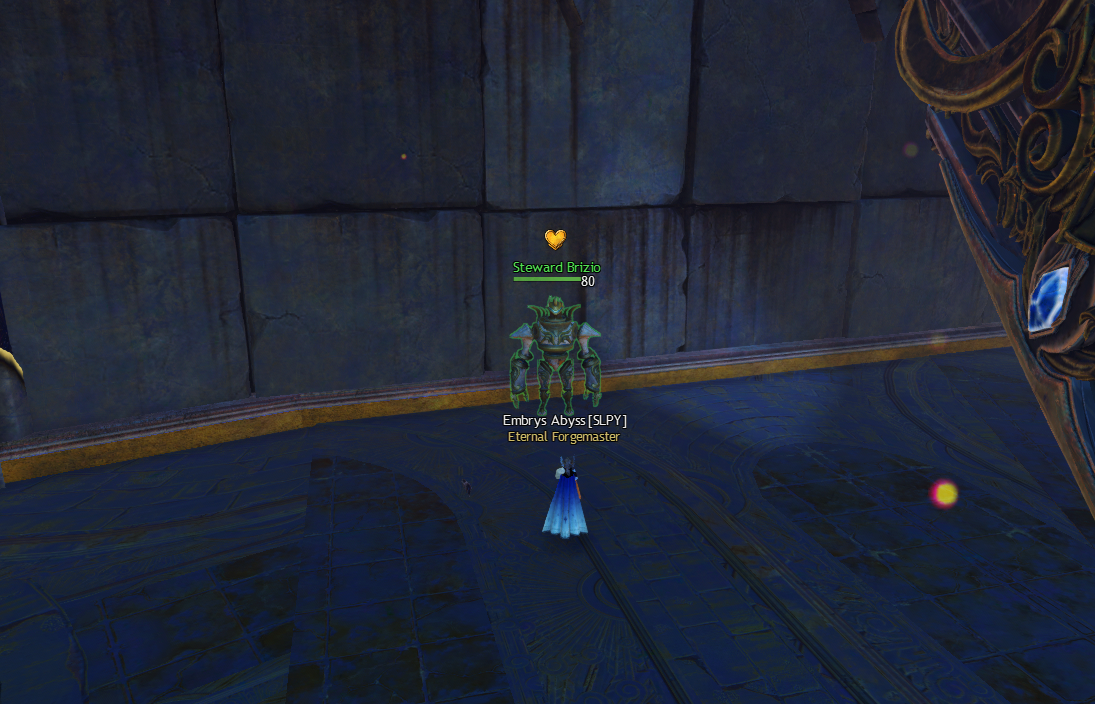
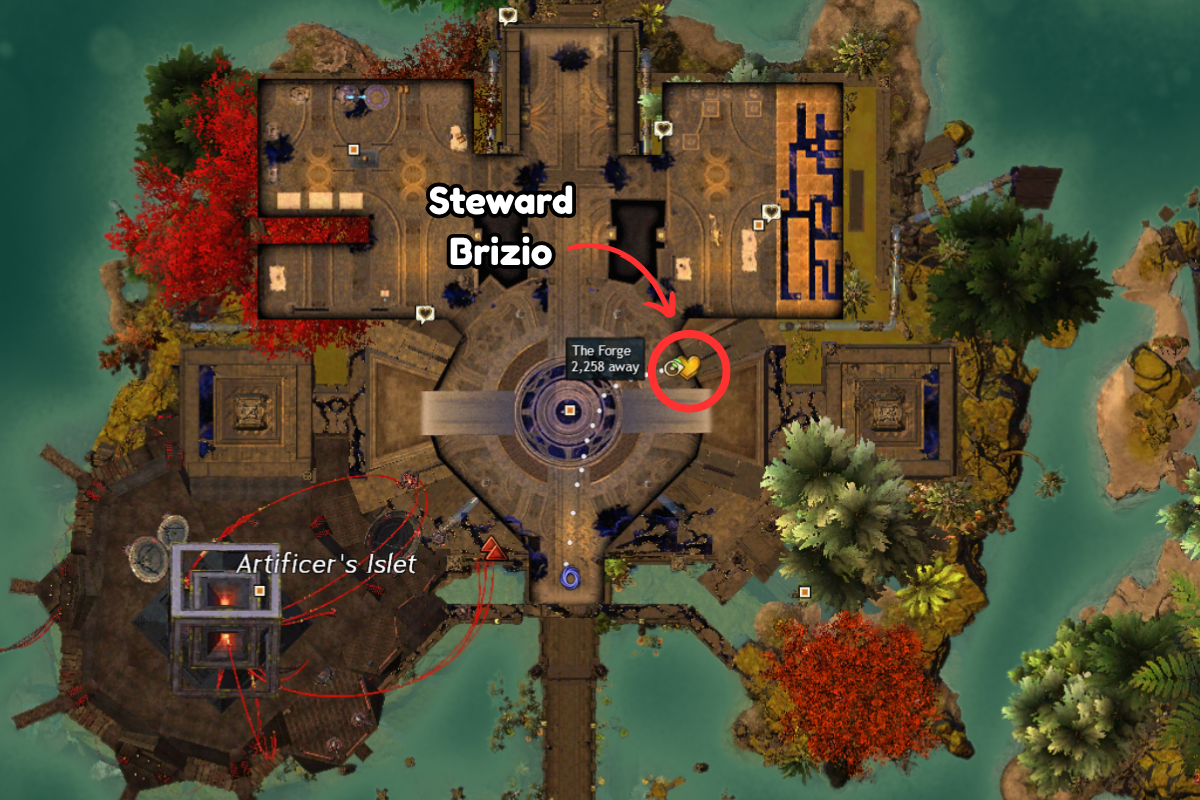
Complete the heart located northeast of The Forge Point of Interest — [&BP8PAAA=]
Help repair the seer pipes in Ley-Drowned Quarry

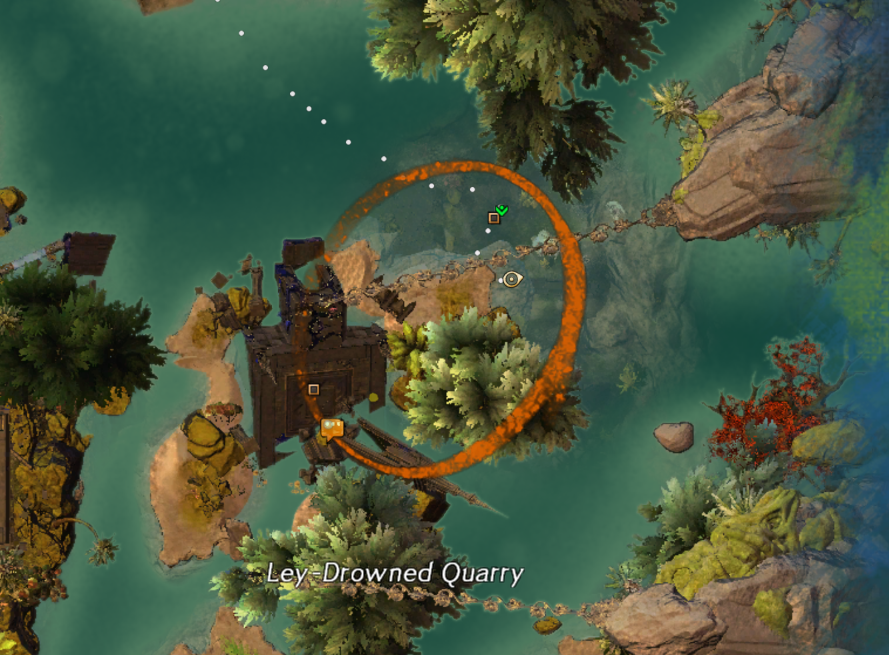
Complete Restore the ley-lines around the quarry - this event starts northwest of Toppled Monument Point of Interest — [&BPMPAAA=]
Help Researcher Daniella gather ritual gear in Venomgrove Observatory
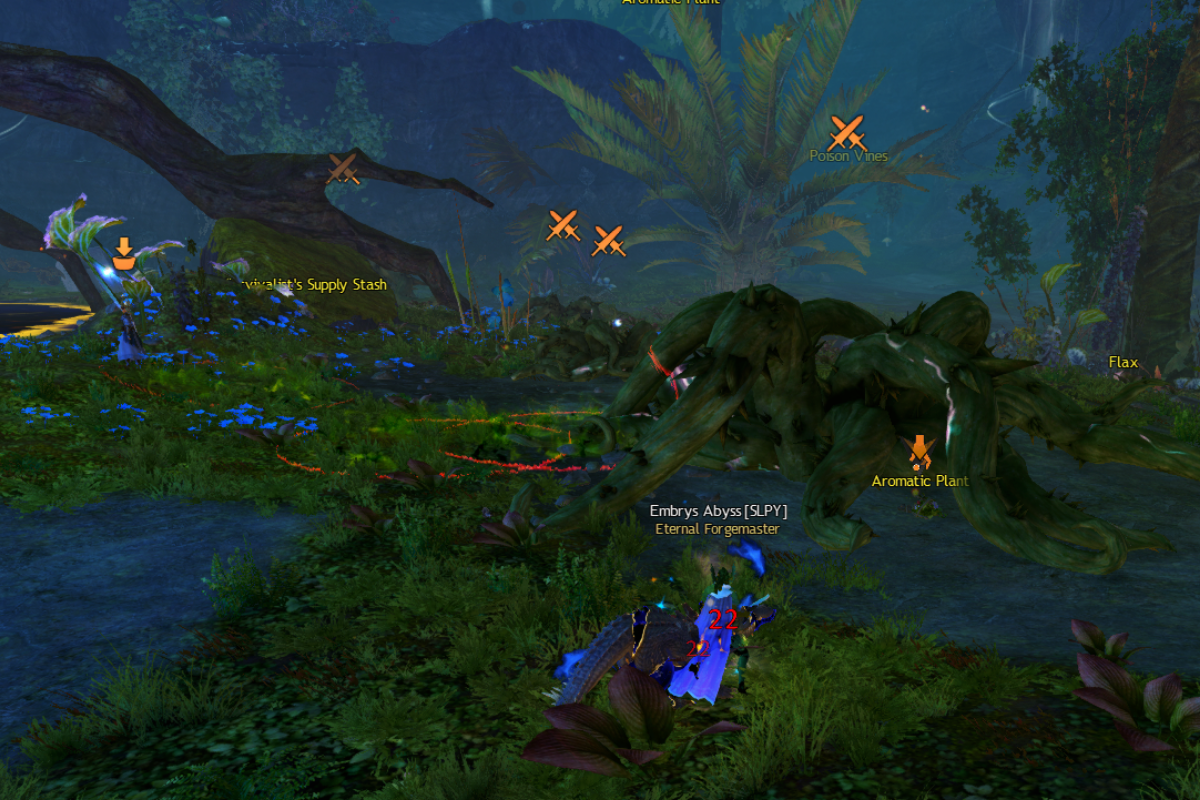
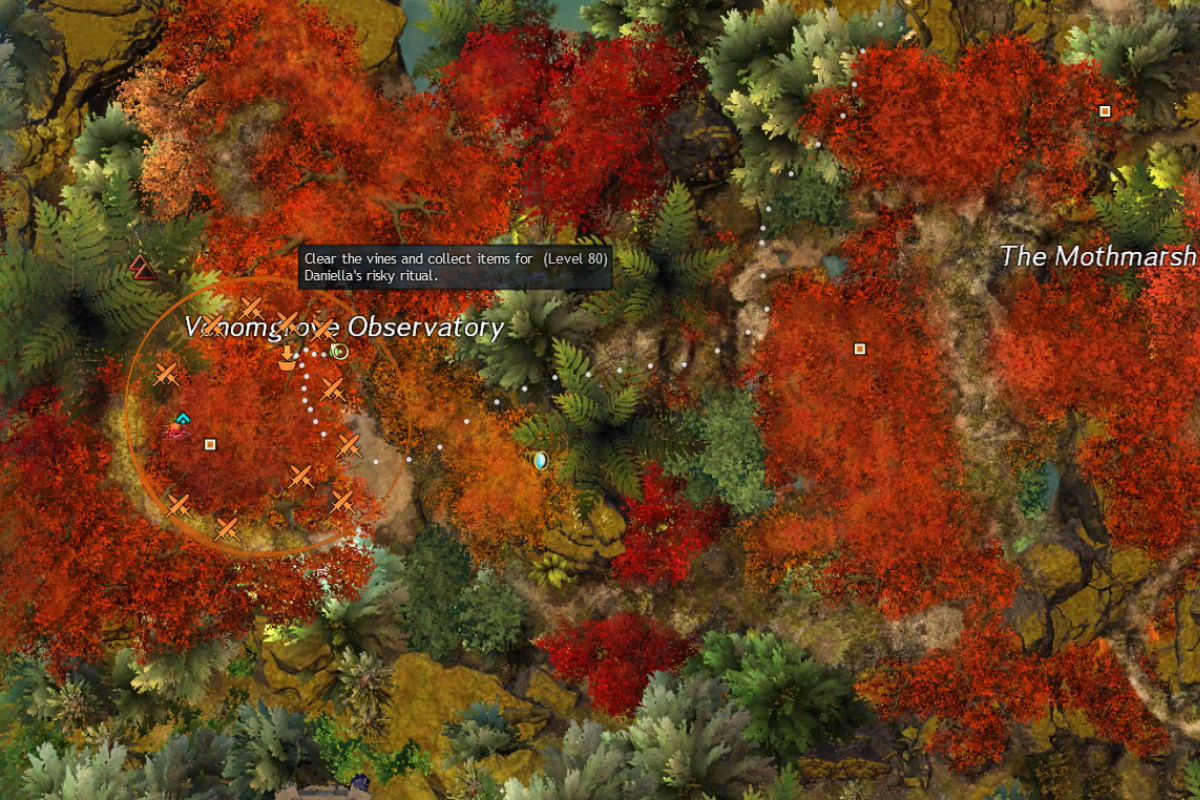
Complete Clear the vines and collect items for Daniella's risky ritual - this event will start at Raul's Watch Point of Interest — [&BOwPAAA=]
Conduct a hands-on field study of one of the ley-spotted moths in the Mothsmarsh
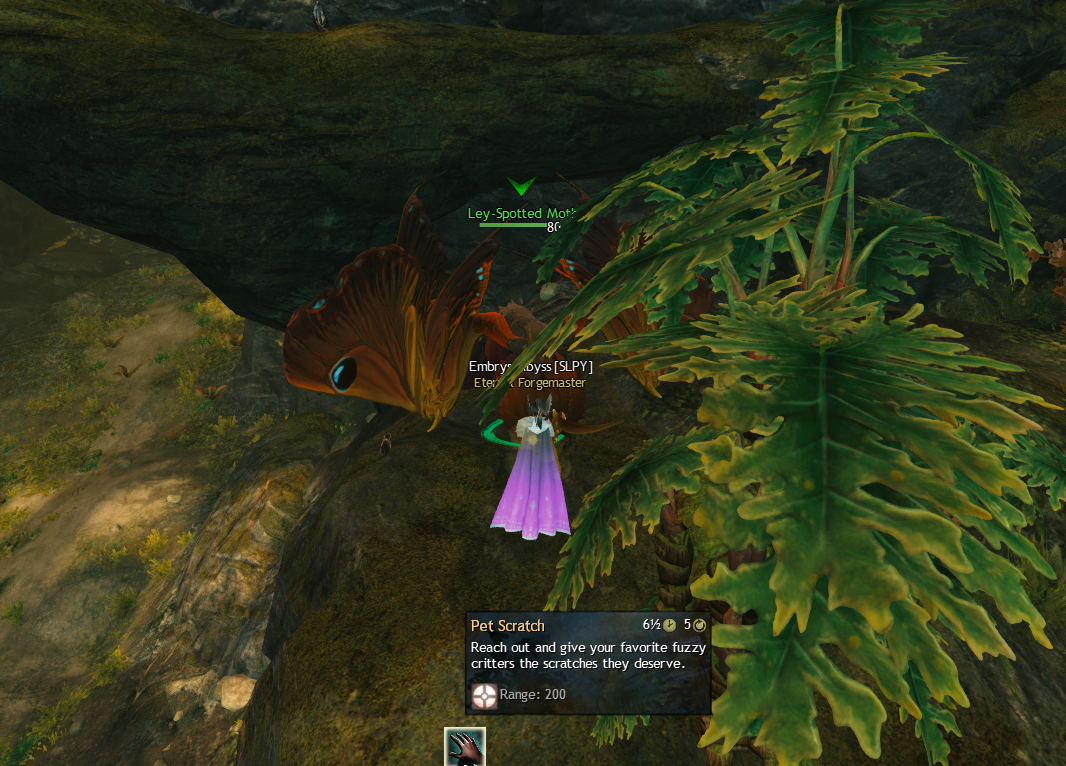

Find any Ley-Spotted Moth in the Mothmarsh area, use your special action key to pet it. One can be found directly south of the Aperture Falls Point of Interest — [&BAcQAAA=]
Assist the Priory with their efforts near Pilgrim’s Rest
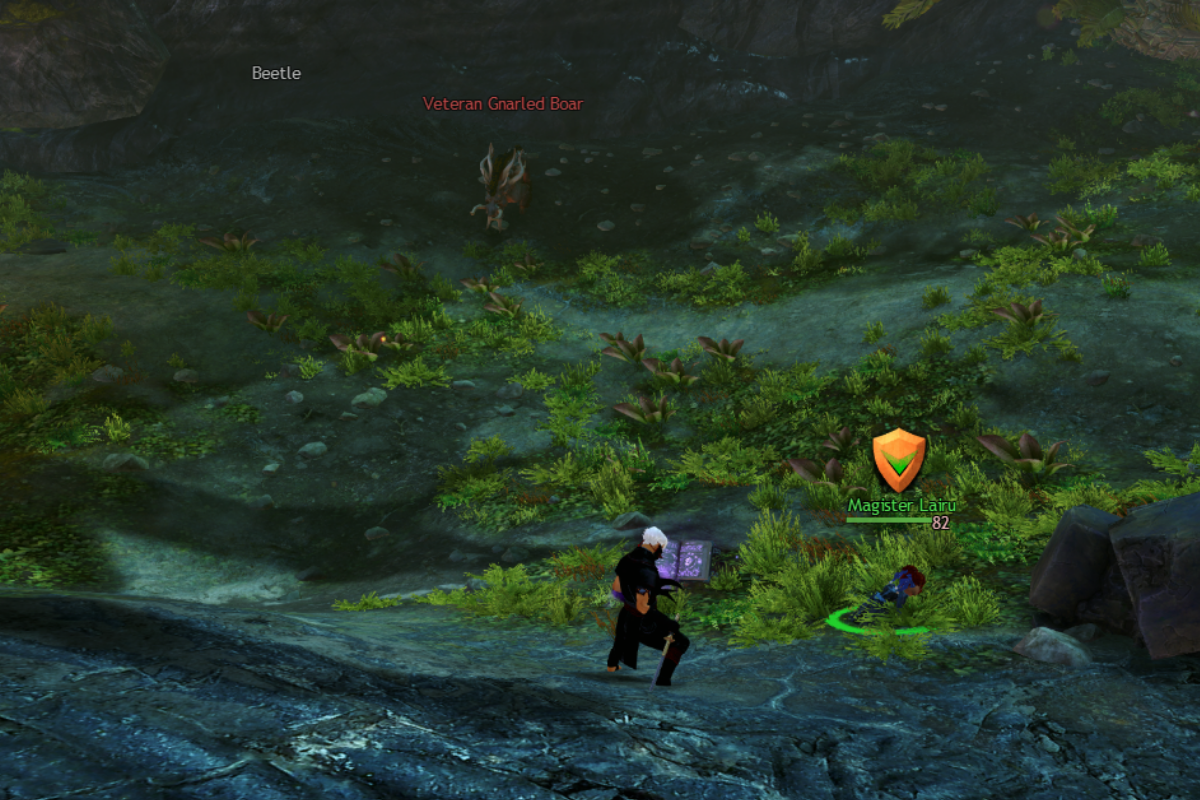
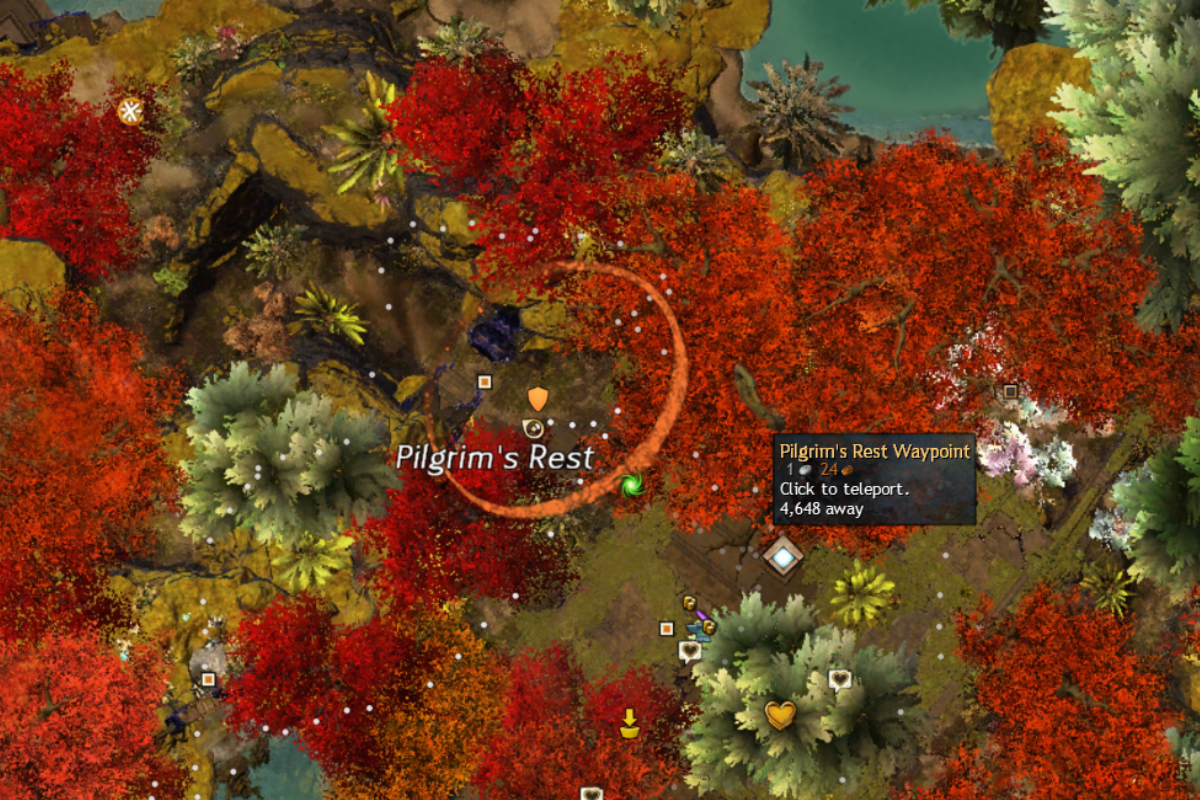
Complete Escort Magister Lairu through the seer ruins - this event will start northwest from from Pilgrim's Rest Waypoint
Surveillance Probe
Scout all three locations called out by Vigil Scout Premhoc without engaging the Inquest in combat
Utilize your Stealth 2.0 skill on your mount to not be noticed as much as you can
Location 1 - Raul's Watch Point of Interest — [&BOwPAAA=]


Location 2 - Supra Fortis Point of Interest — [&BOEPAAA=]
Location 3 - Sanctum Exterior Waypoint — [&BPAPAAA=]
The Path of Ascension
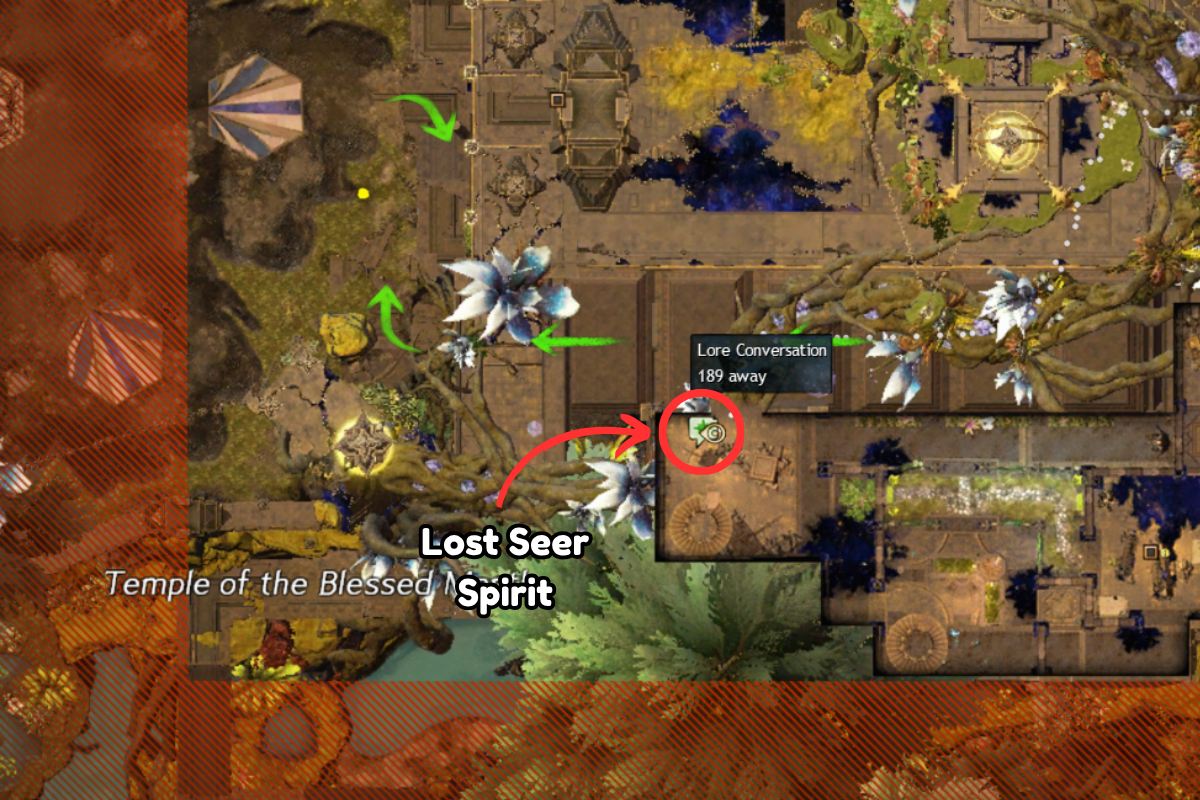
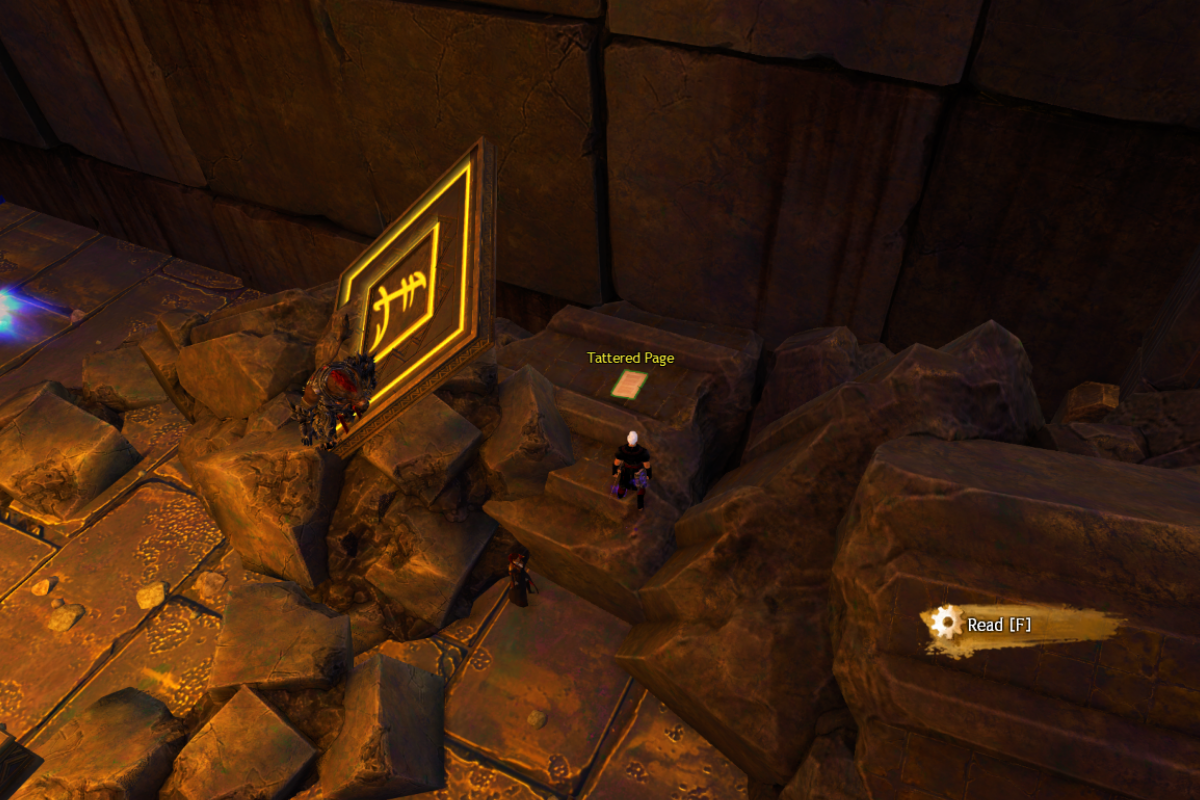
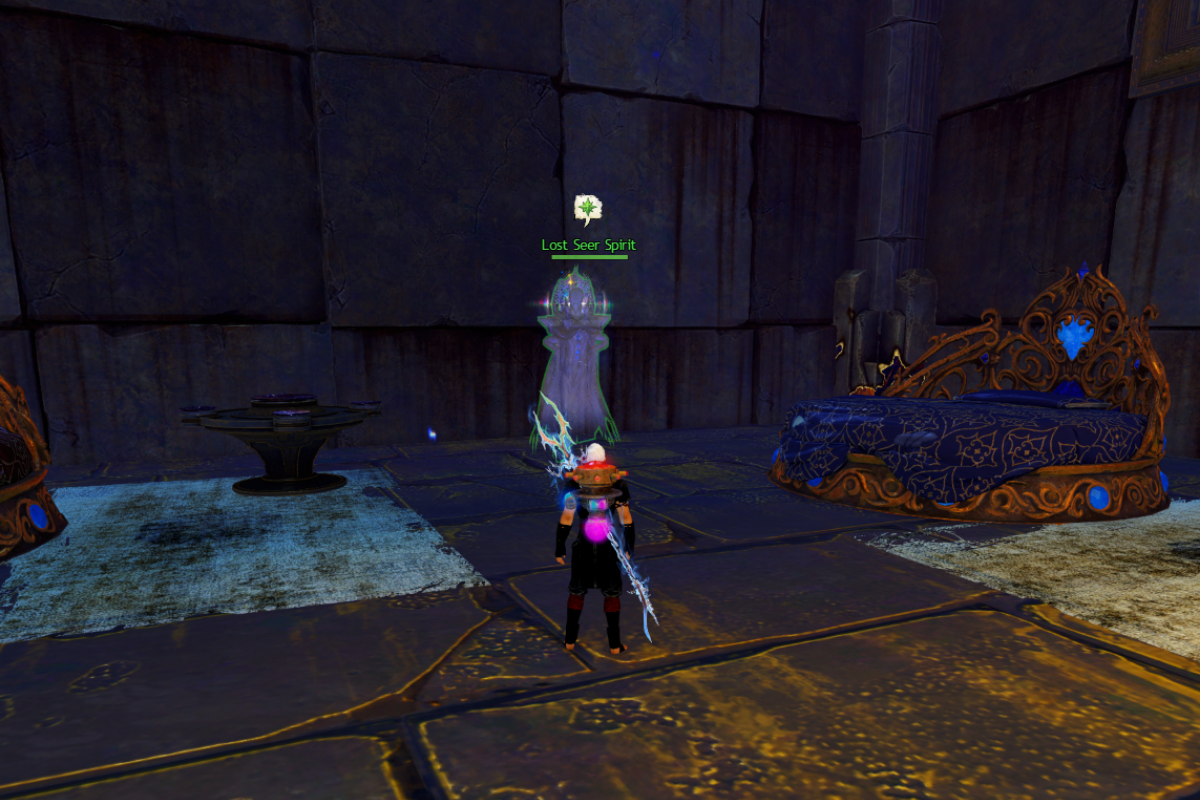
Help a lost seer spirit recall moment from their past as they walked the path of ascension
Speak with the Lost Seer Spirit in the south room near the start of the story instance
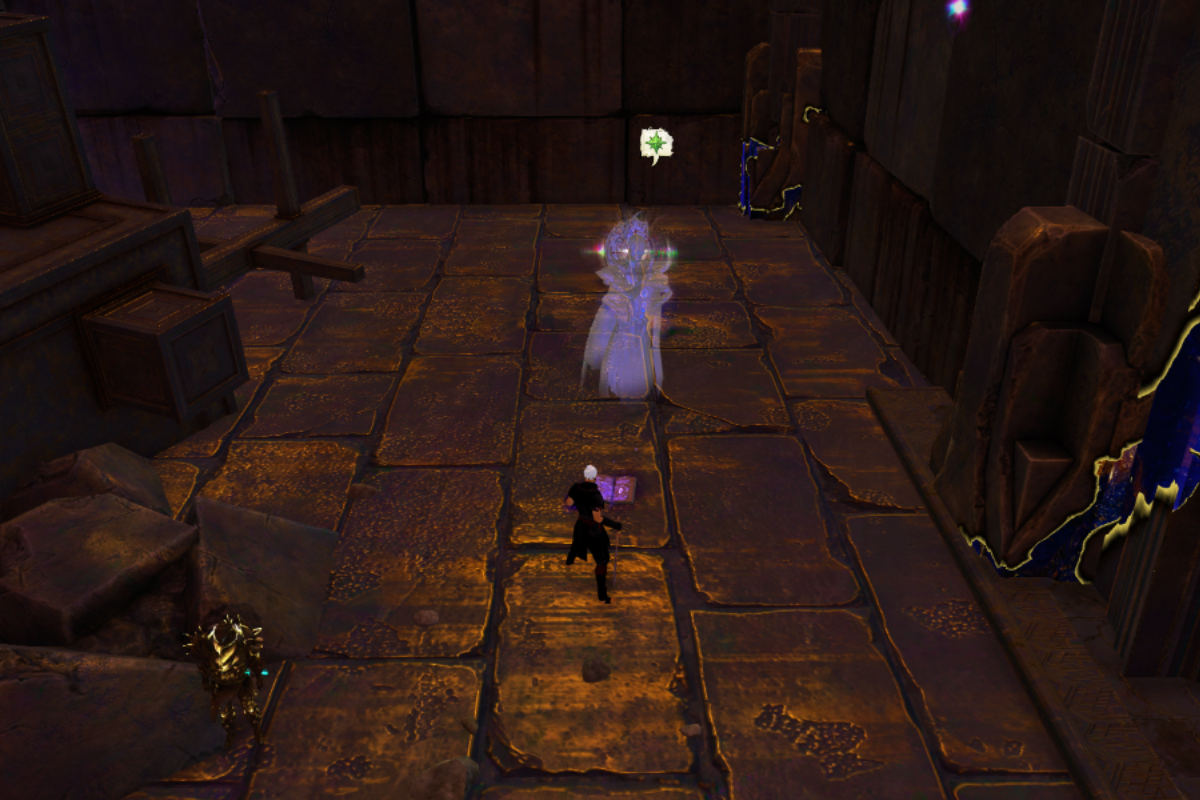
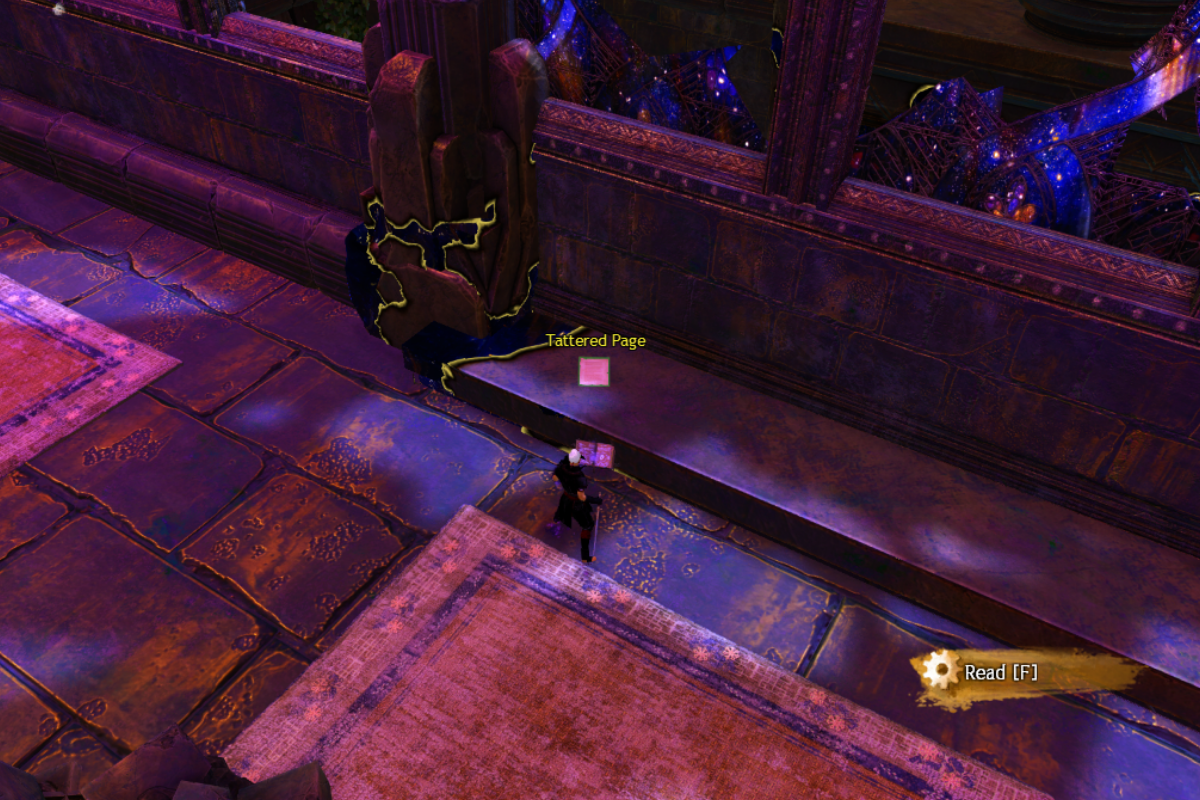
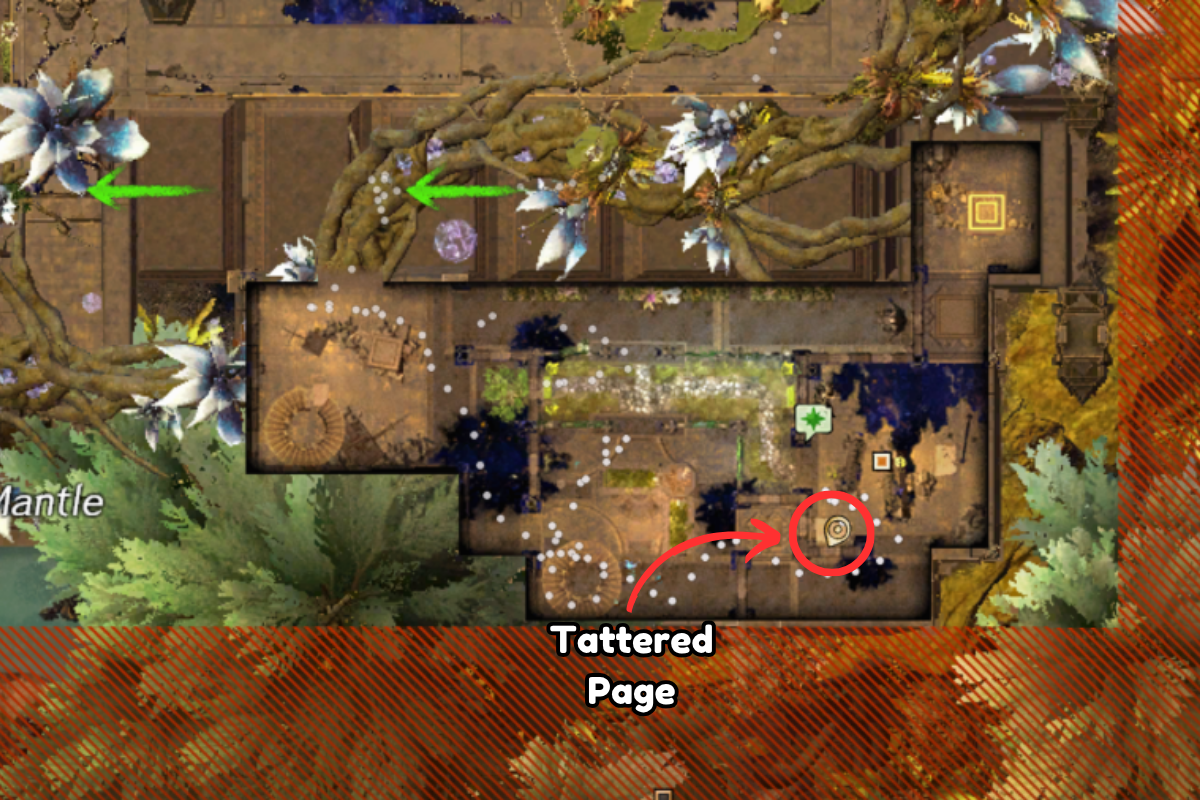
You will then need to find the Tattered Pages - but you will only need to find one at a time then return to speak with the Lost Seer Spirit and answer questions based on the pages
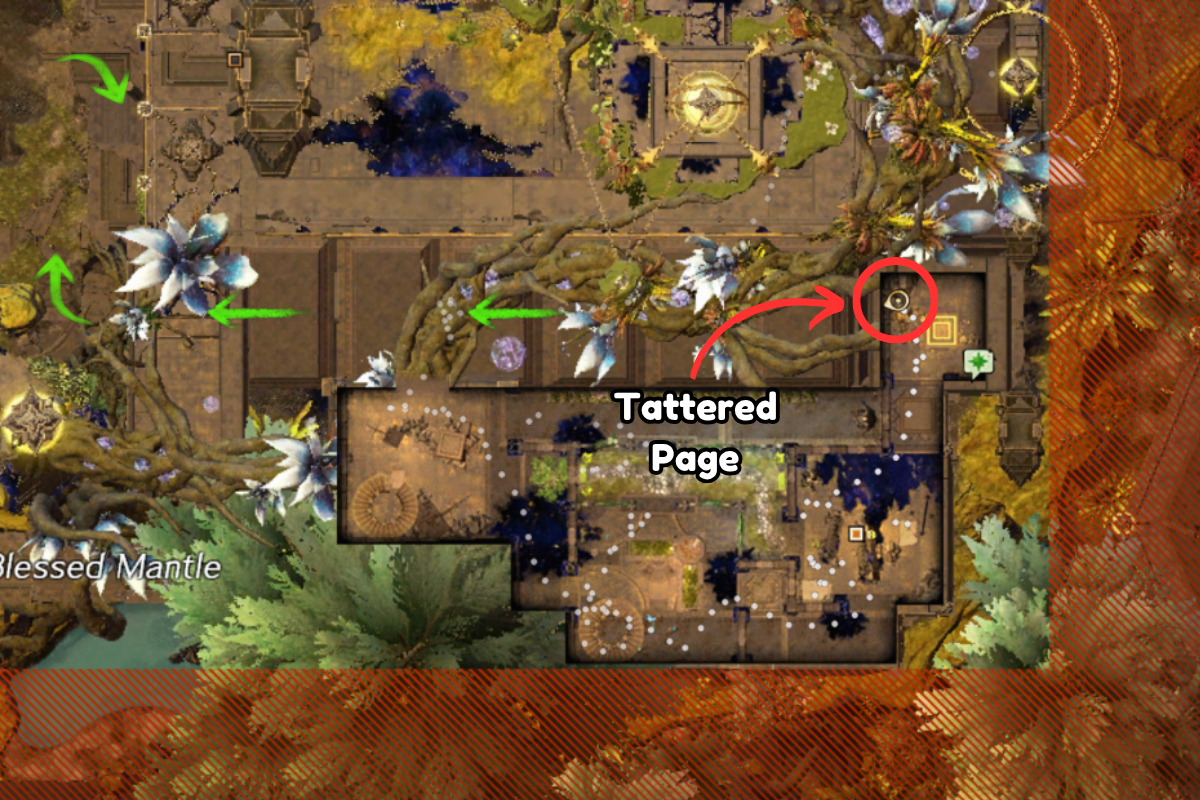
Tattered Page 1
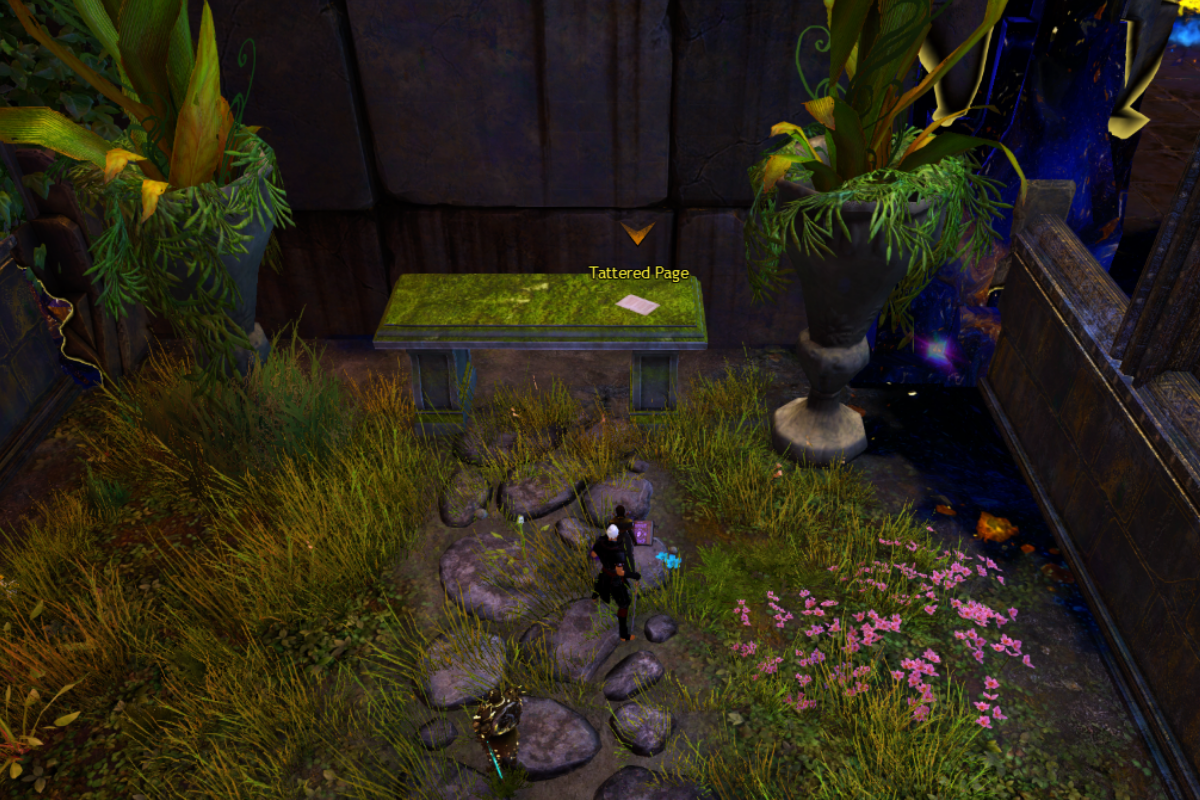
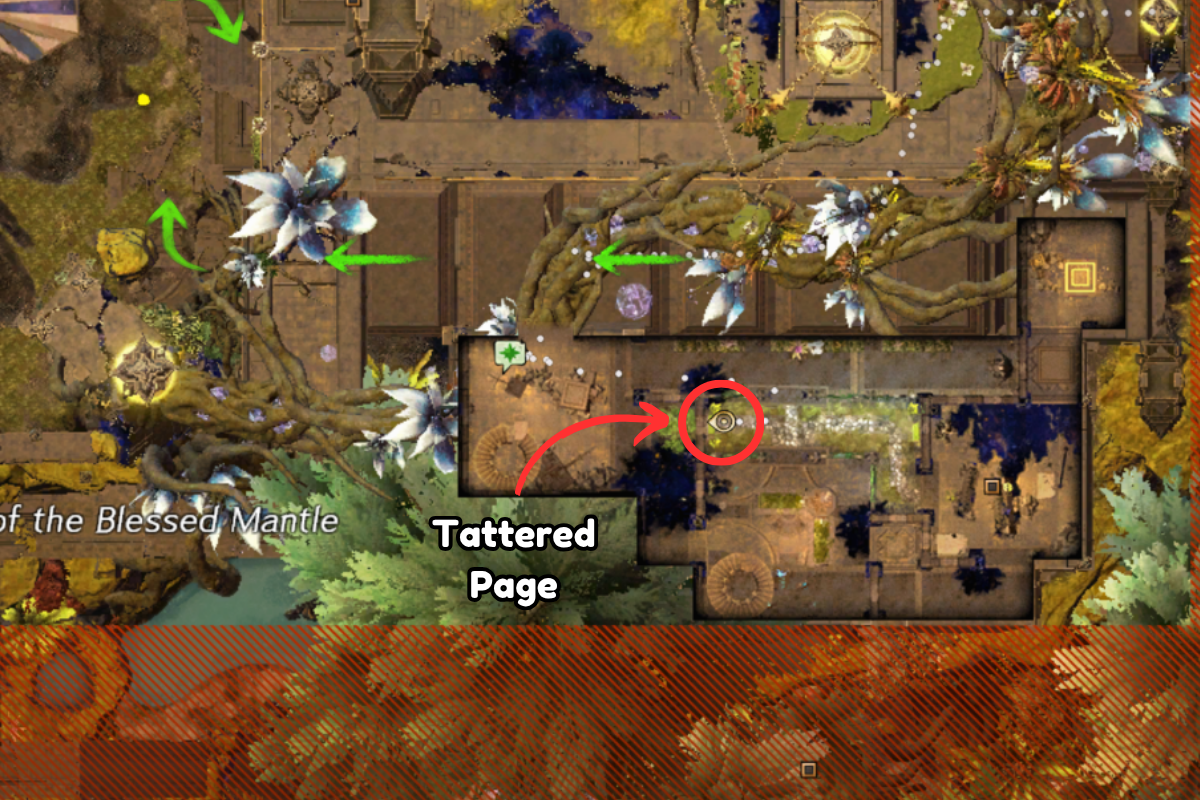
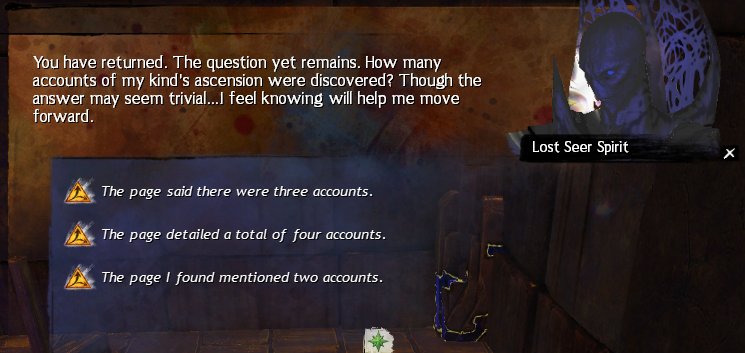
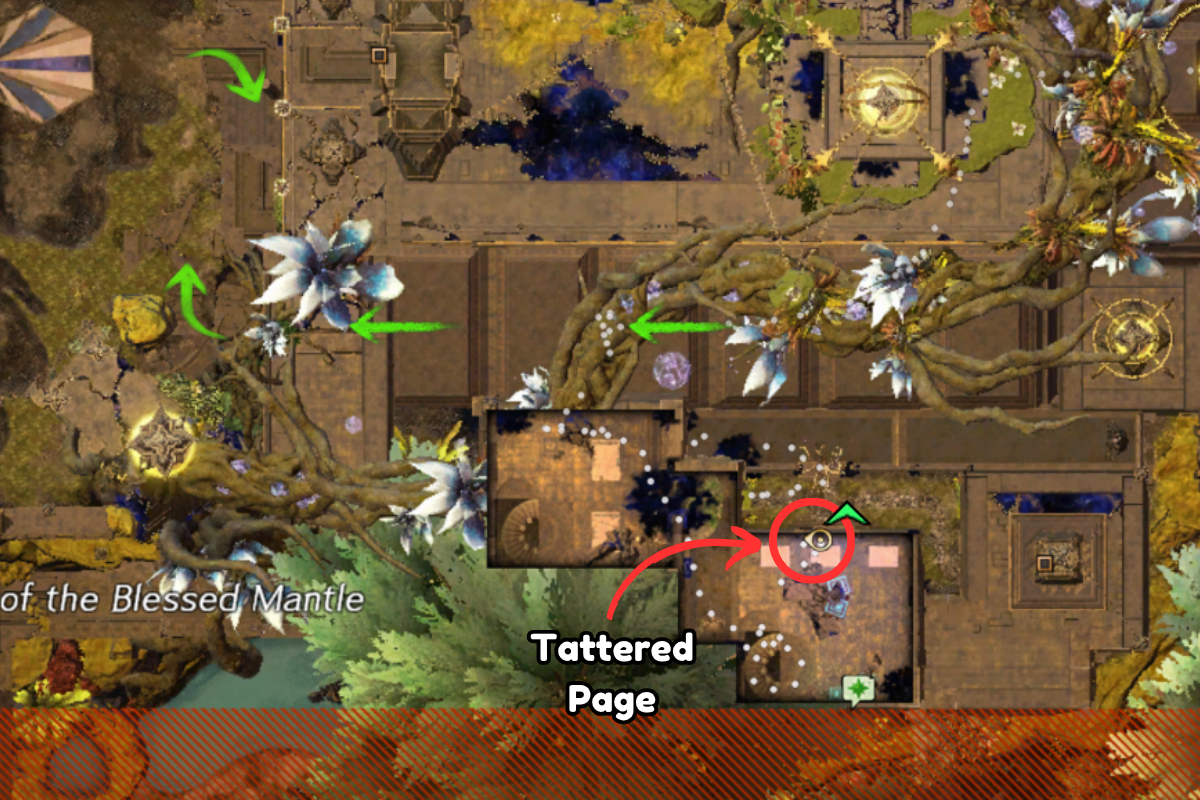
The first Tattered Page is east down the hallway and then south into a small room where it will be on your right - after reading this return to the Lost Seer Spirit and reply with The page detailed a total of four accounts
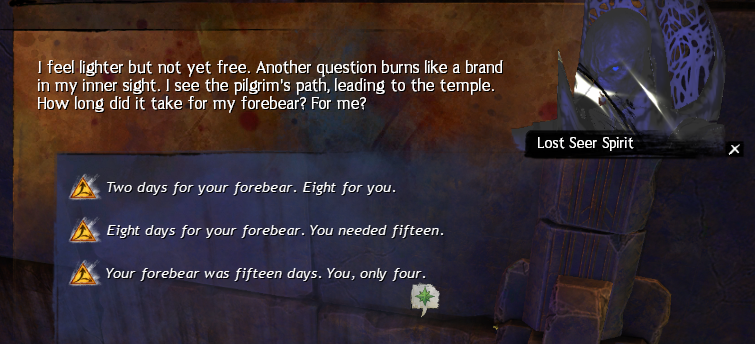
Tattered Page 2
Tattered Page 2 will be up the spiral staircase next to the Lost Seer Spirits new location - after reading this return to the Lost Seer Spirit and reply with Eight days for your forebear. You needed fifteen.
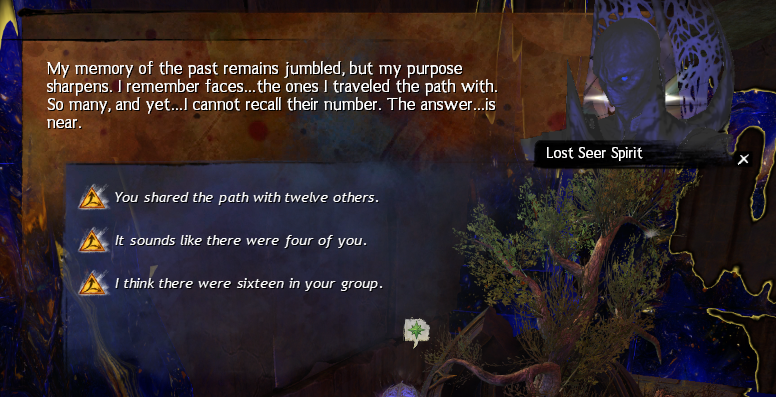
Tattered Page 3
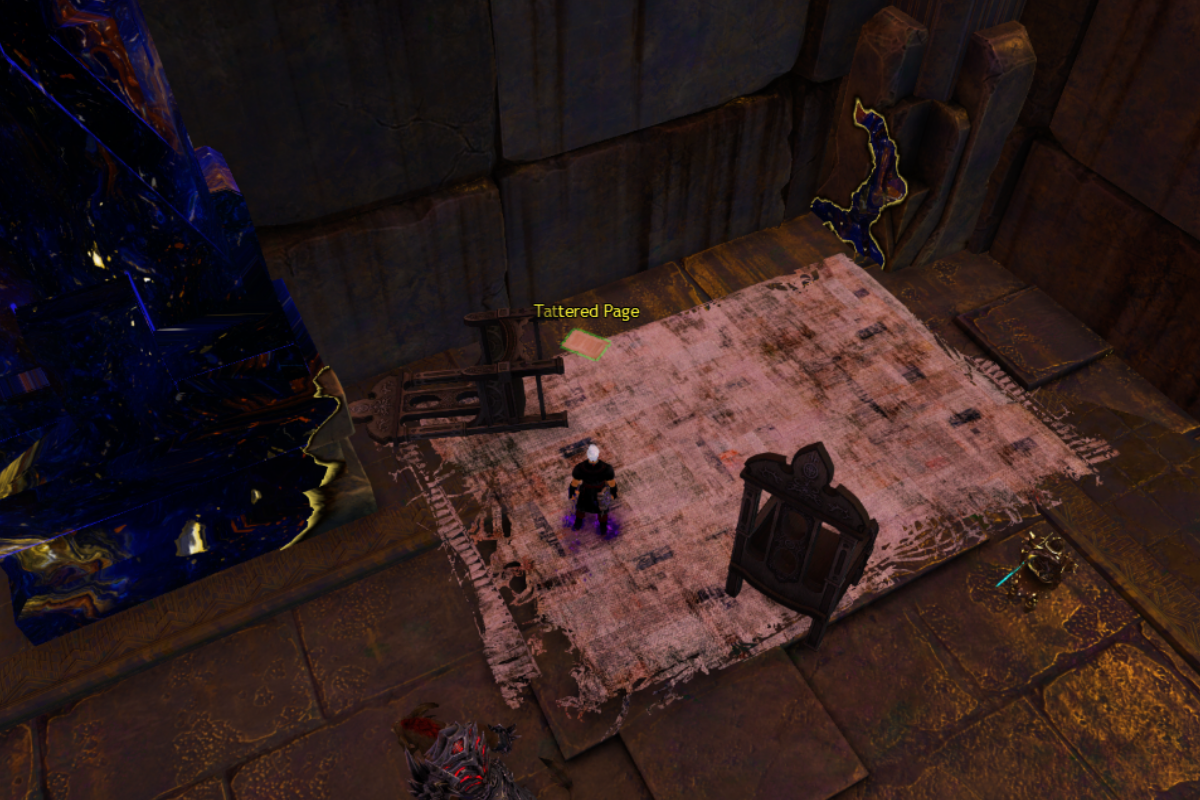
Tattered Page 3 will be right beside the Lost Seer Spirits new location, just side the two chairs sitting there - after reading this return to the Lost Seer Spirit and reply with I think there were sixteen in your group.
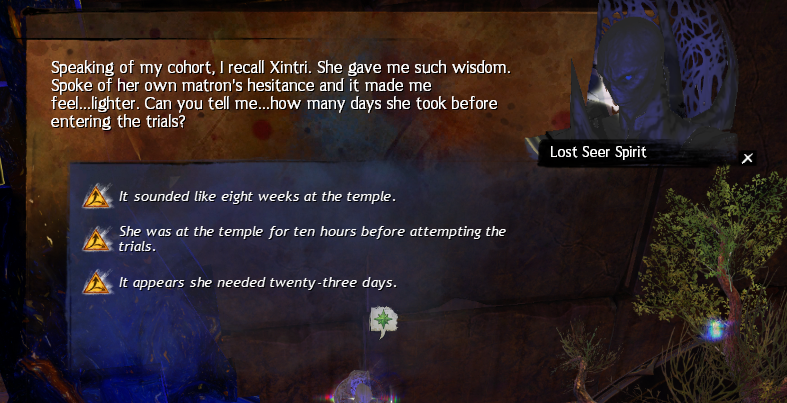
Tattered Page 4

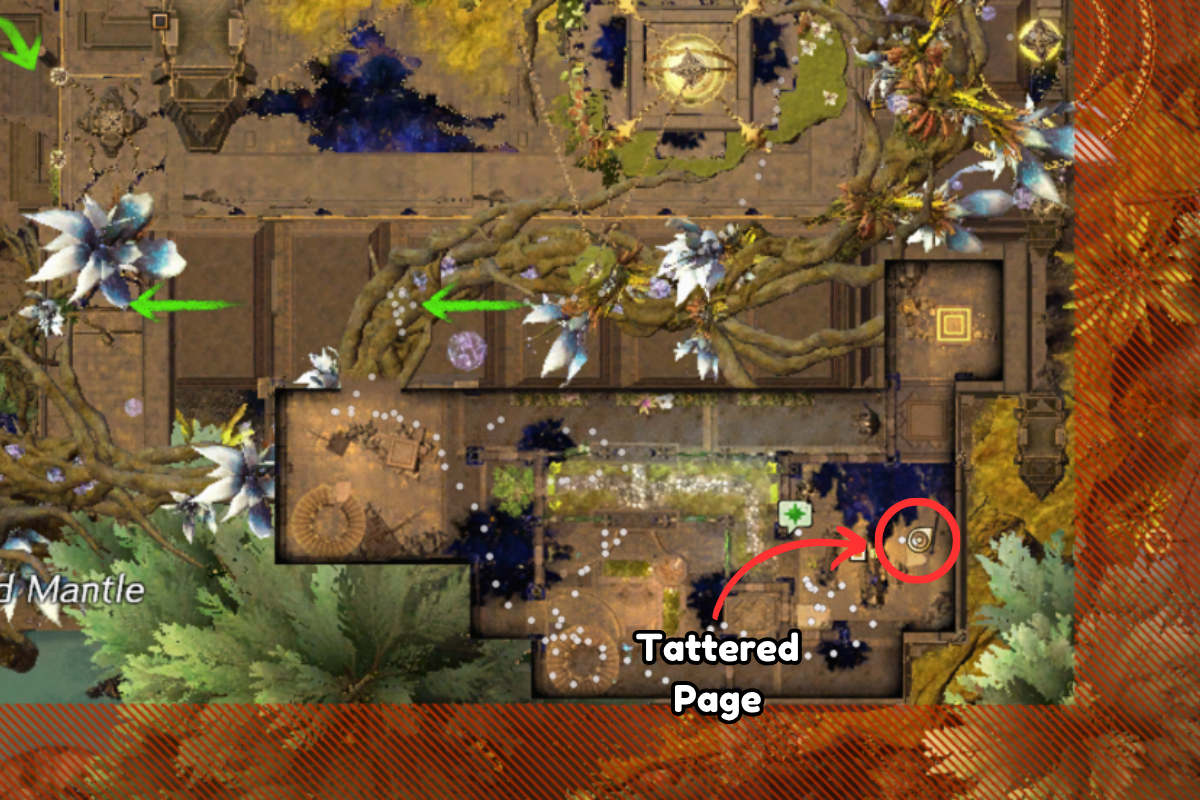
Tattered Page 4 will be in the same room as Tattered Page 3, just more on the eastern side of the room - after reading this return to the Lost Seer Spirit and reply with It appears she needed twenty-three days.
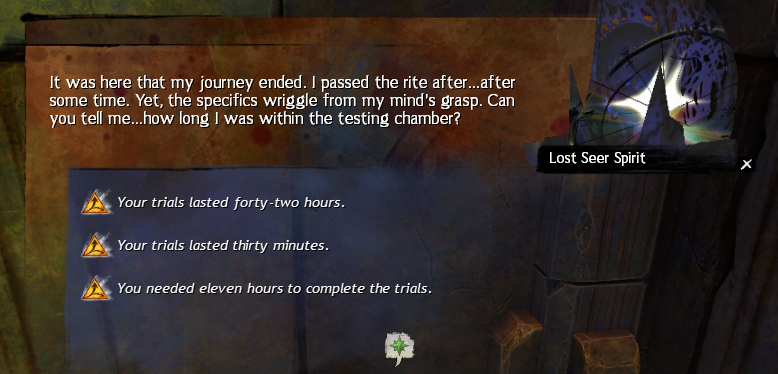
Tattered Page 5
Tattered Page 5 will be on the western wall near the Lost Seer Spirits new location - after reading this return to the Lost Seer Spirit and reply with Your trials lasted fourty-two hours
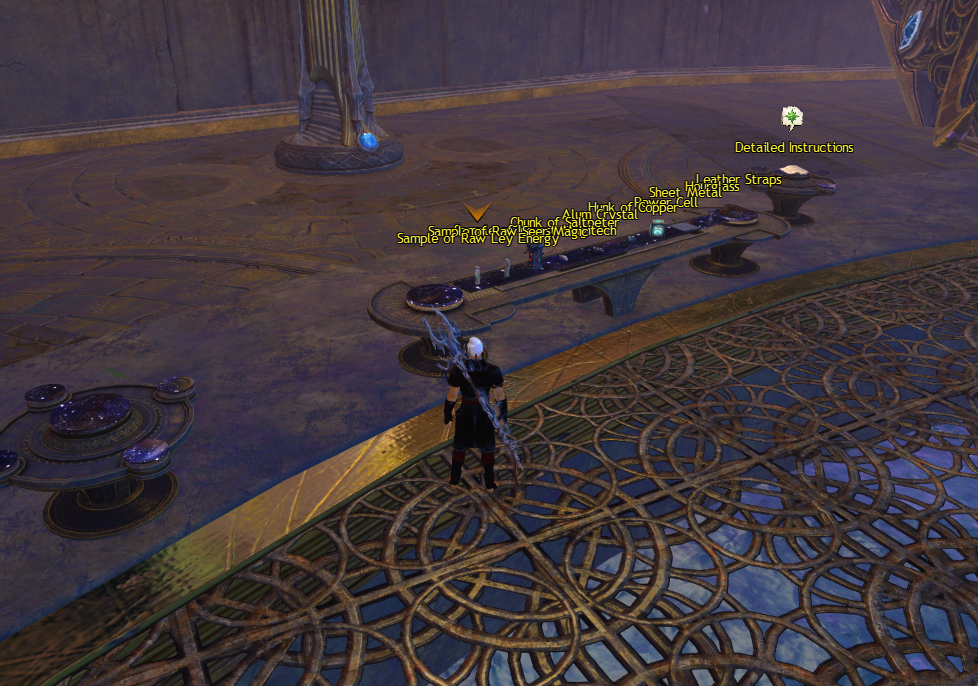
Infiltration Improvisation
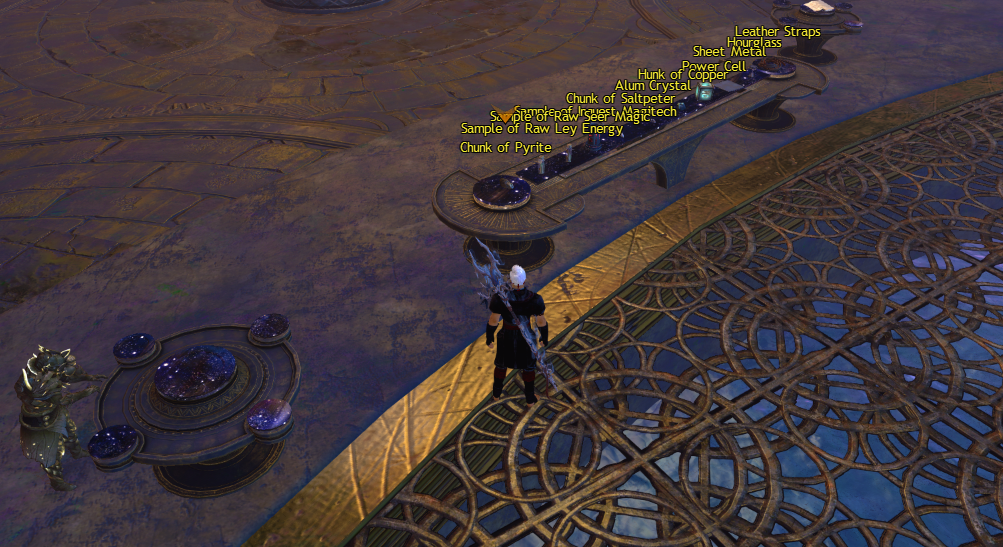
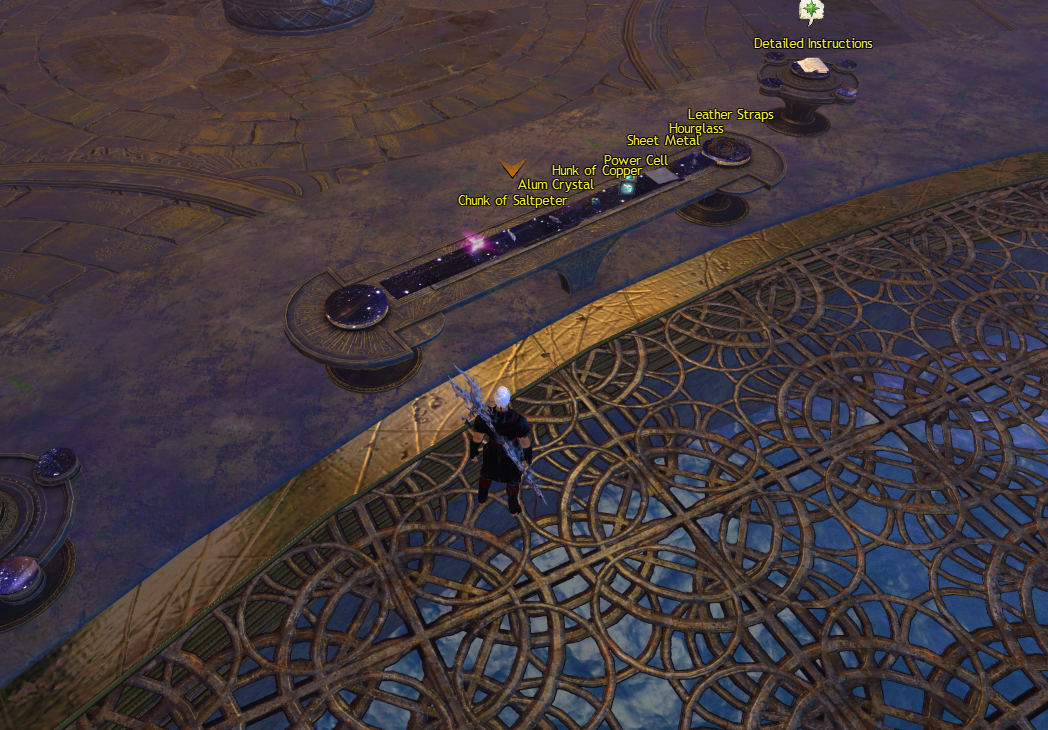
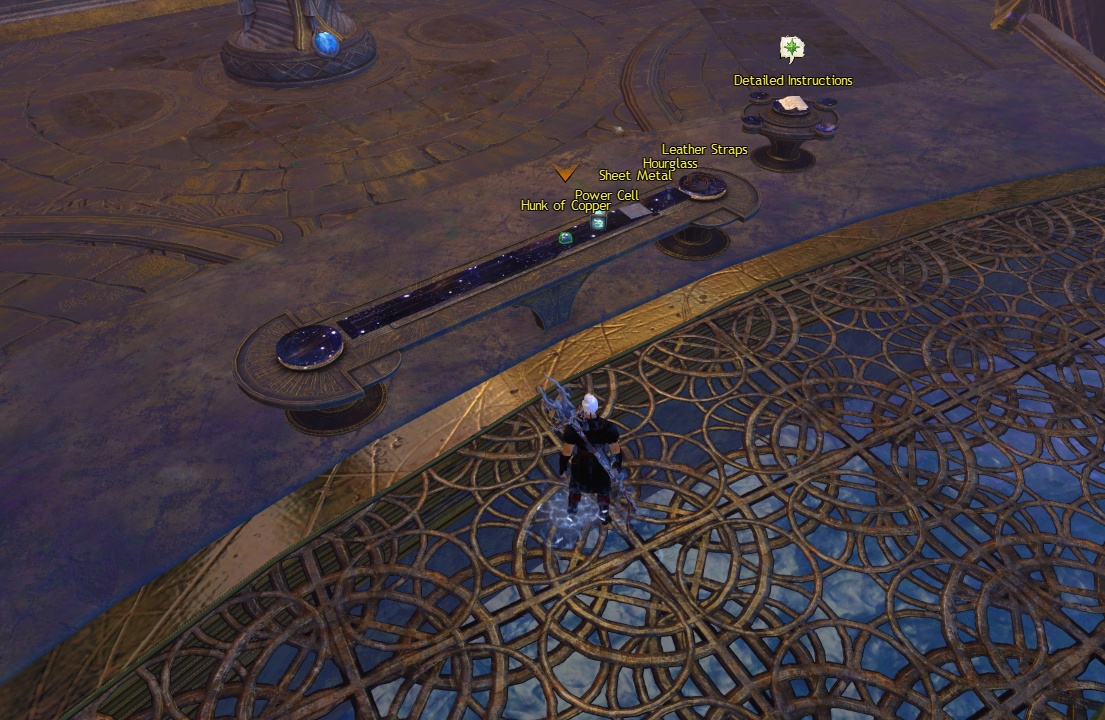
Find and collect the components to construct Canach's Device
Canach's Device Component List
You will recieve this once you open the mail from Canach
Sample of Raw Ley Magic
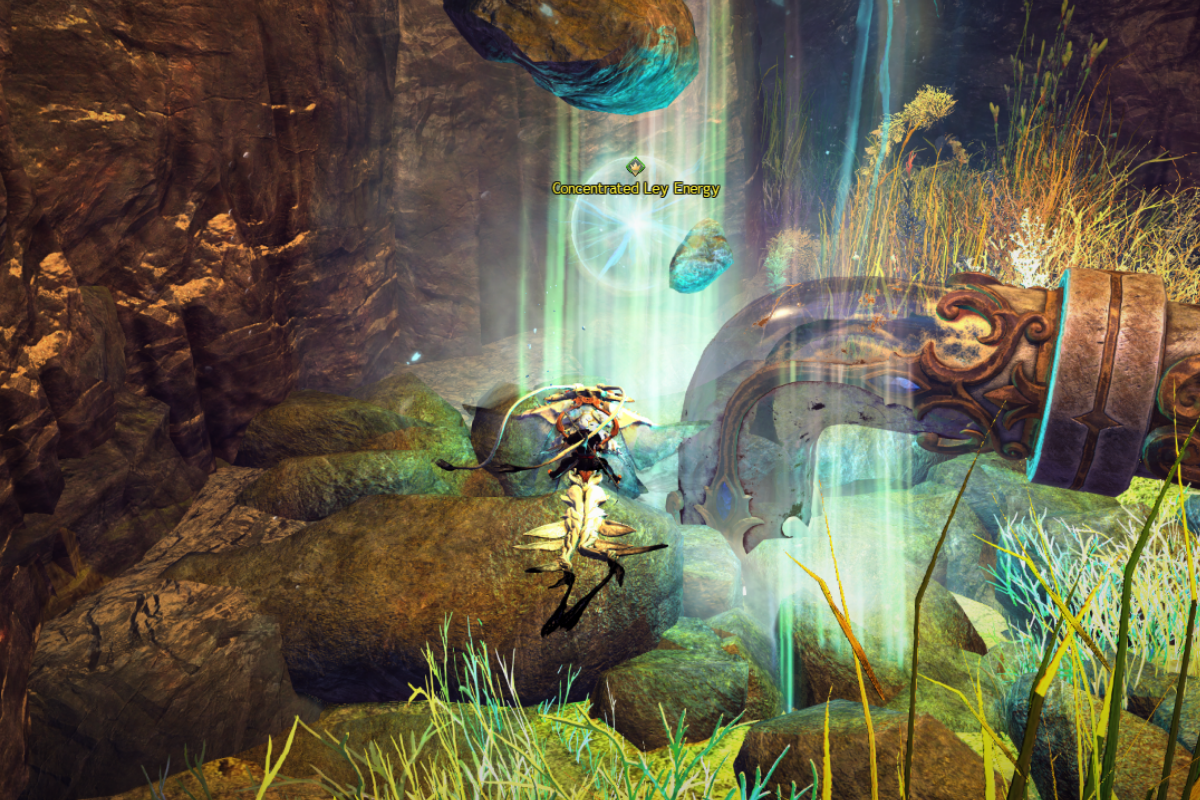
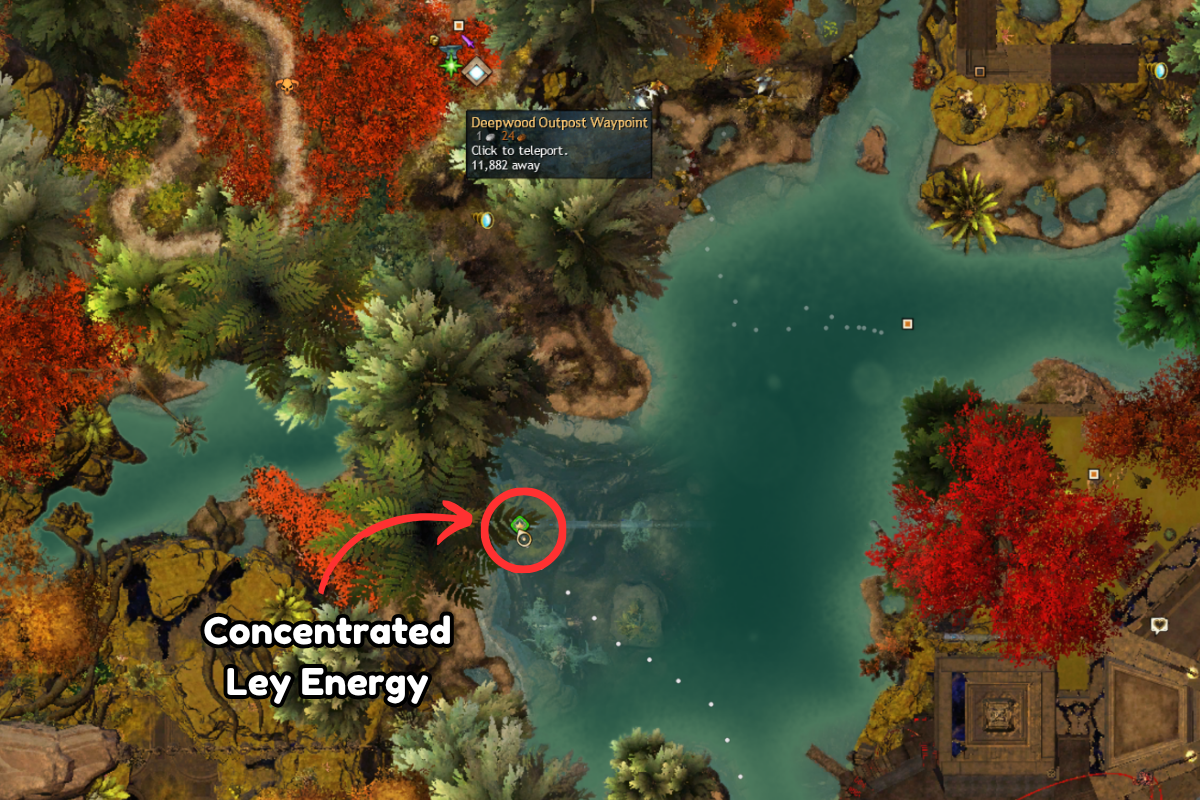
There are three locations that Vigil Scout Premhoc will mark for you, but they are all under water - here is the one north by the Temple of Abnegation Waypoint — [&BPoPAAA=]
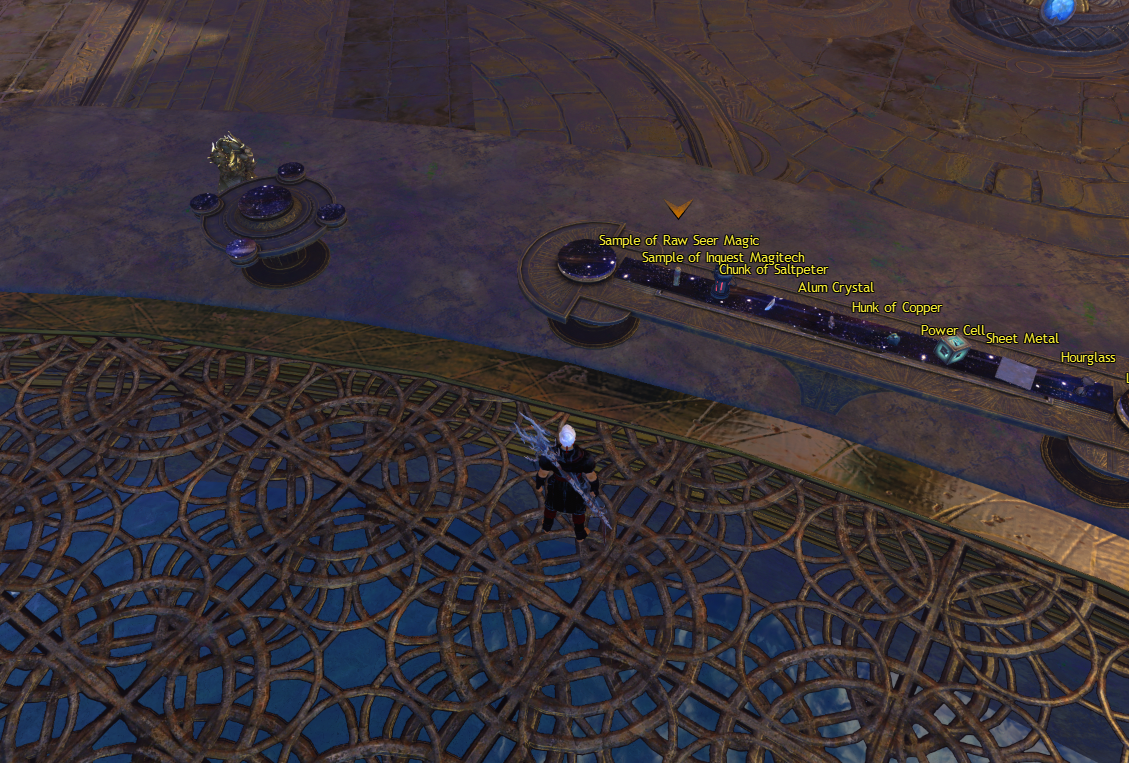
Sample of Raw Seer Magic
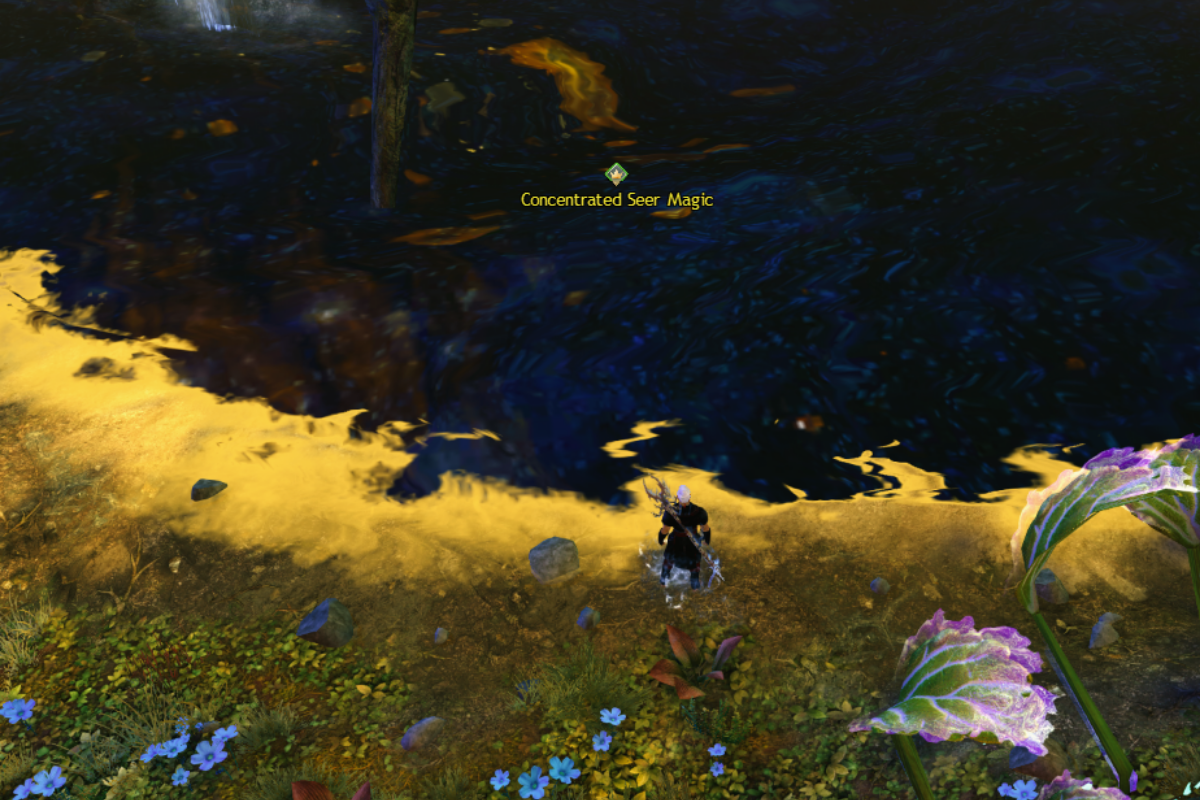
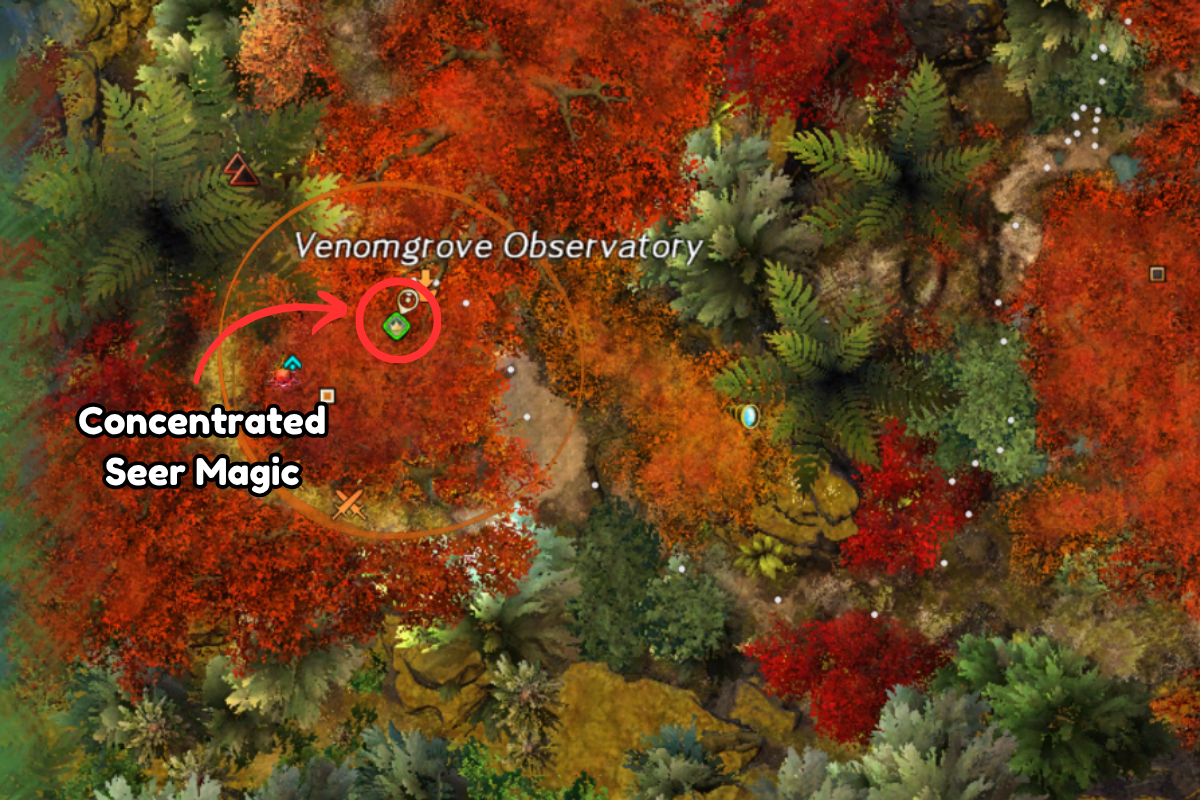
At the far south west side of the map - beside Raul's Watch Point of Interest — [&BOwPAAA=]
Sample of Inquest Magitech
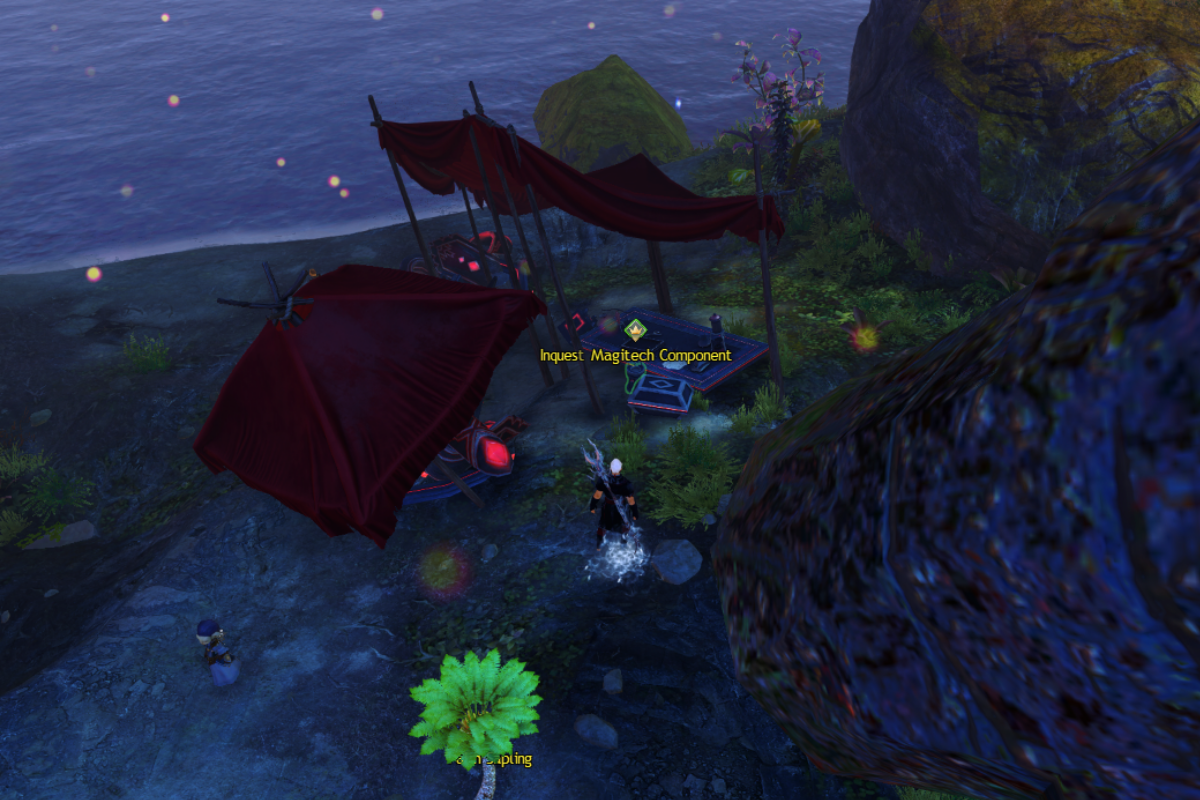
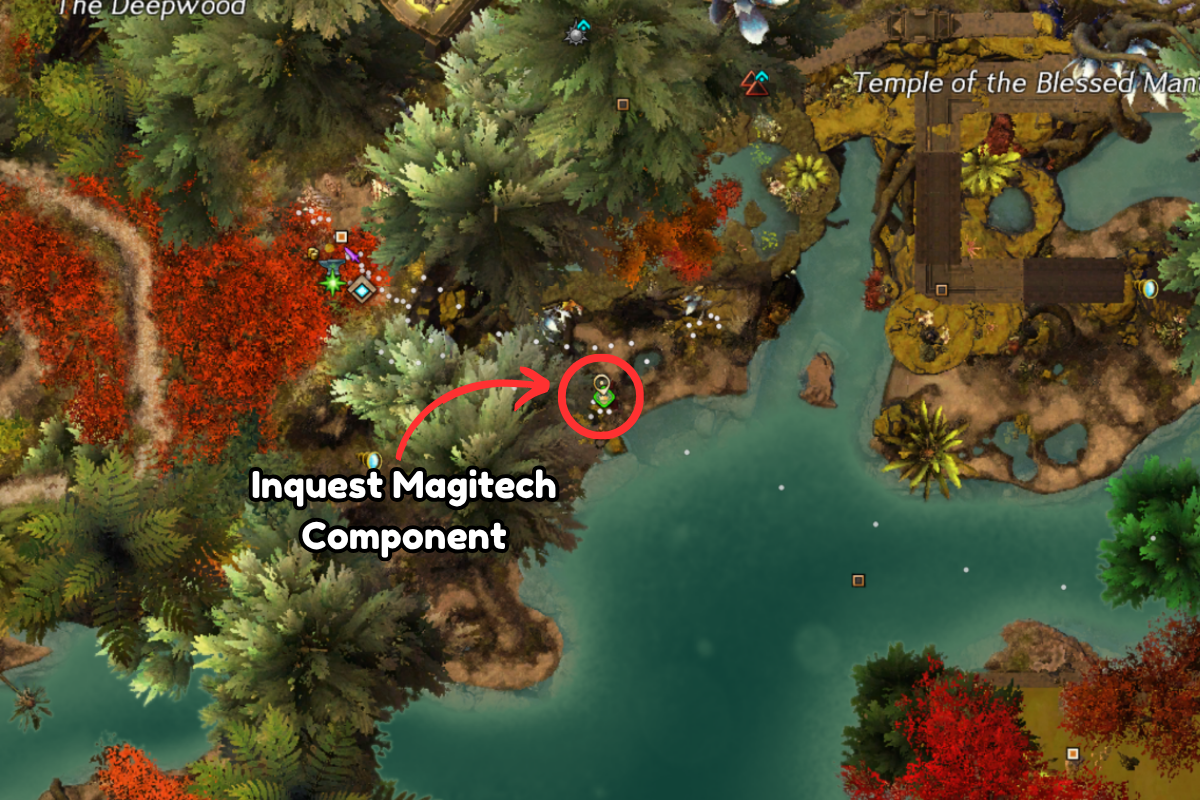
Slightly east from the Deepwood Outpost Waypoint — [&BOQPAAA=] - there actually is another location near the Sanctum Exterior Waypoint — [&BPAPAAA=] as well
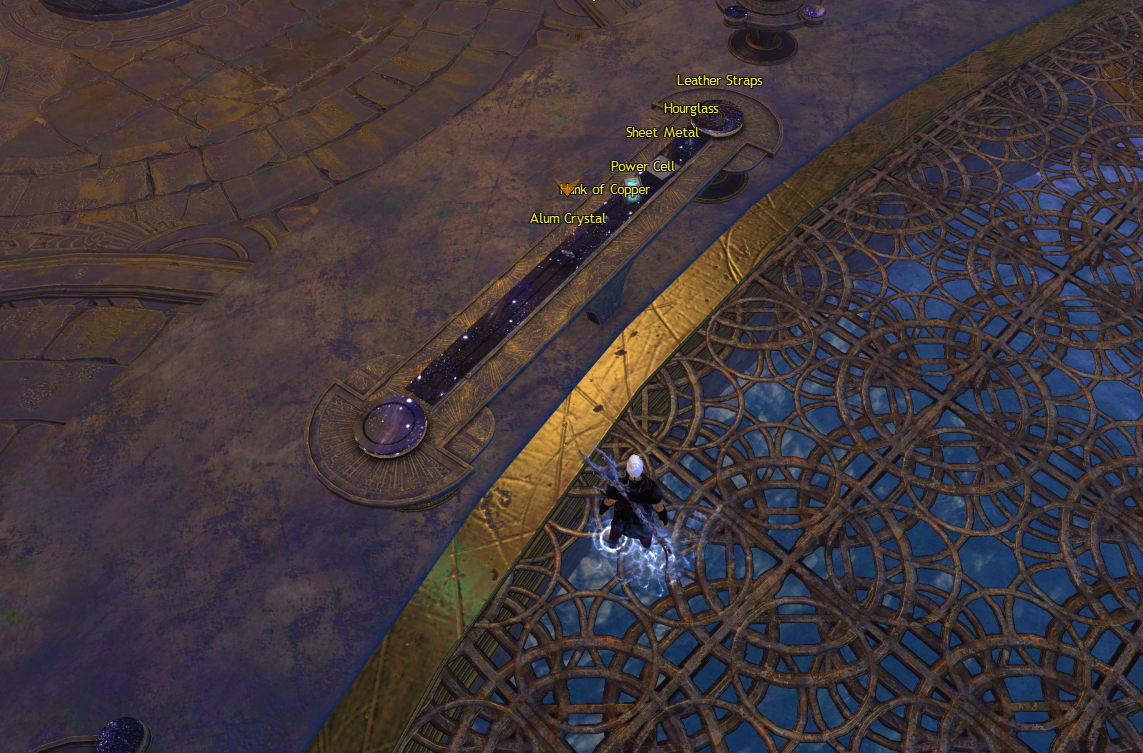
Chunk of Saltpeter
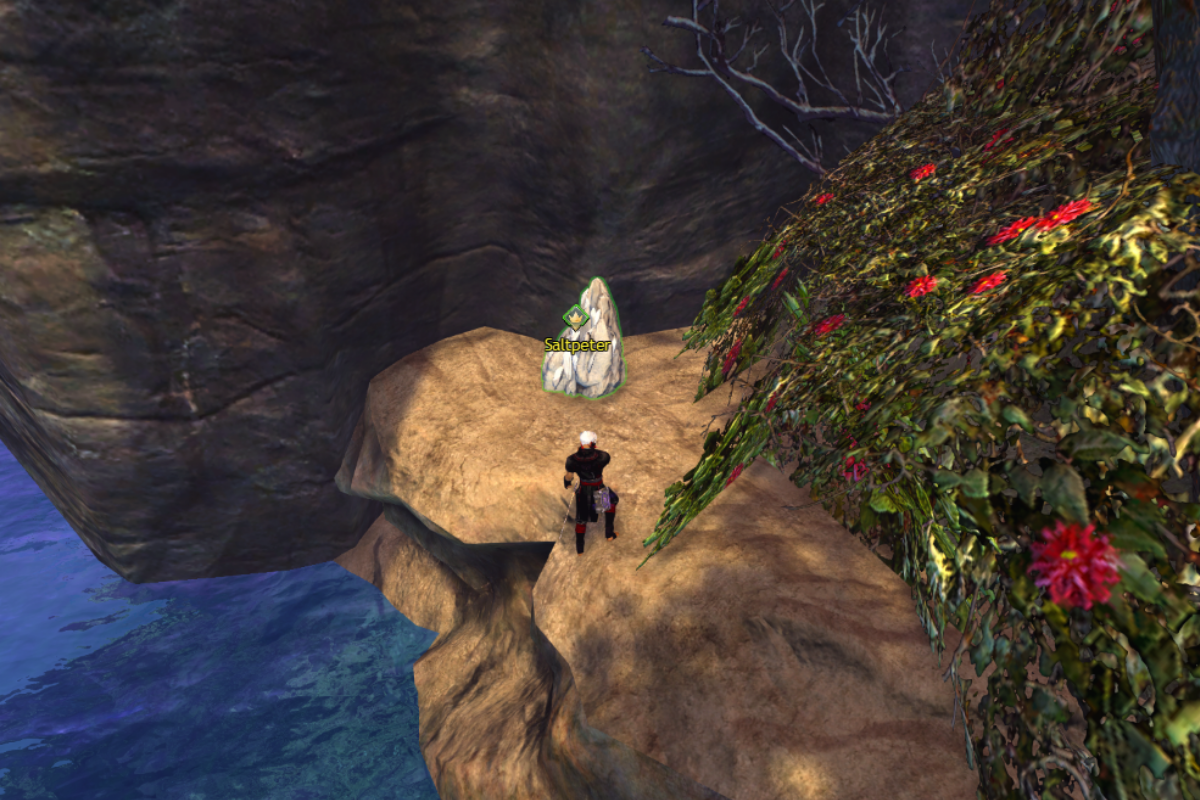
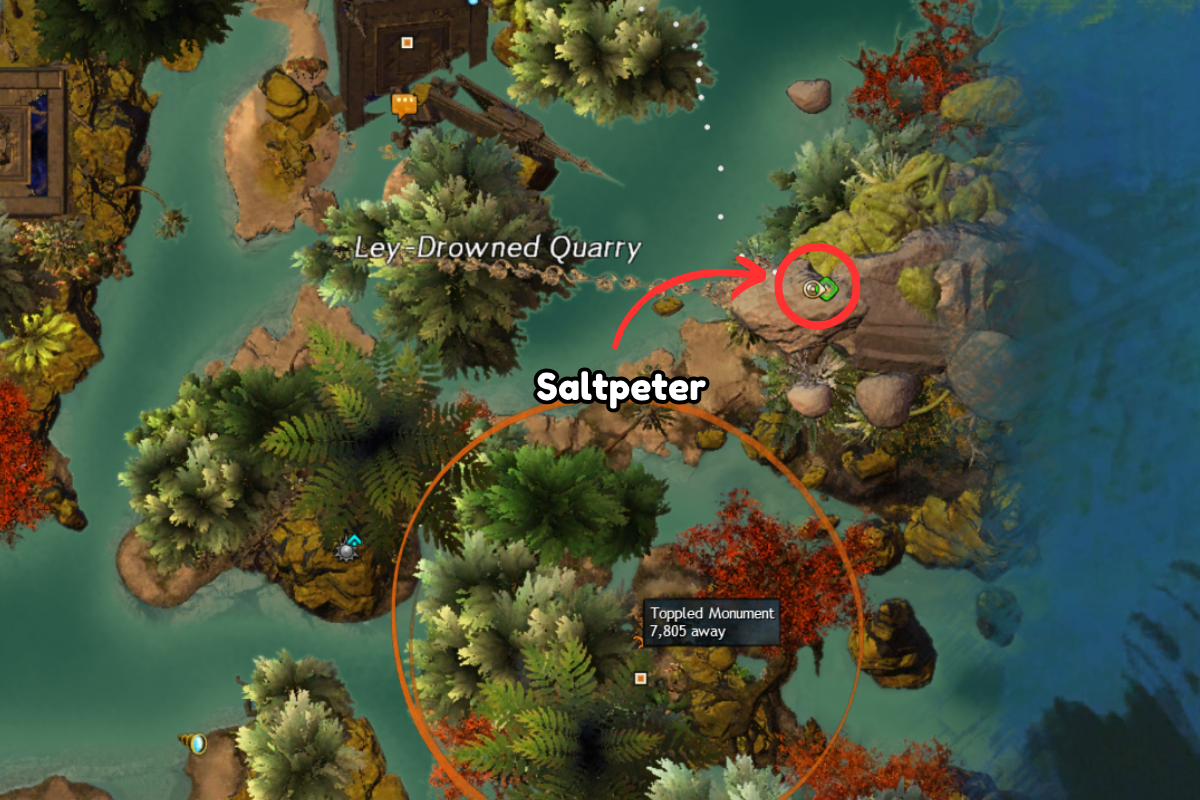
On the very eastern side of the map in the Ley-Drowned Quarry head north east from the Pilgrim's Rest Waypoint — [&BPwPAAA=]
Chunk of Oxidized Copper
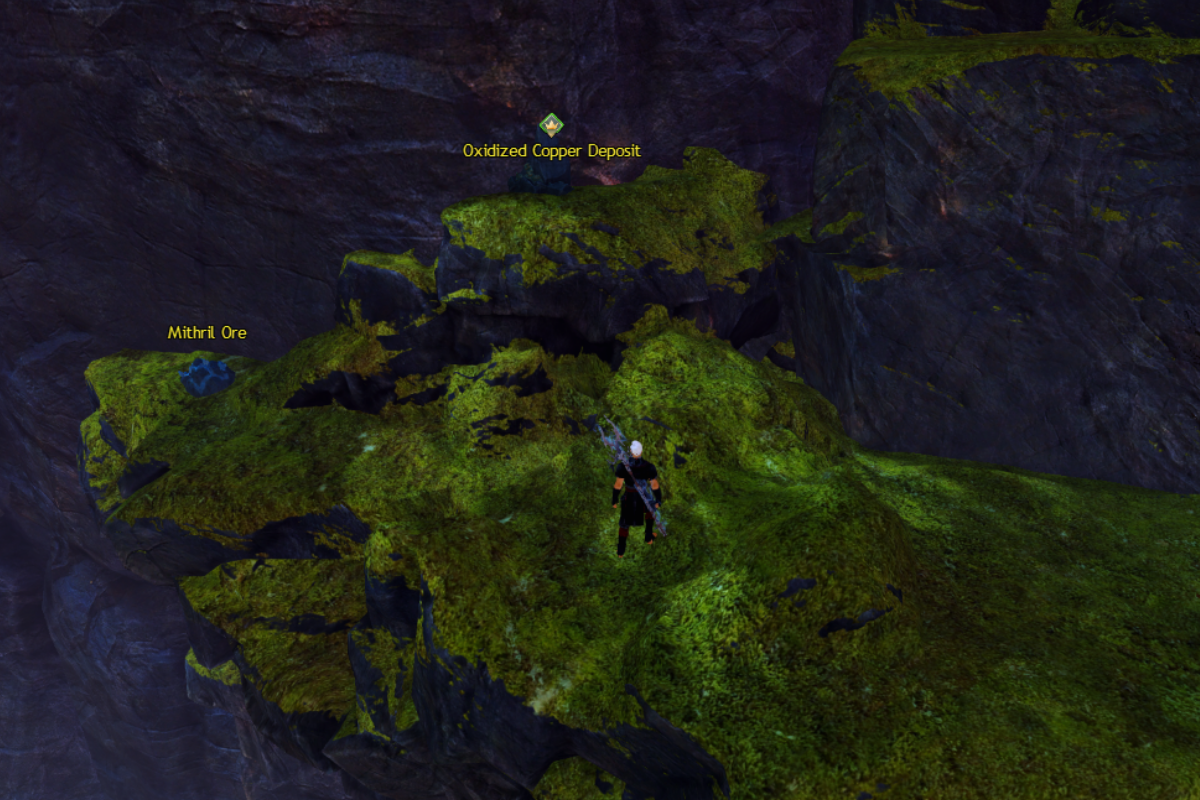
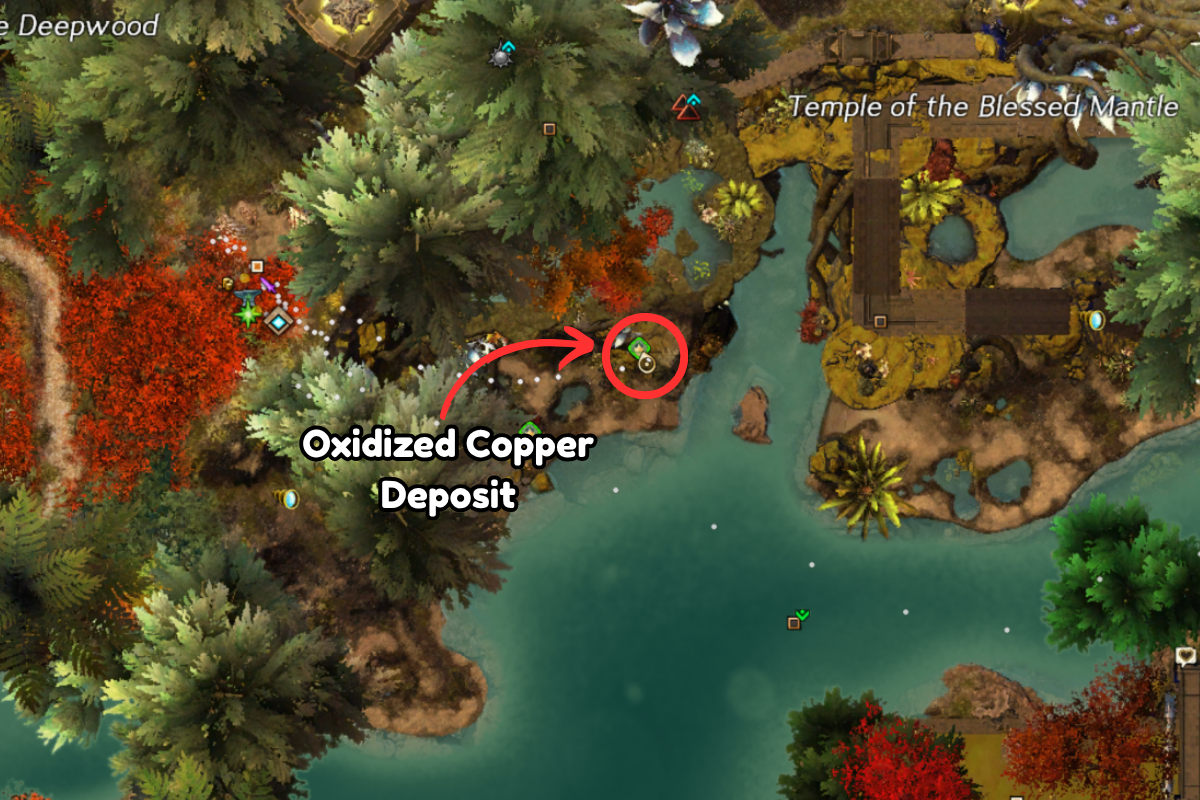
Up on a ledge just east of the Deepwood Outpost Waypoint — [&BOQPAAA=]
Shard of Alum Crystal
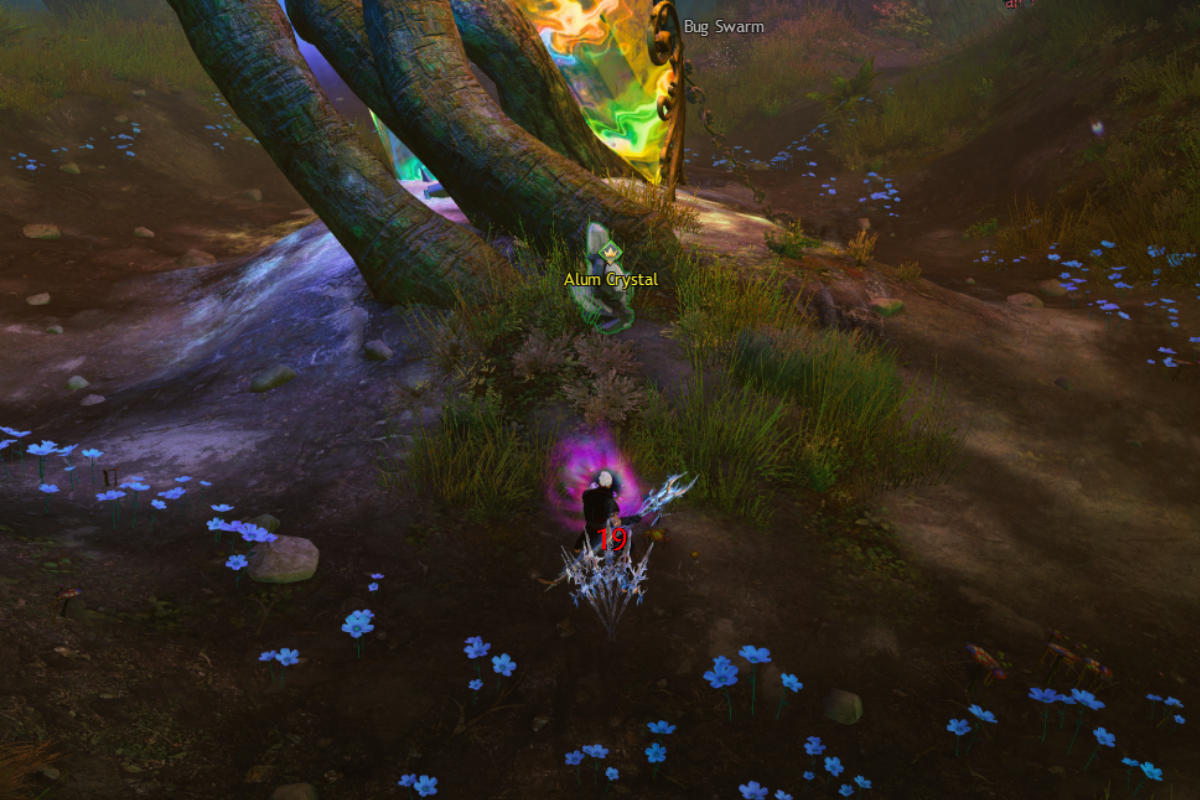
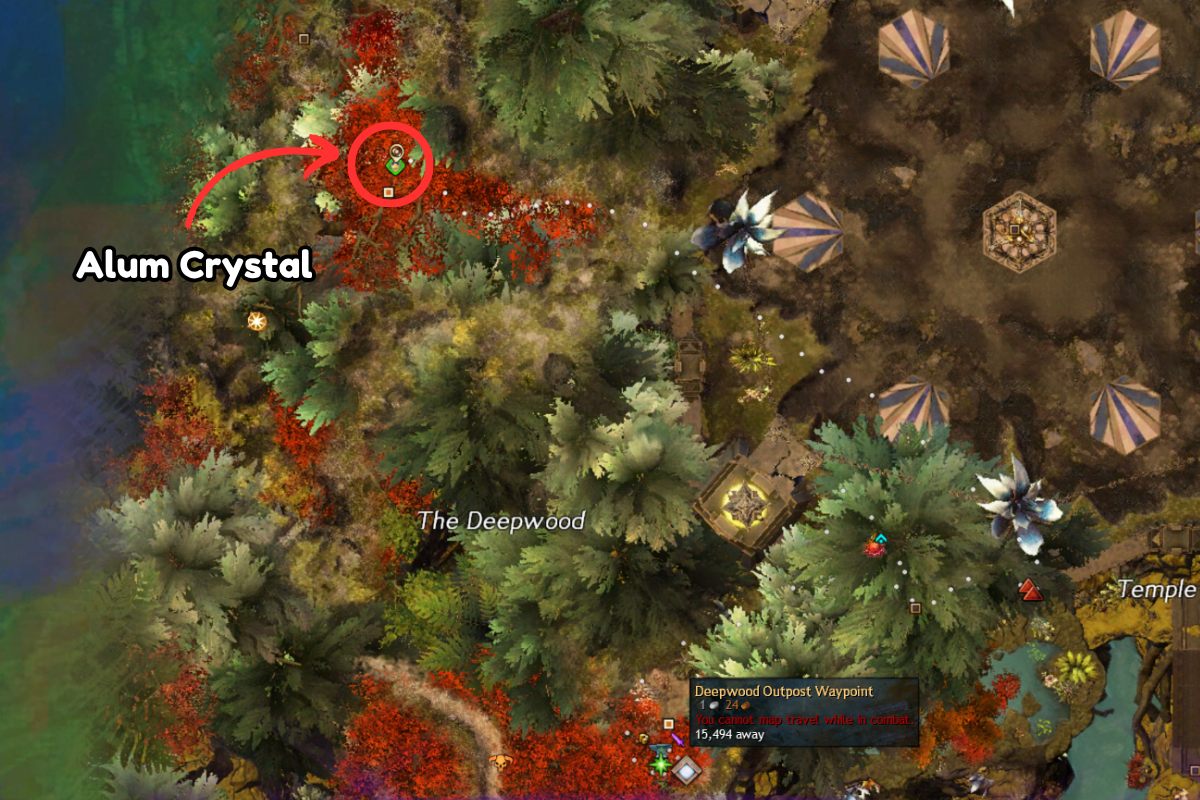
Beside the Whispering Artifact Point of Interest — [&BAYQAAA=] northwest from the Deepwood Outpost Waypoint — [&BOQPAAA=]
Chunk of Pyrite Crystal
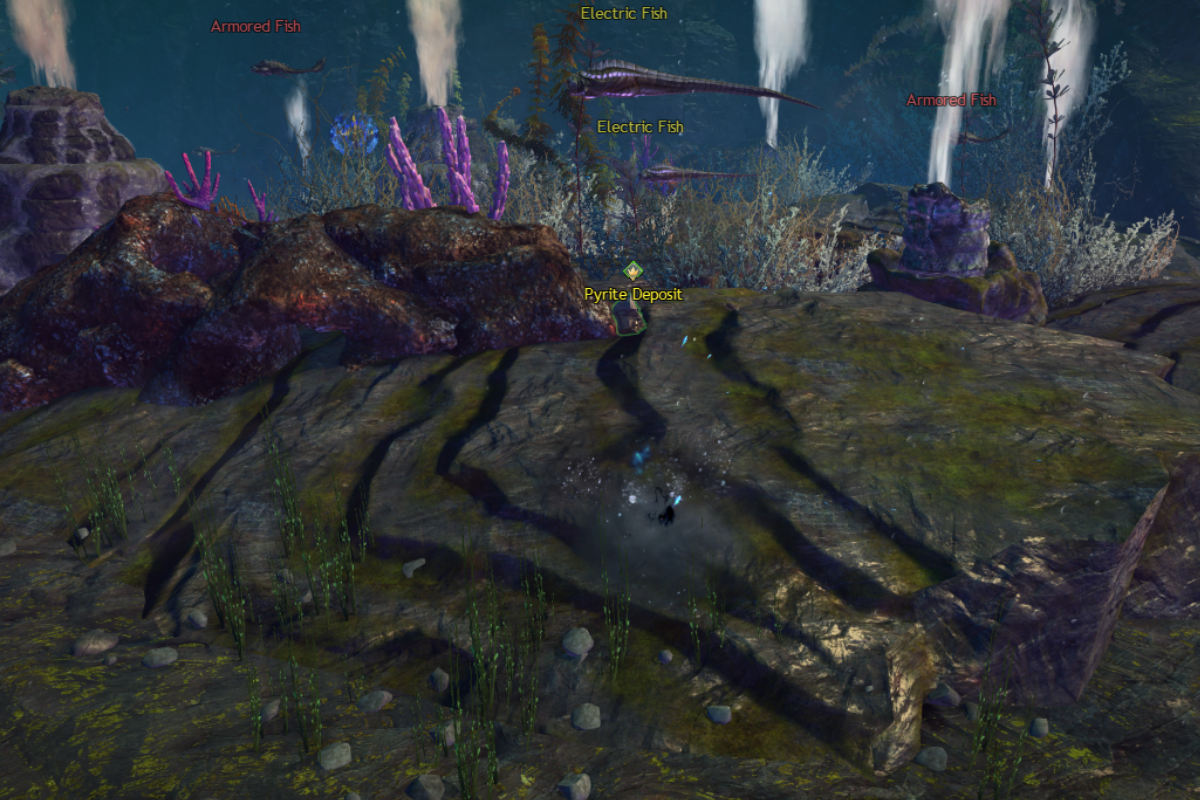
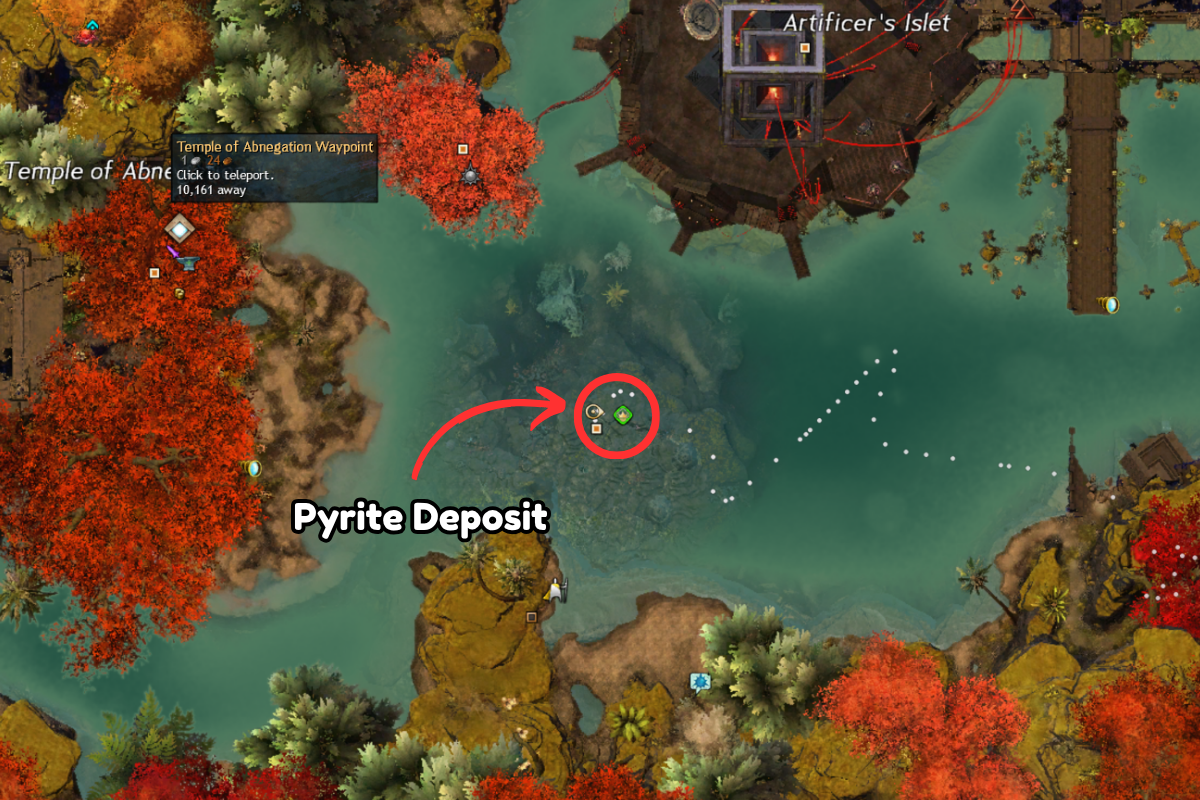
Found underwater beside the Hydrothermal Vents Point of Interest — [&BO8PAAA=]
Vial of Crude Oil
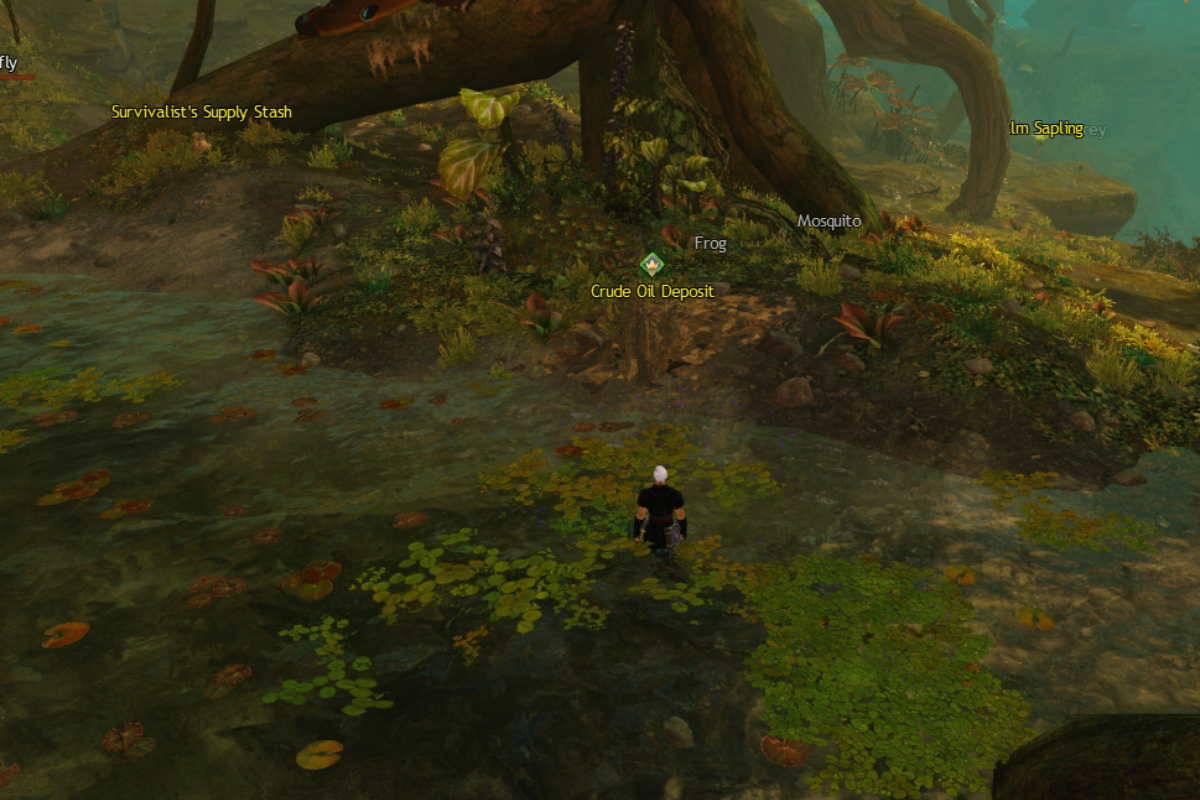
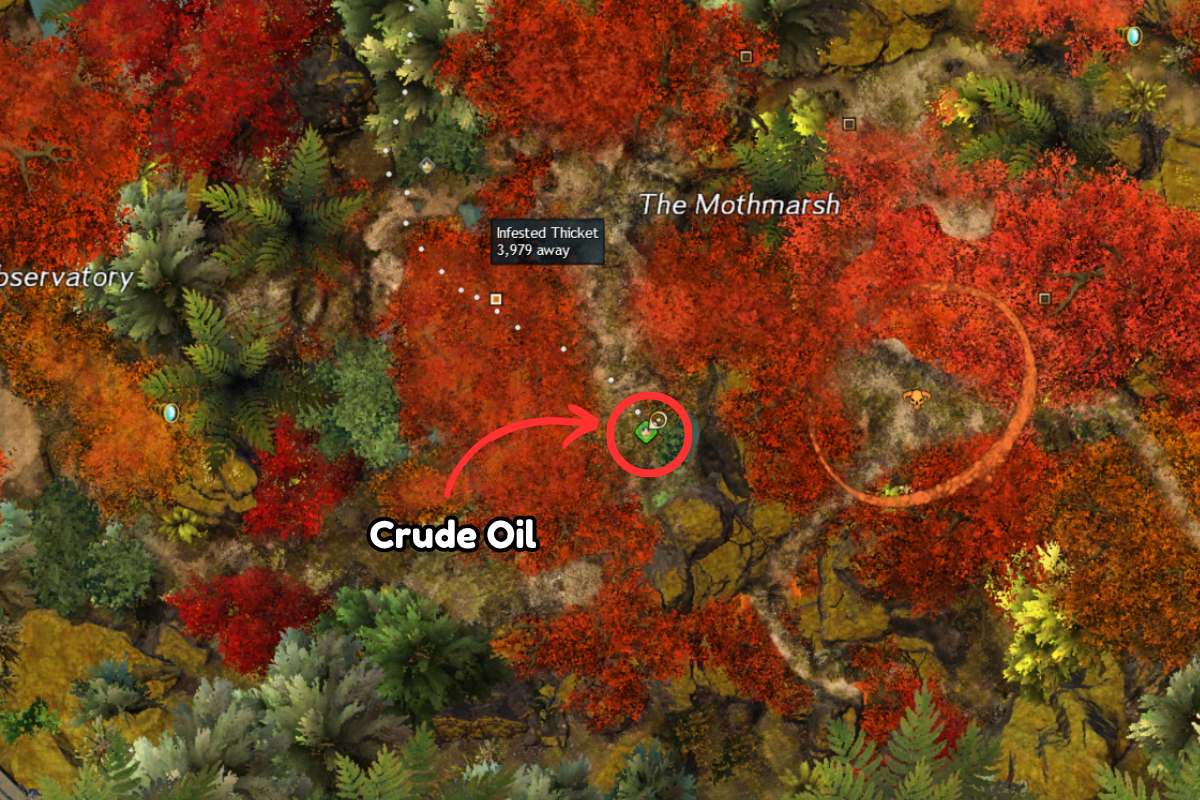
East from the Infested Thicket Point of Interest — [&BAkQAAA=]
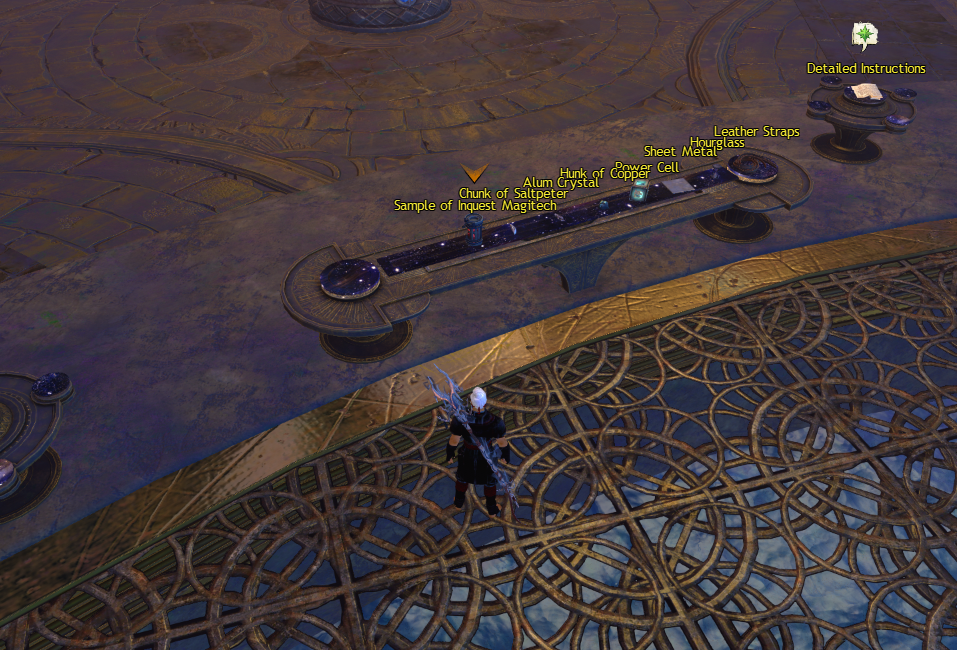
Portable Hourglass


This will be found at the Pilgrim's Rest Waypoint — [&BPwPAAA=] just on a table to the east
Rudimentary Power Cell
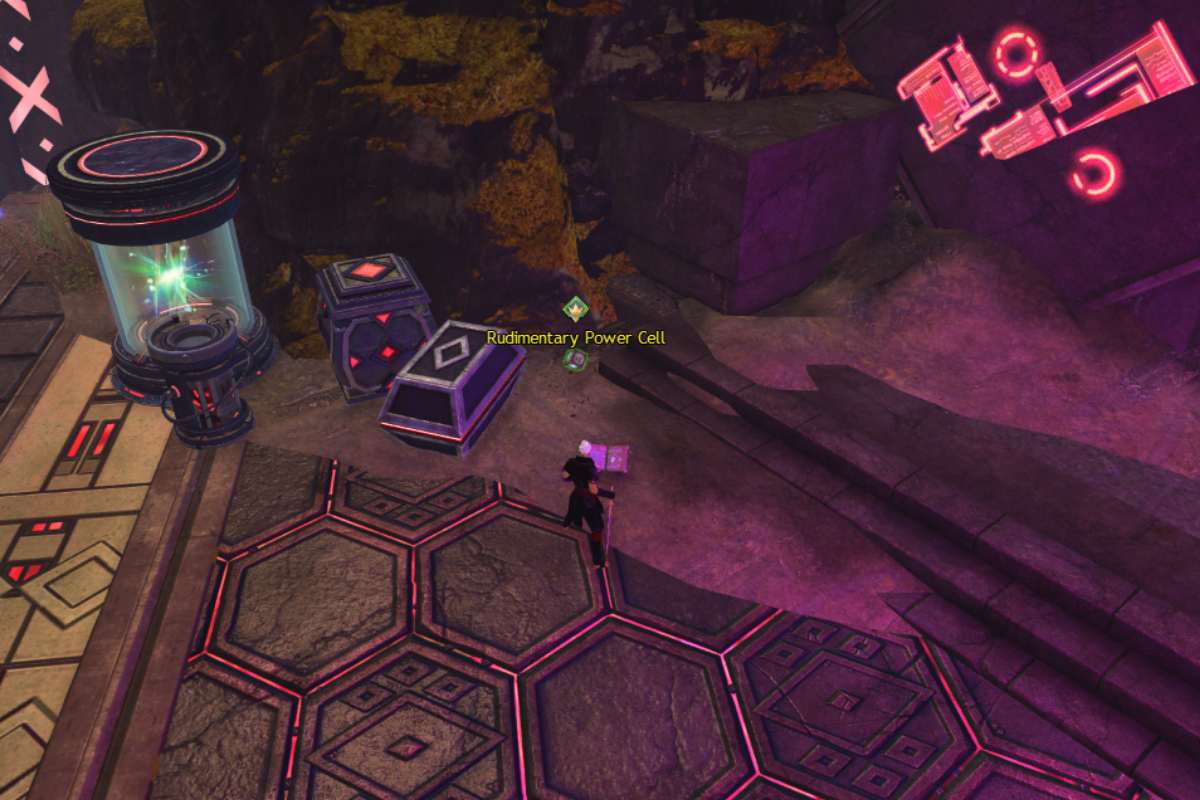
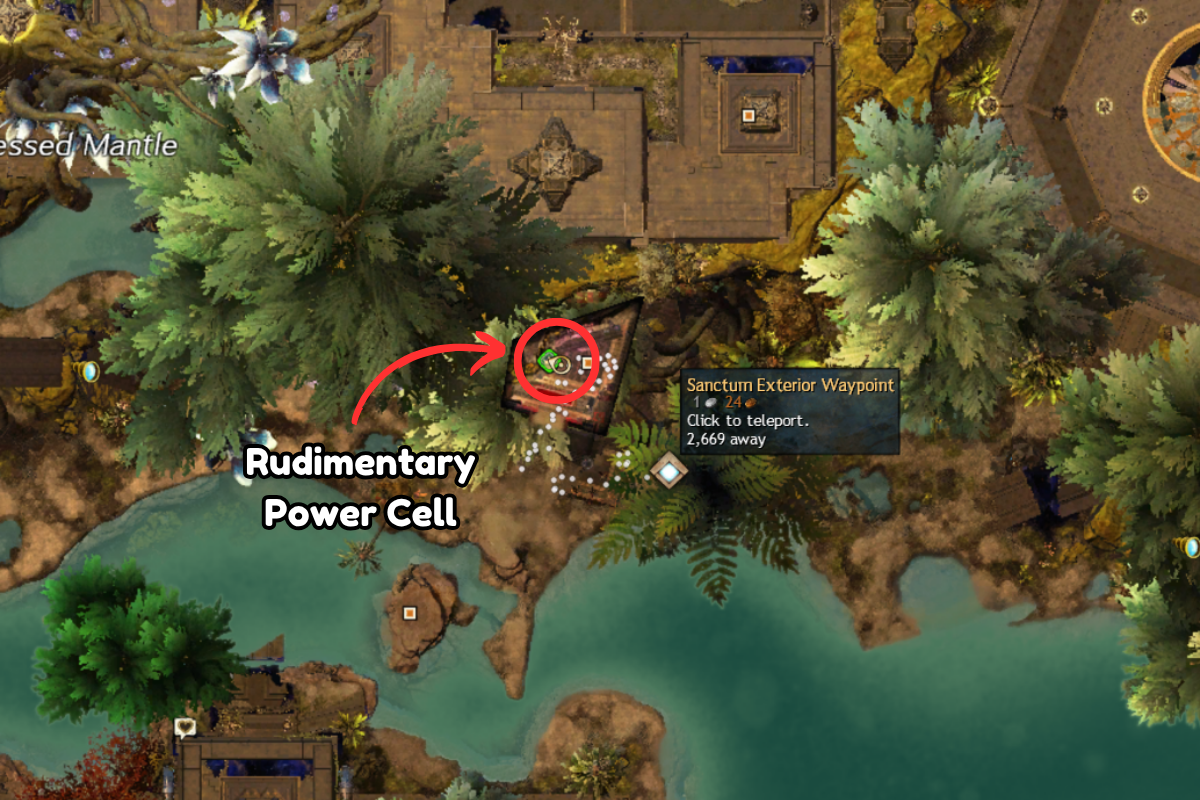
Slightly west from the Sanctum Exterior Waypoint — [&BPAPAAA=] in the Arcanological Survey Station Point of Interest — [&BOUPAAA=] room
Sheet of Metal
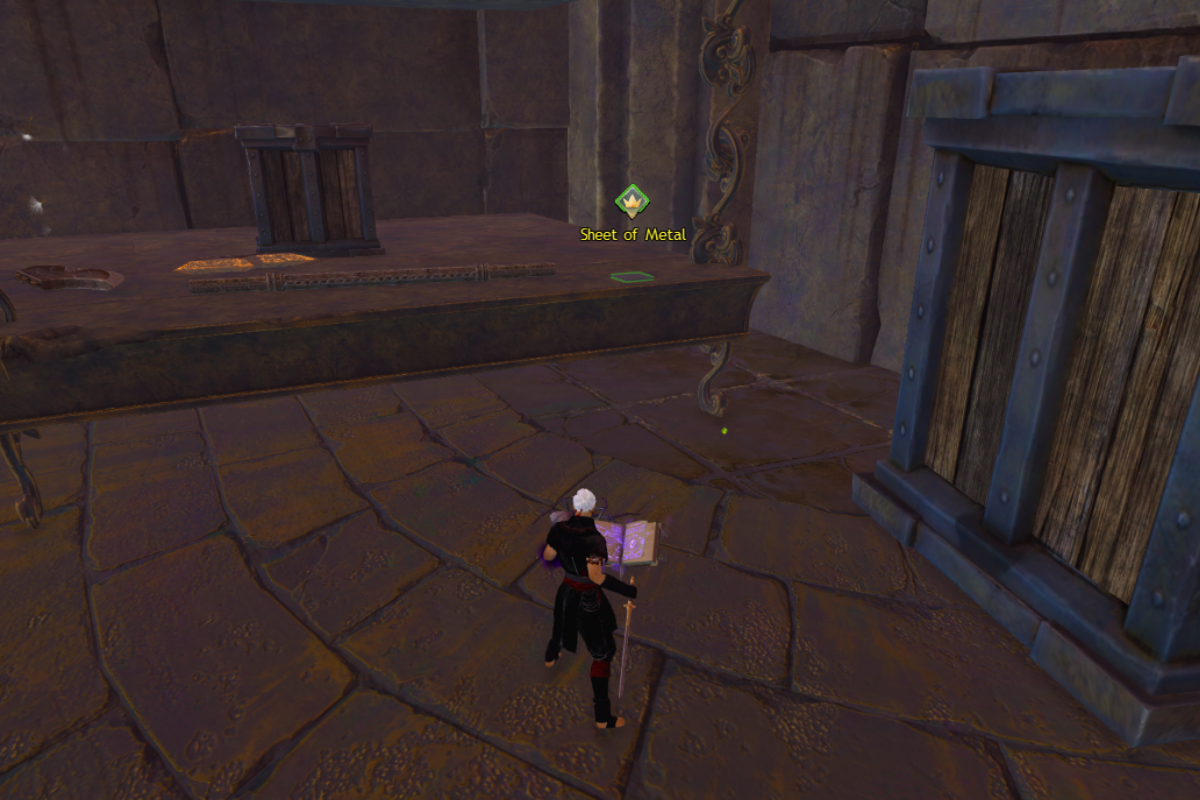
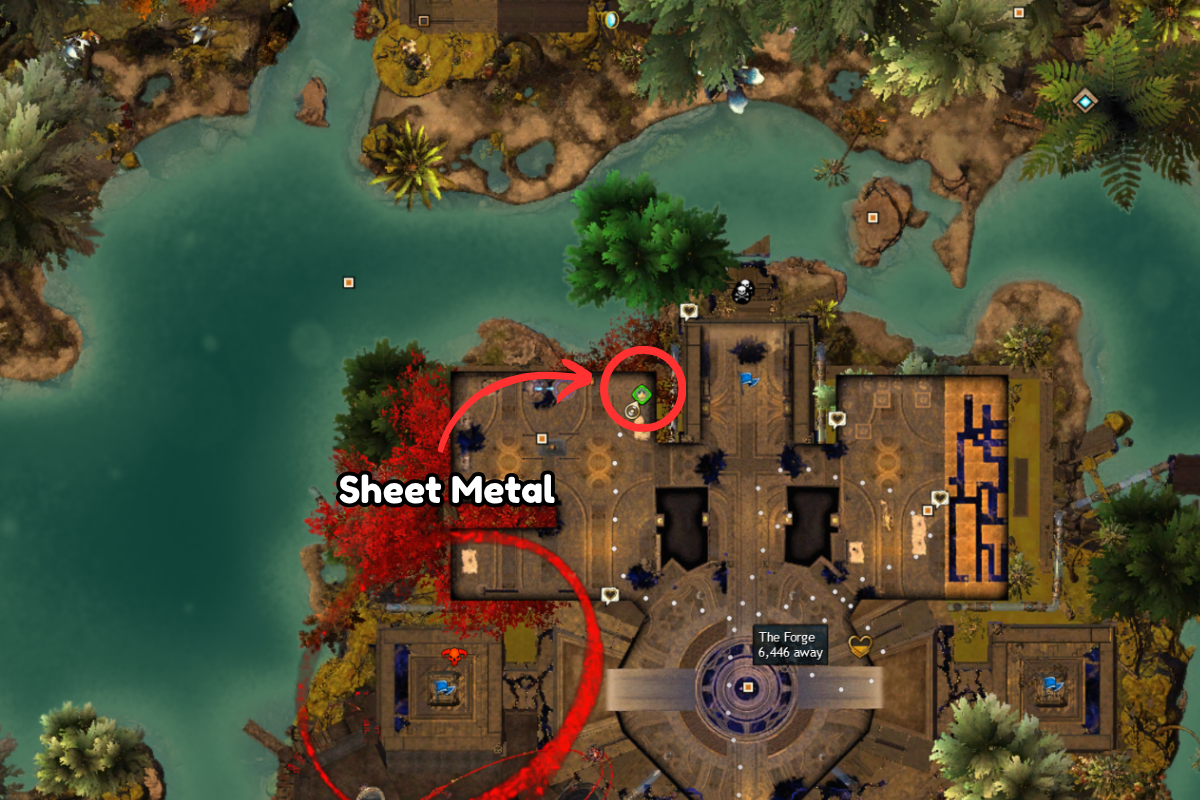
South west from the Sanctum Exterior Waypoint — [&BPAPAAA=] inside the structure and into a large room on the west side with Gardesano's Atelier Point of Interest — [&BN4PAAA=]
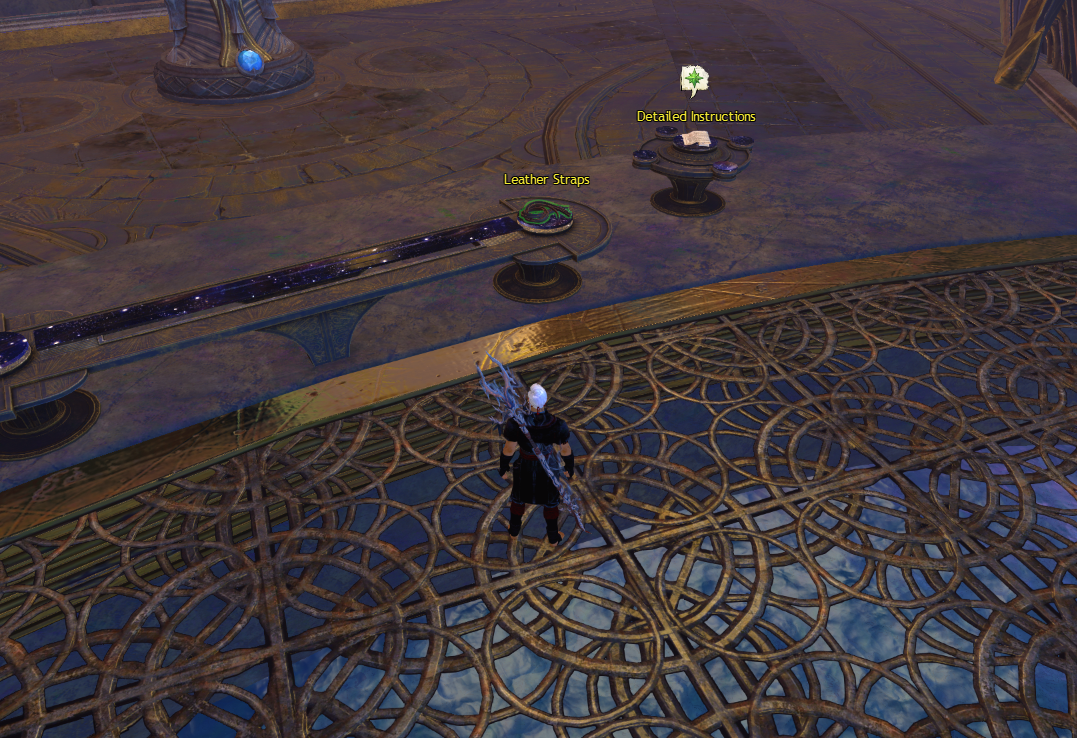
Leather Straps
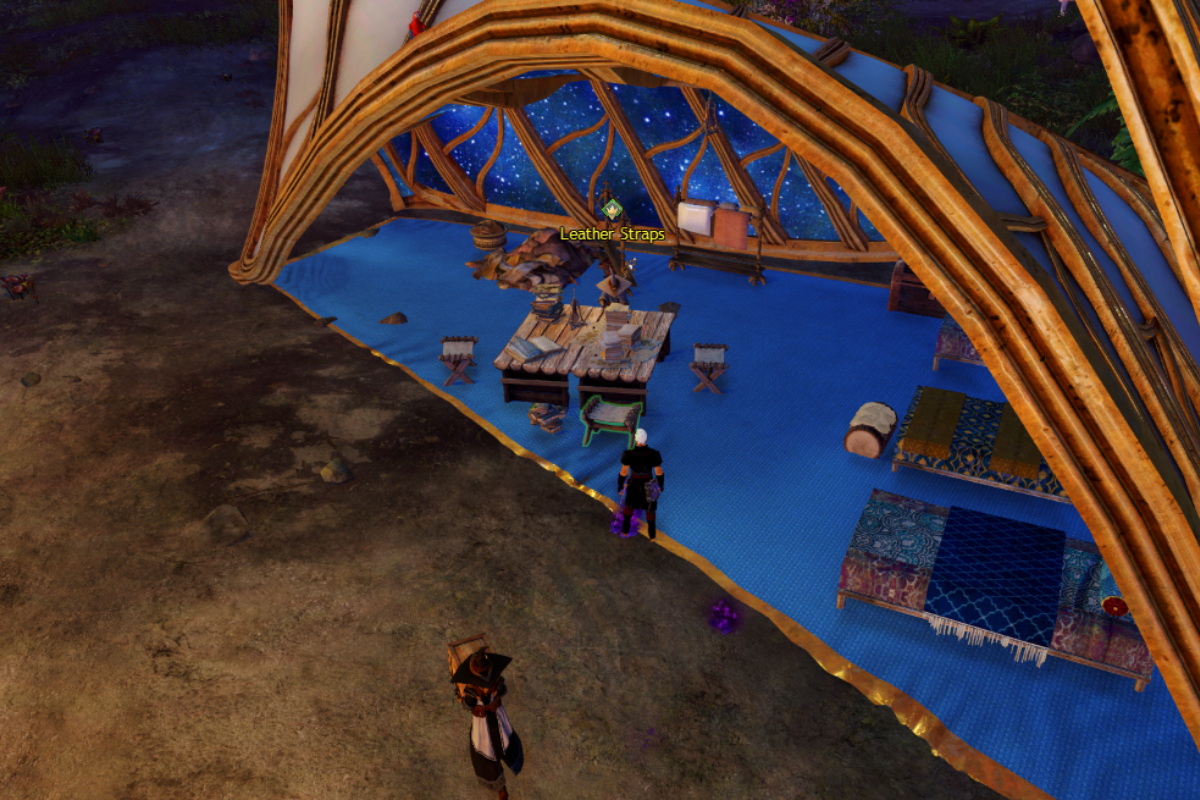
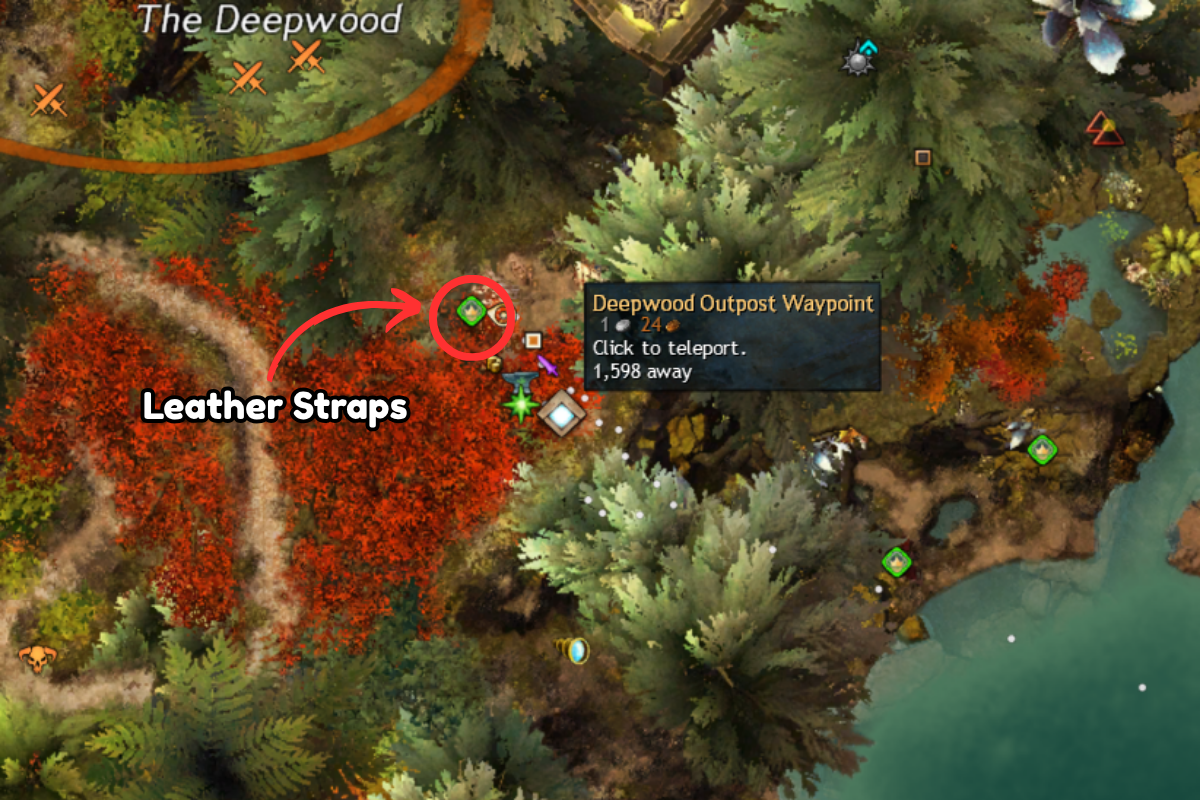
Inside a tent at the Deepwood Outpost Waypoint — [&BOQPAAA=]
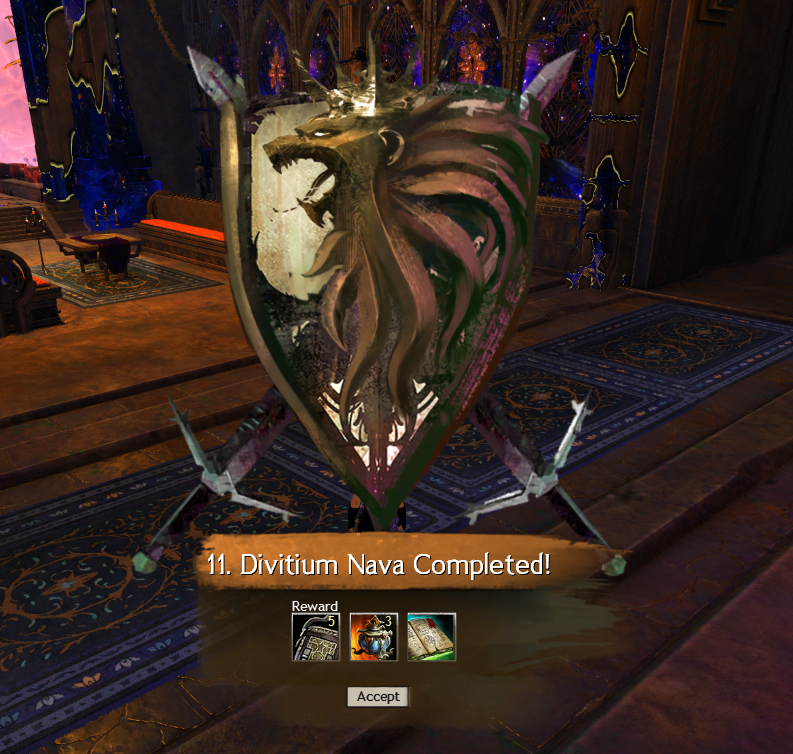
Divitium Nava
Divitium Nava
Attempt to reach Director Vloxx
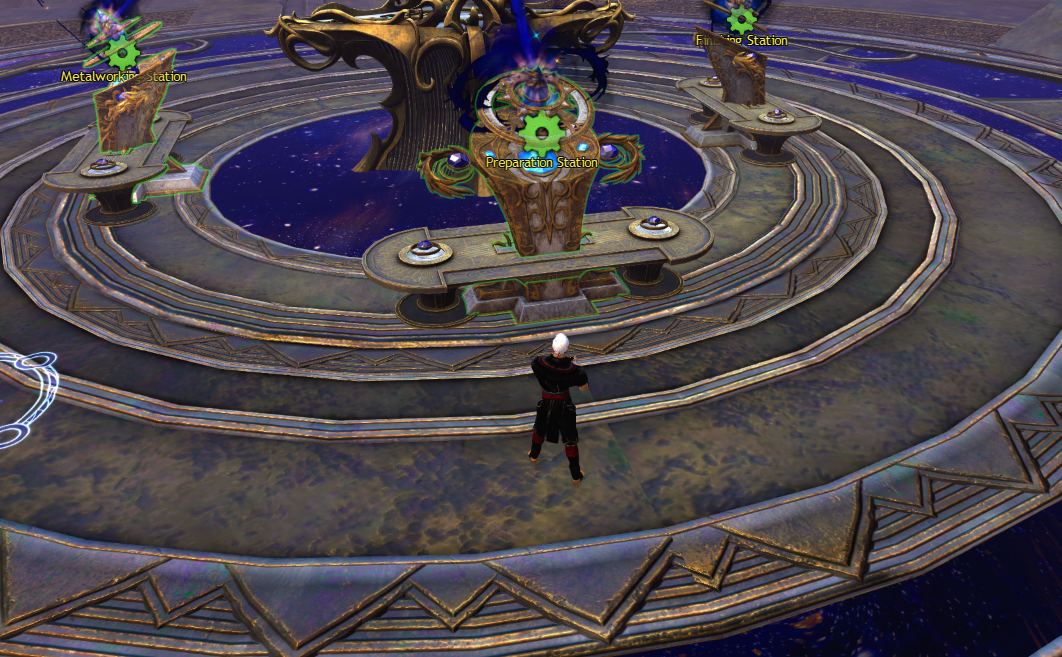
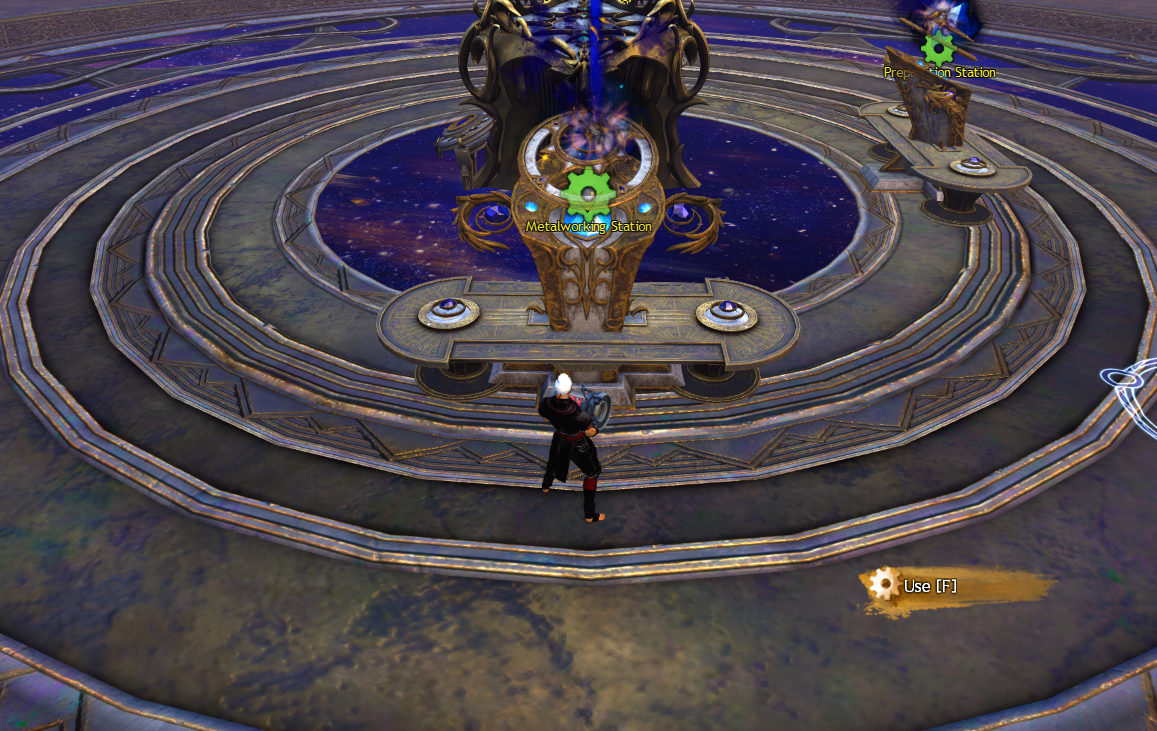
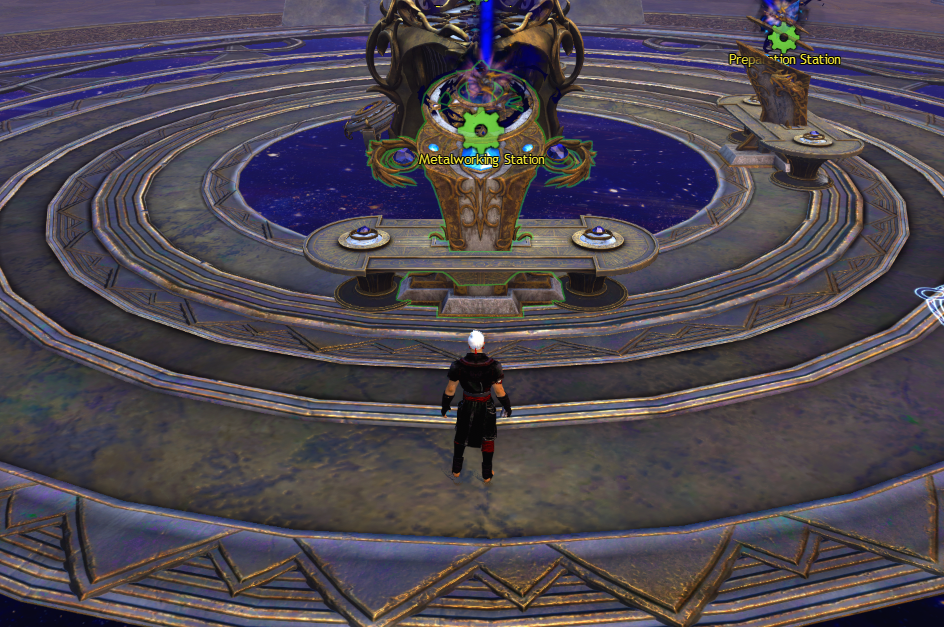
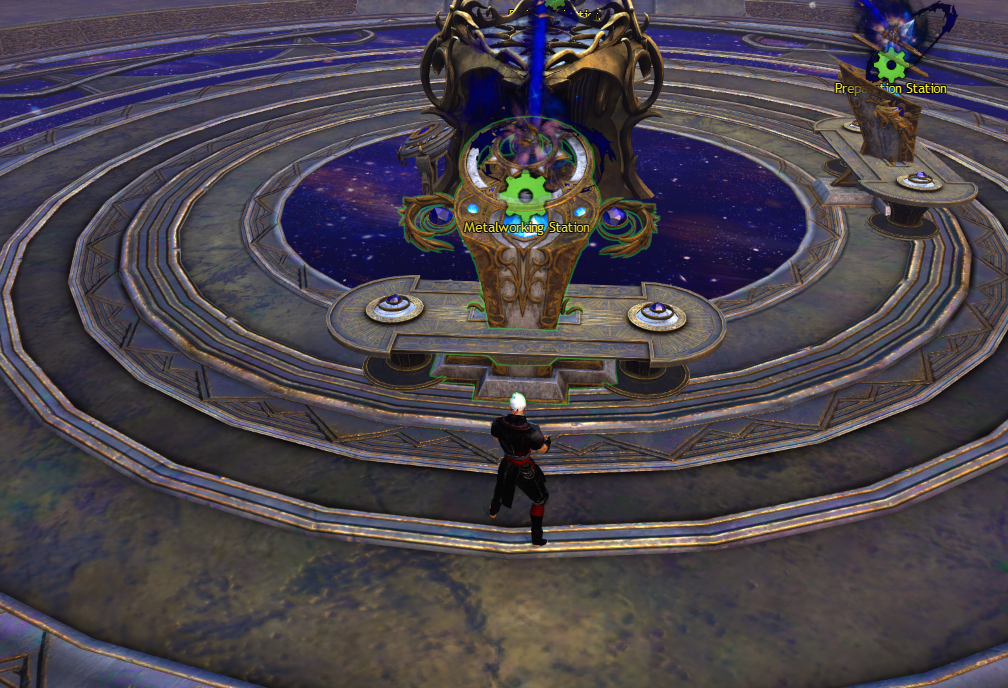
Meticulous Craftsperson
Follow Canach’s instructions to the letter; steps must be followed in the order given and without any mistakes
Step One
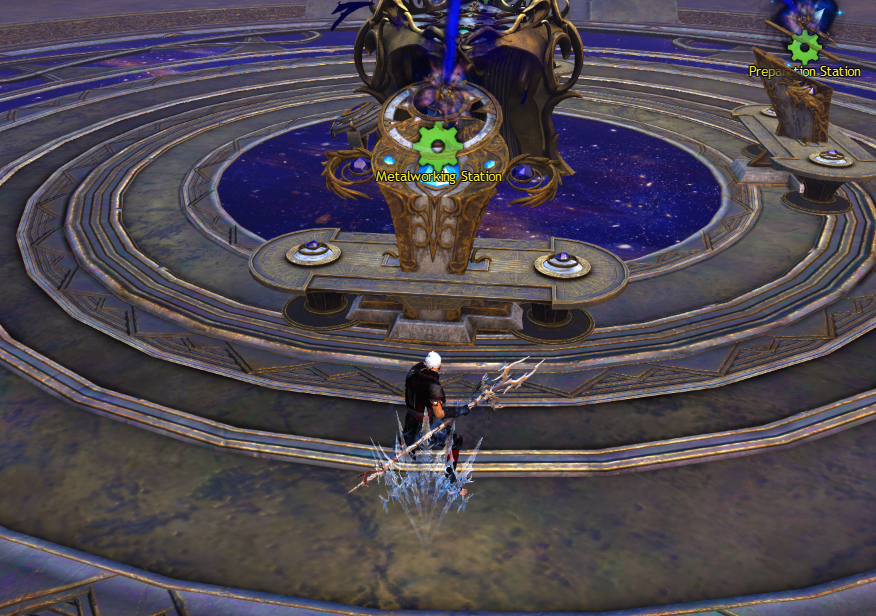
Bring the Chunk of Pyrite to the Metalworking Station and use the Hammer Function
Step Two
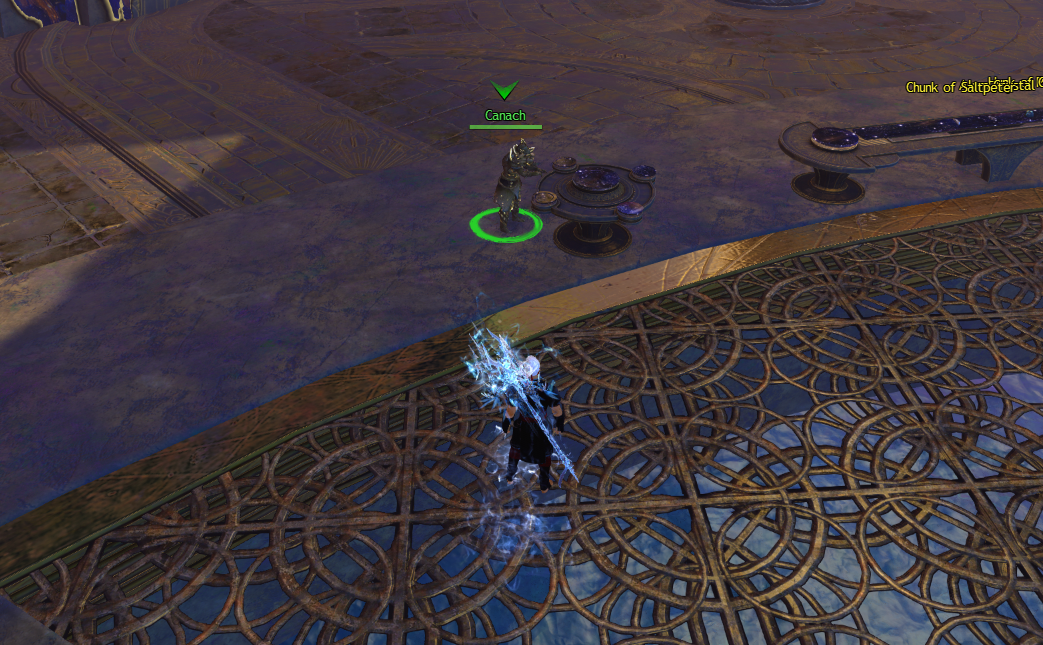
Bring the Pyrite to Canach
Step Three
Bring the Sample of Ley Energy to the Preparation Station and use select I have a component that needs extraction

Bring the Sample of Raw Seer Magic to the Preparation Station and use select I have a component that needs extraction
Take the Sample of Inquest Magitech to the Metalworking Station and use the Hammer Function and then bring the results to the Preparation Station and select I have a component that needs extraction
Step Four
Return to Canach
Step Five
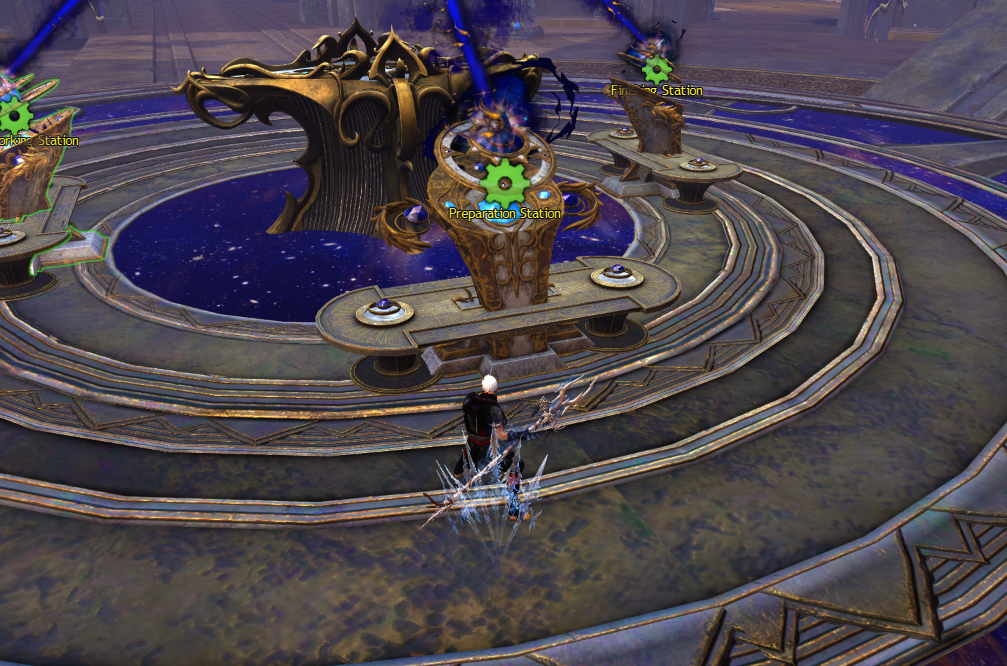
Bring the solution Canach has given you to the Preparation Station and select I have a component that requires leaching

Take the Chunk of Saltpeter to the Metalworking Station and use the Hammer Function then take the result to the Preparation Station and select I have a component that requires leaching
Take the Alum Crystal to the Metalworking Station and use the Hammer Function then take the result to the Preparation Station and select I have a component that requires leaching
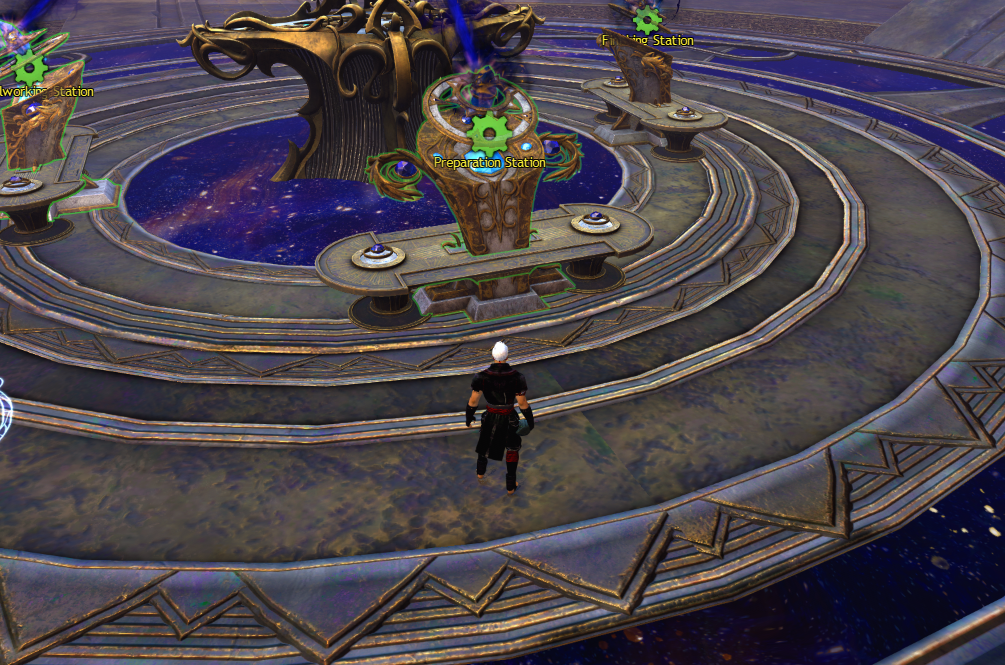
Take the Hunk of Copper to the Preparation Station and select I need to ablate a component then while still at the Preparation Station select the I have a component that requires leaching option
Step Six
Canach will use the Crude Oil - there is nothing for you to do for this step
Step Seven

Take the Power Cell to the Preparation Station and select I have a component that needs extraction
Step Eight
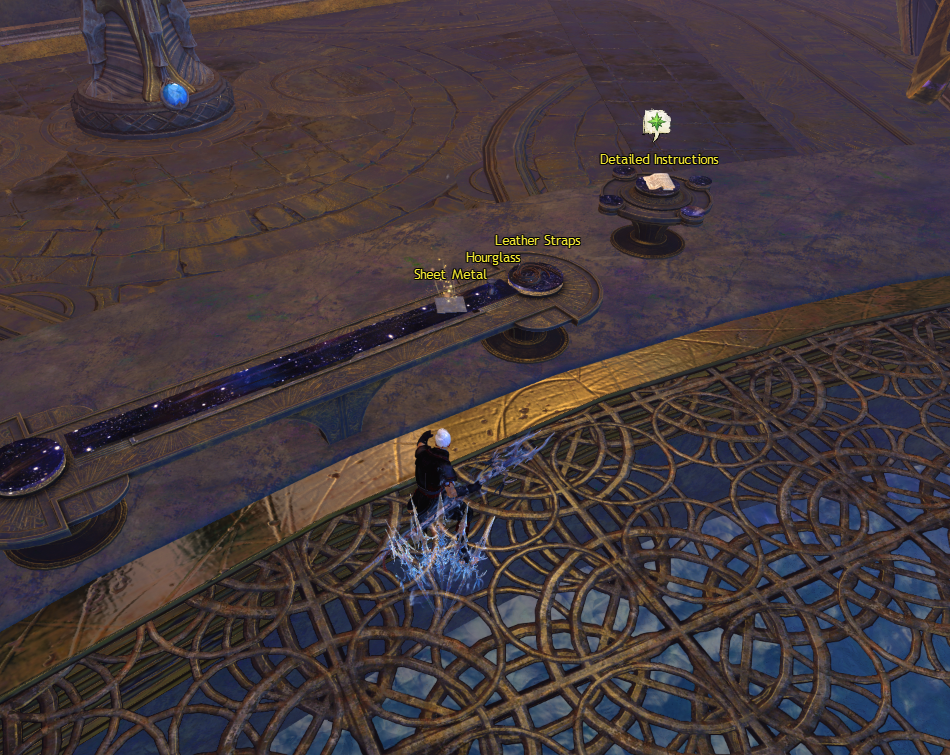
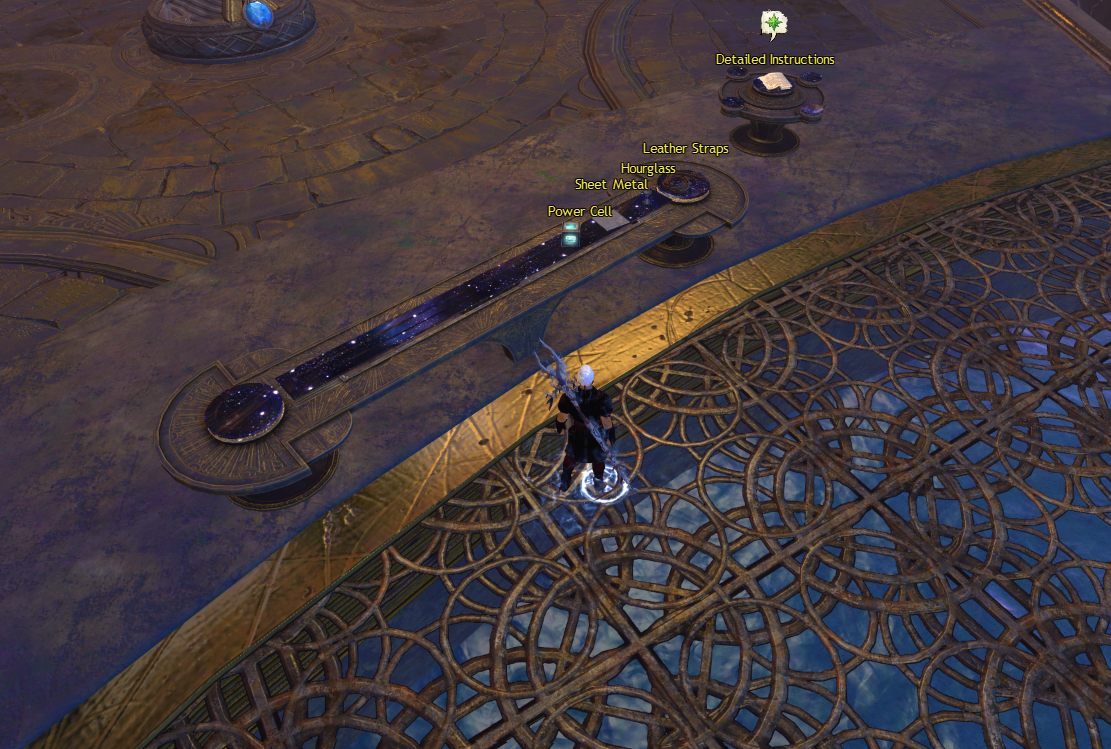
Grab the Sheet Metal and take it to the Metalworking Station and use the Molding Function - take the results to the Finishing Station and select I have a component that requires a coating
Step Nine
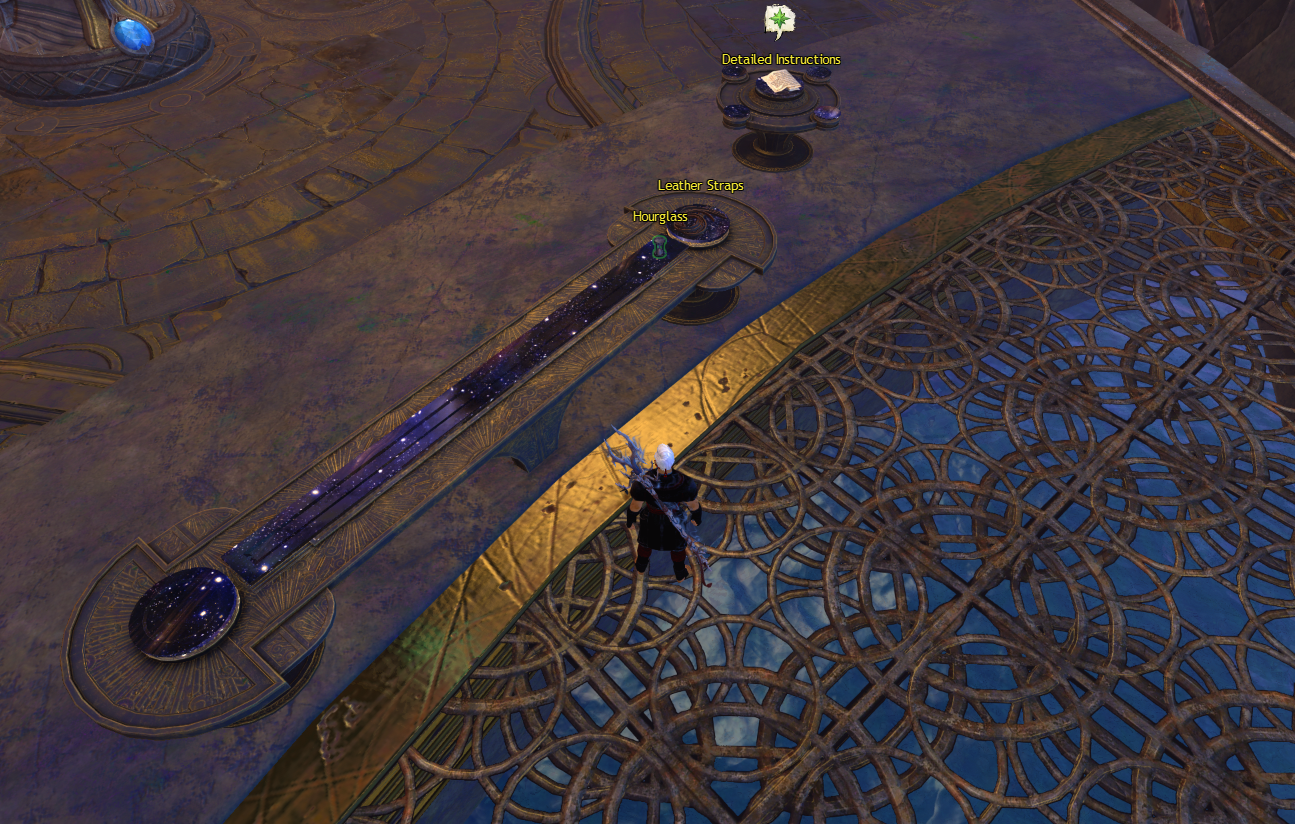

Take the Hourglass to the Finishing Station and select One of my components needs to be plated
Step Ten

Finally grab the Leather Straps and take then to the Finishing Station and select I need to have a component polished

Press the Seer Forge Controls to finish everything
Ascensions End

You must have done the achievement The Path of Ascension in the pervious chapter to have this one unlocked
Help the lost spirit reach the end of their path
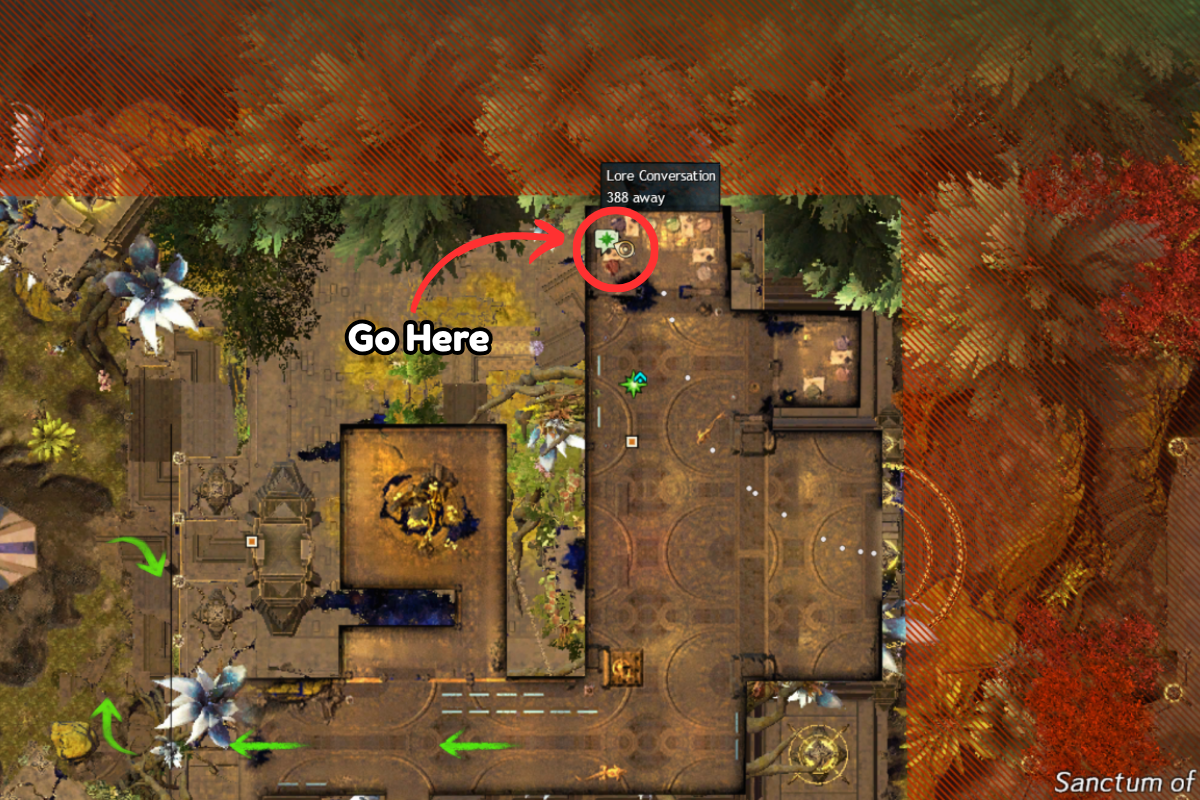
Once you start the story instance head to the most north room in the first area, you will find the Lost Seer Spirit here
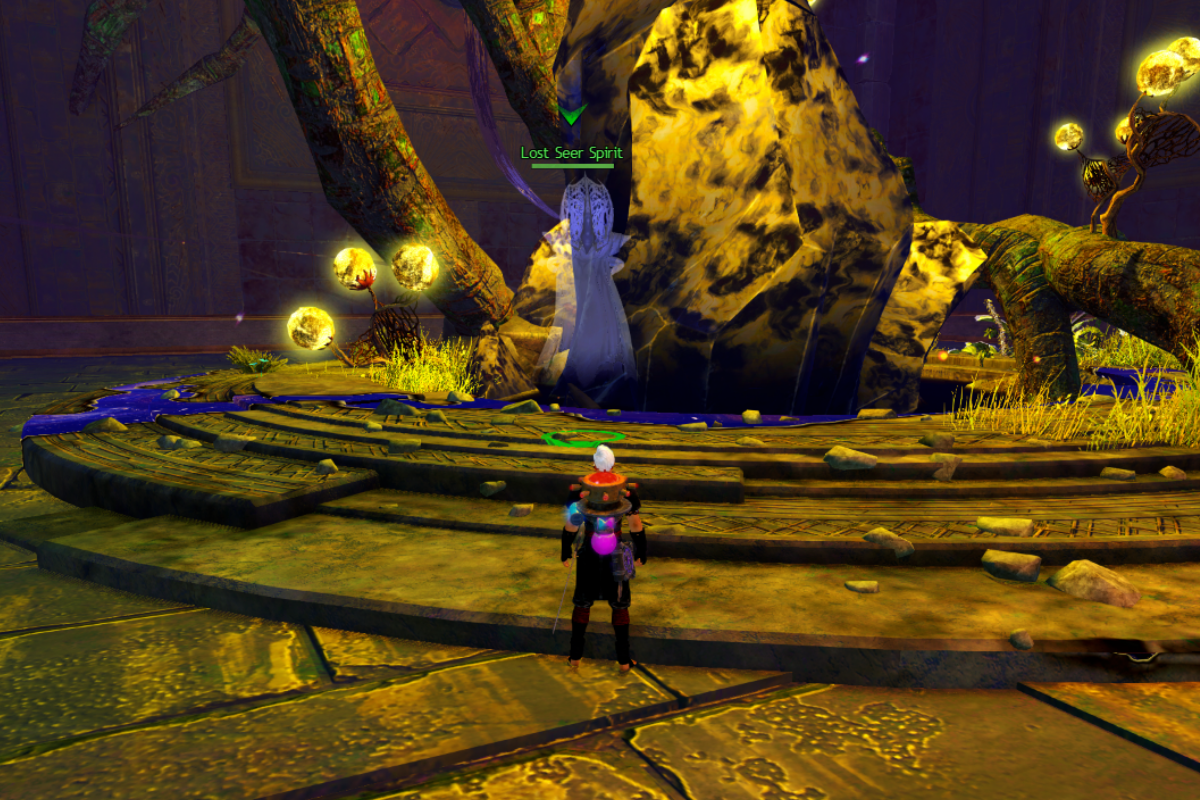
Just escort the Lost Seer Spirit to the end of their journey
Stalwart Candidate
Pass all of the physical trials without failing any of the tests

If you fail any of the tests the whole achievement stops counting so you will need to either leave and try them all again, or return later by redoing the chapter
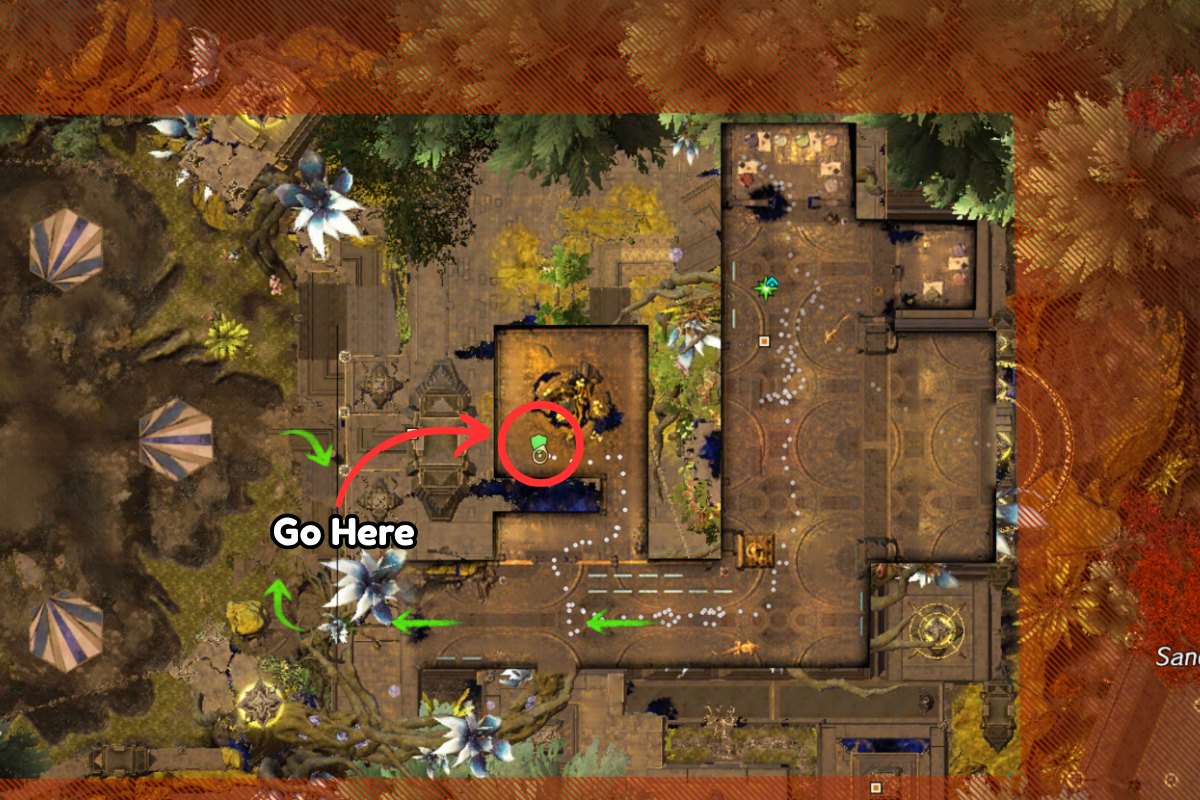
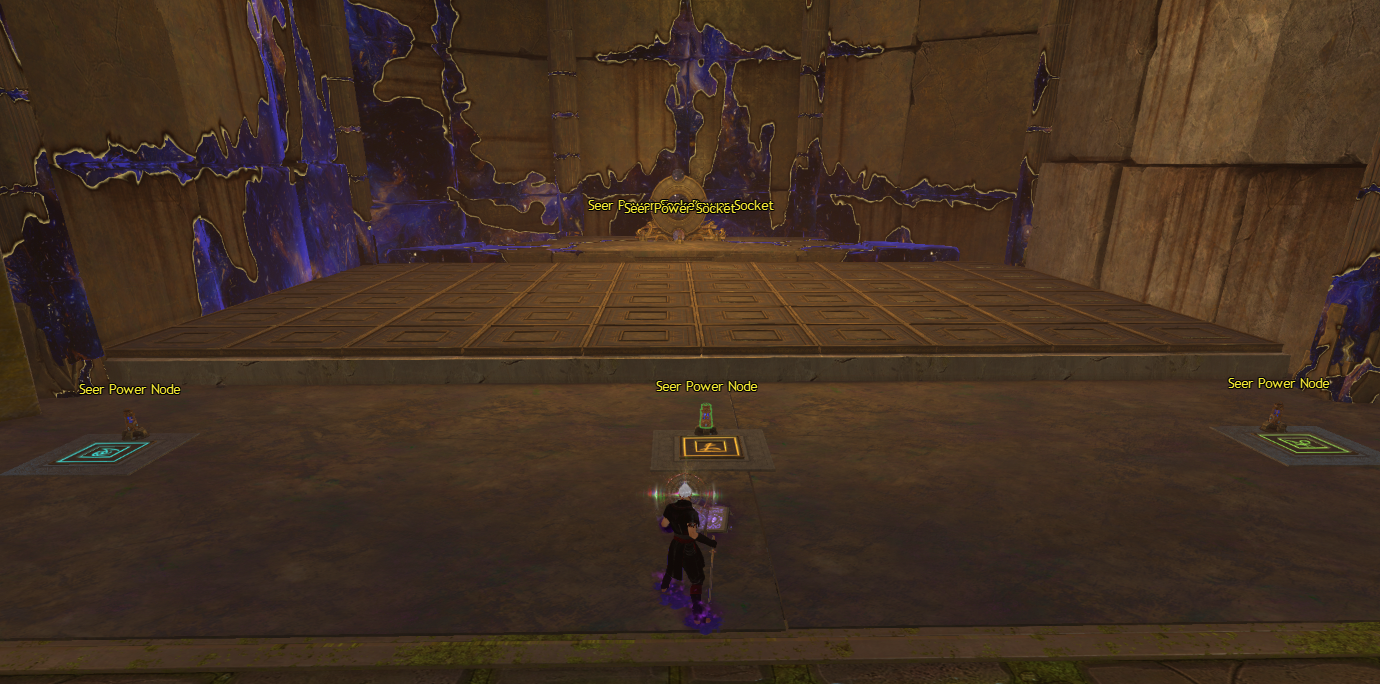
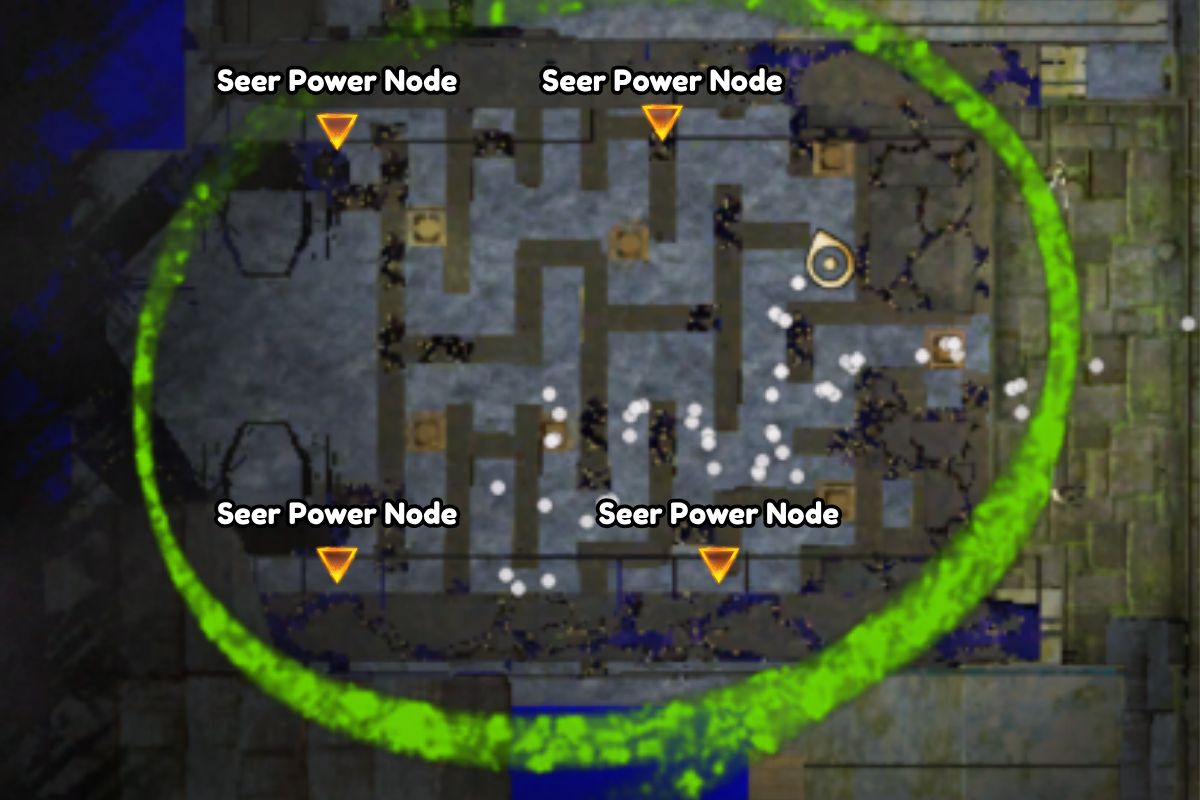
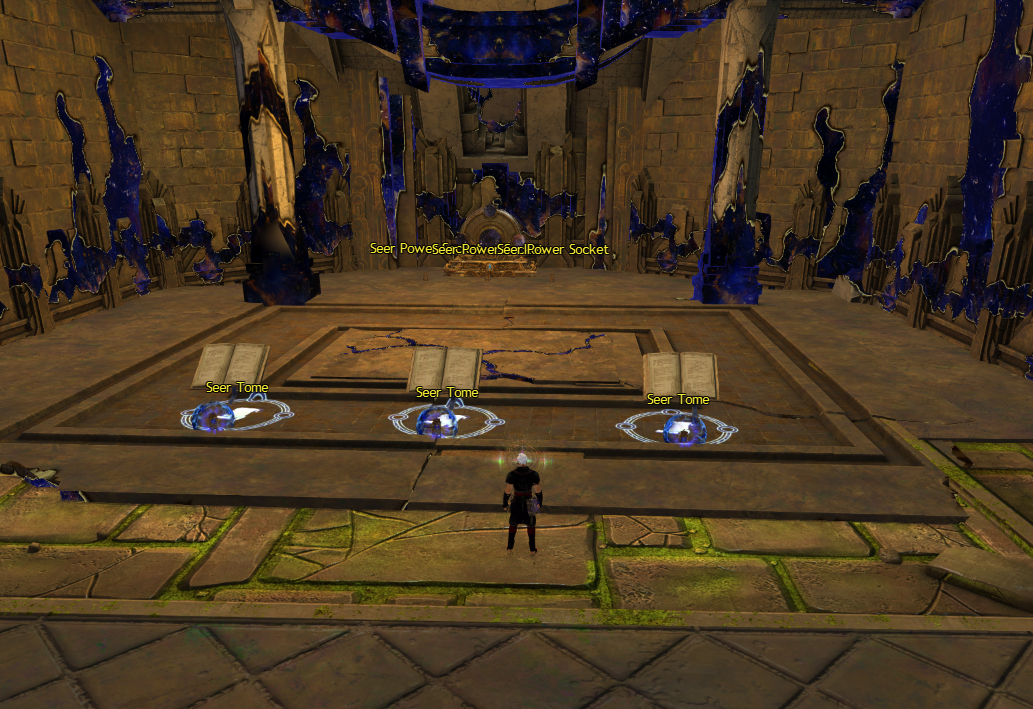
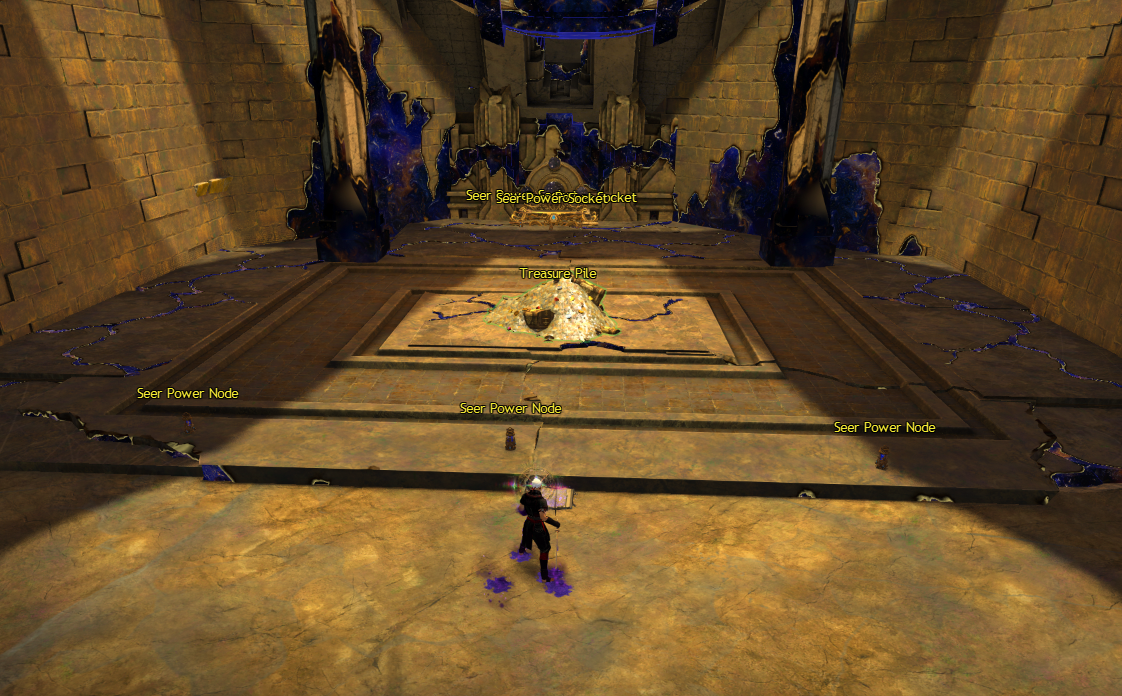
Trial of Balance: Carry the seer power node to the top without falling from the upper platforms
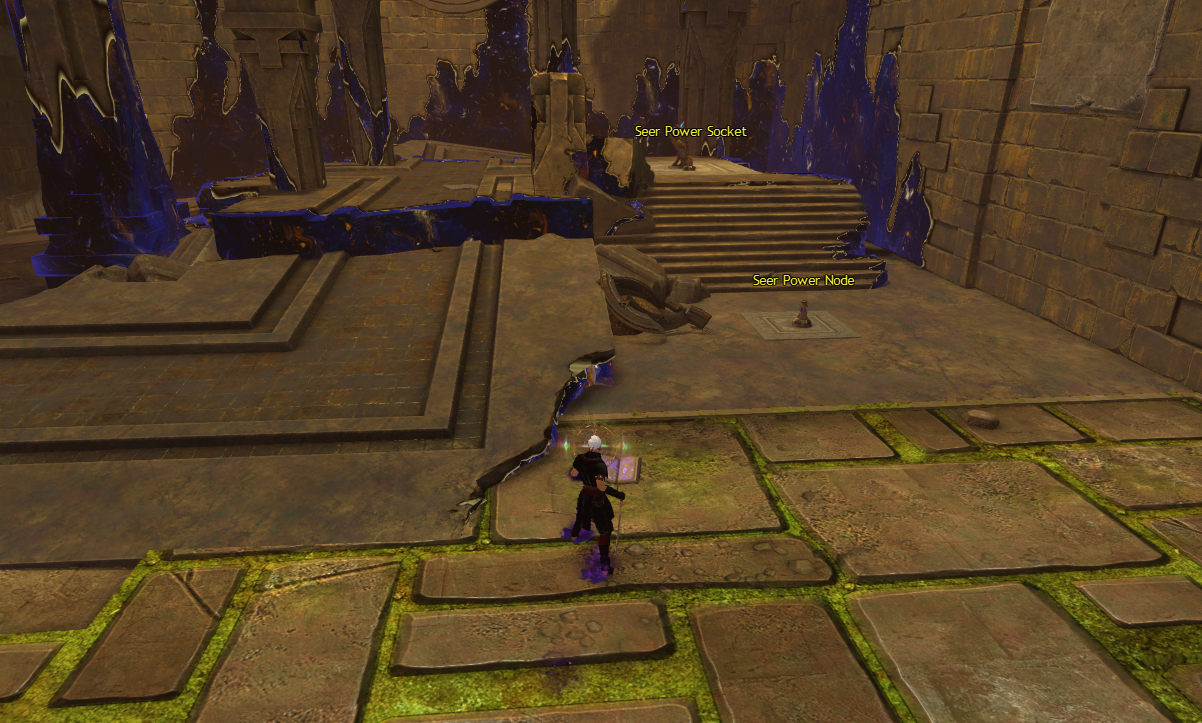
You will need to bring the Seer Power Node to the first Seer Power Socket and use the station to rotate the cube
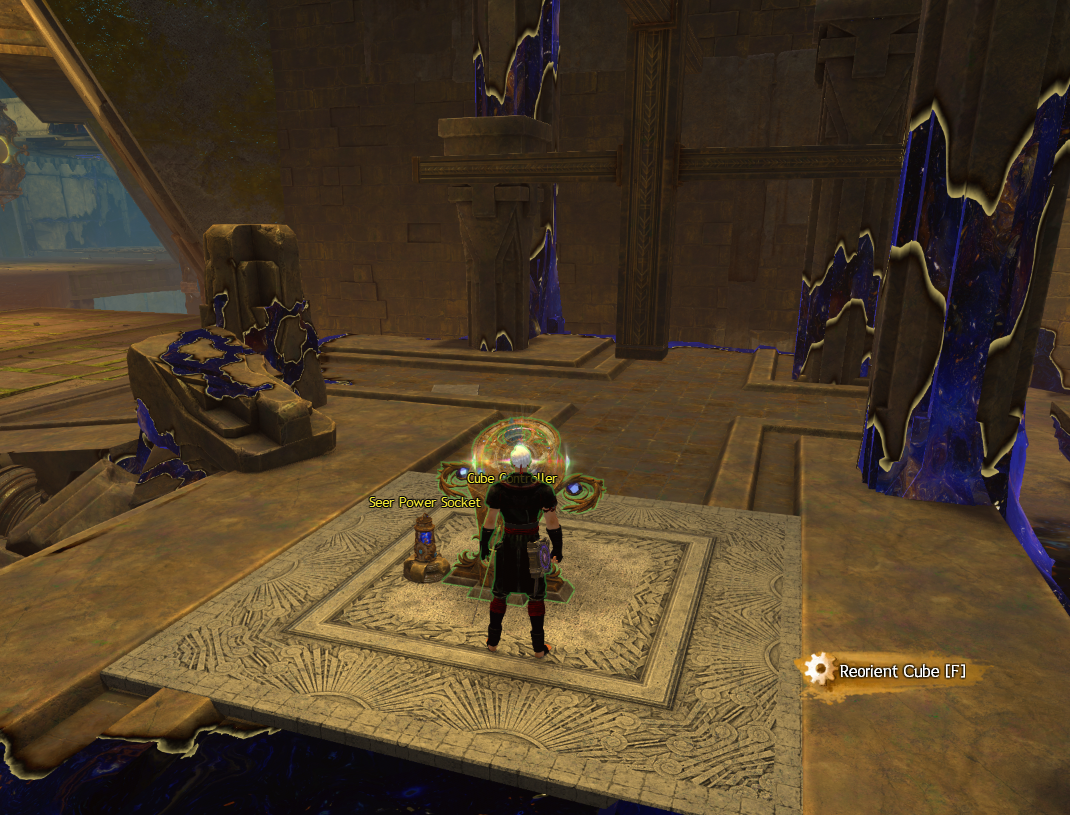
You will need to this two more times, but for the last one before the socket you can rotate it twice to get the correct orientation
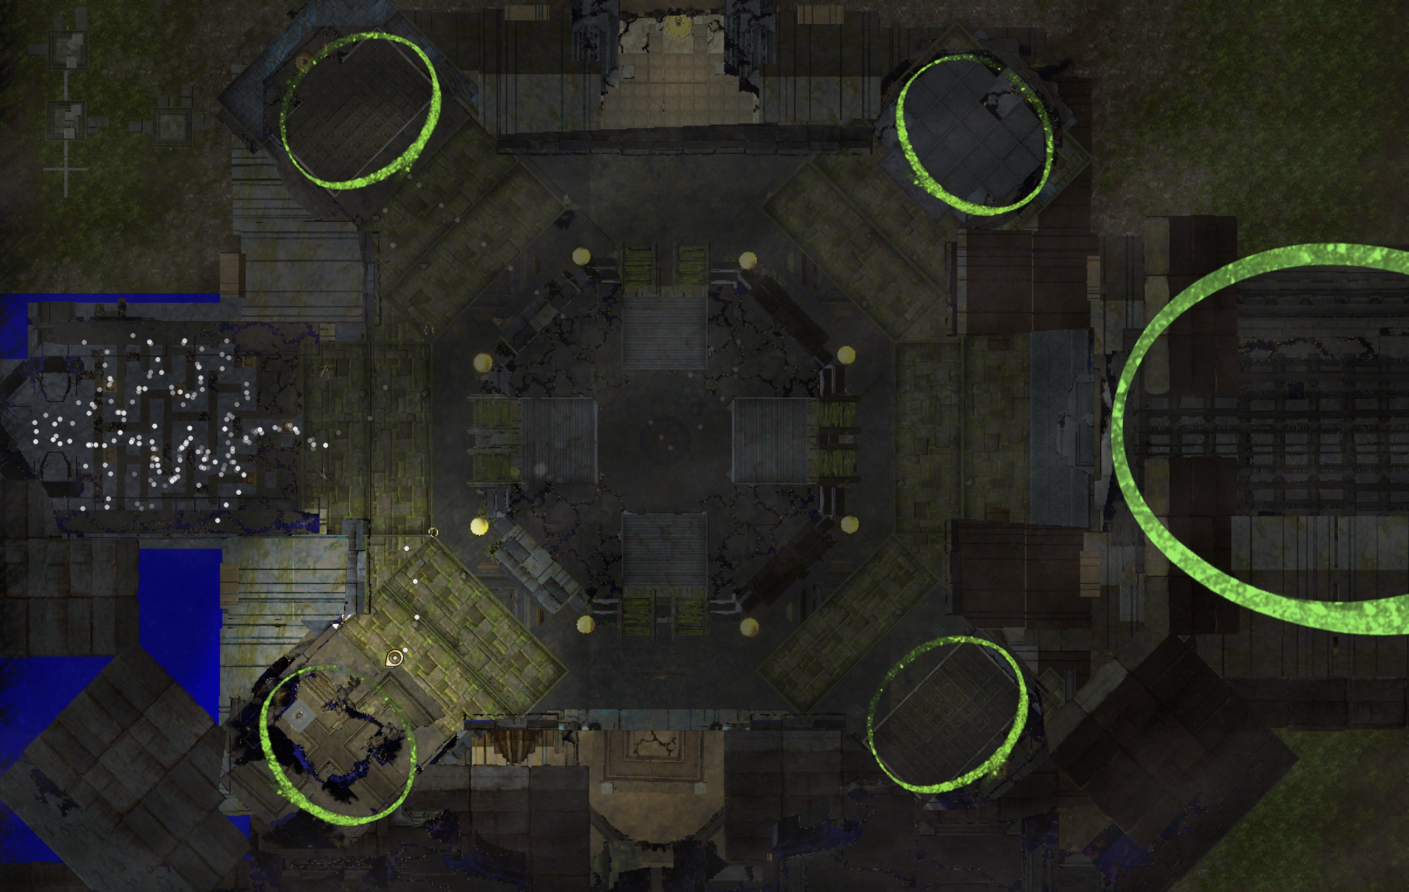
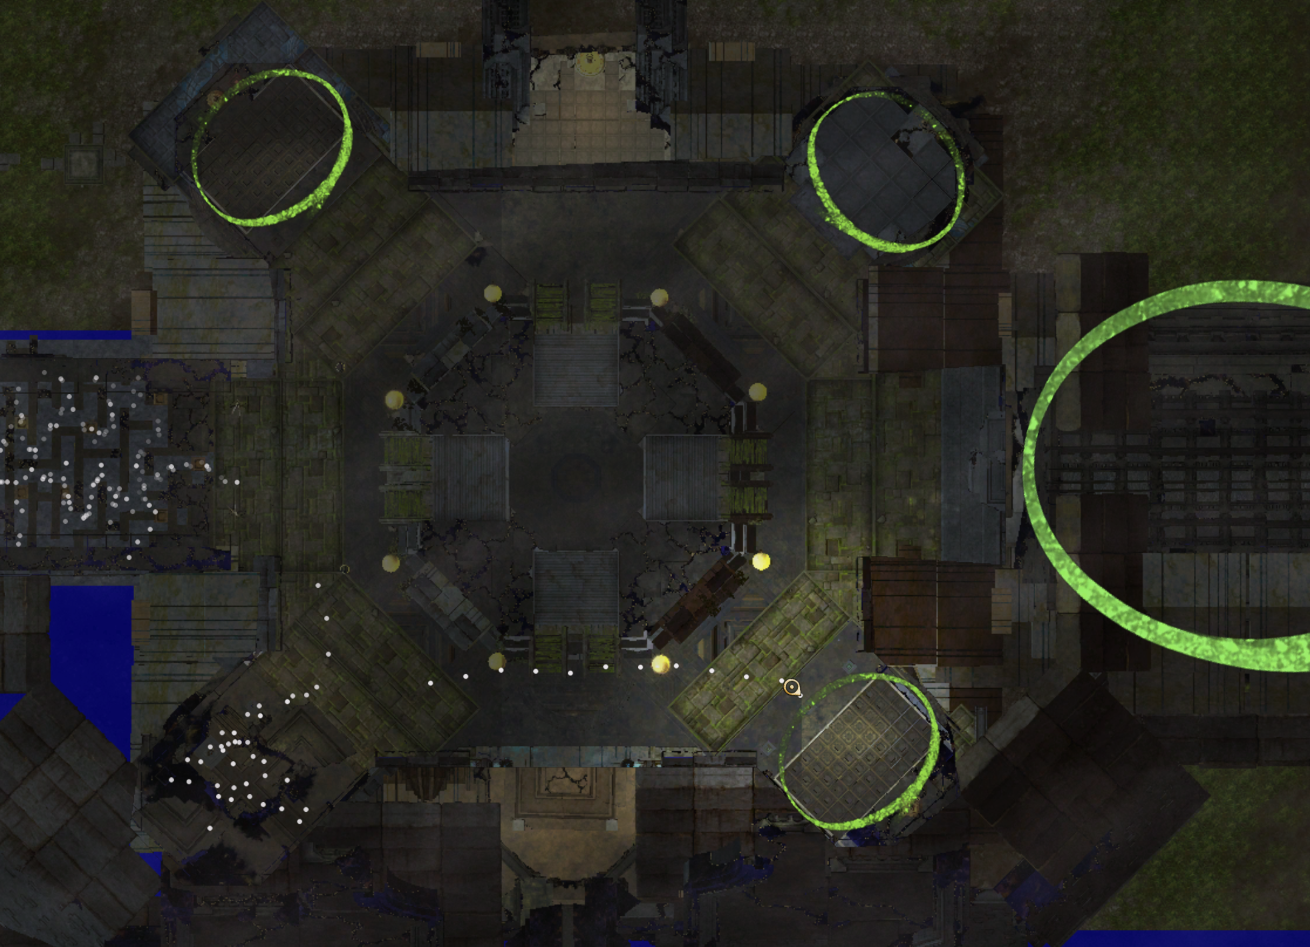
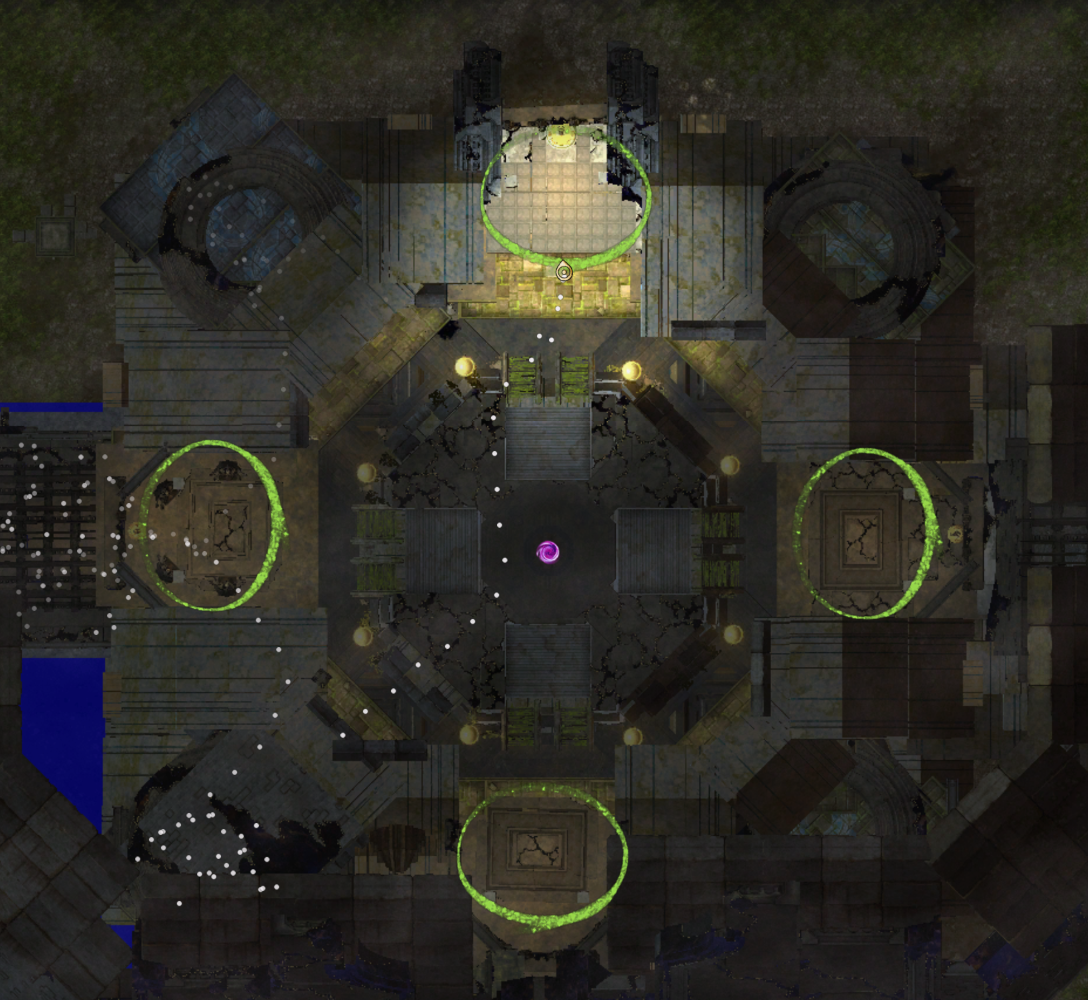
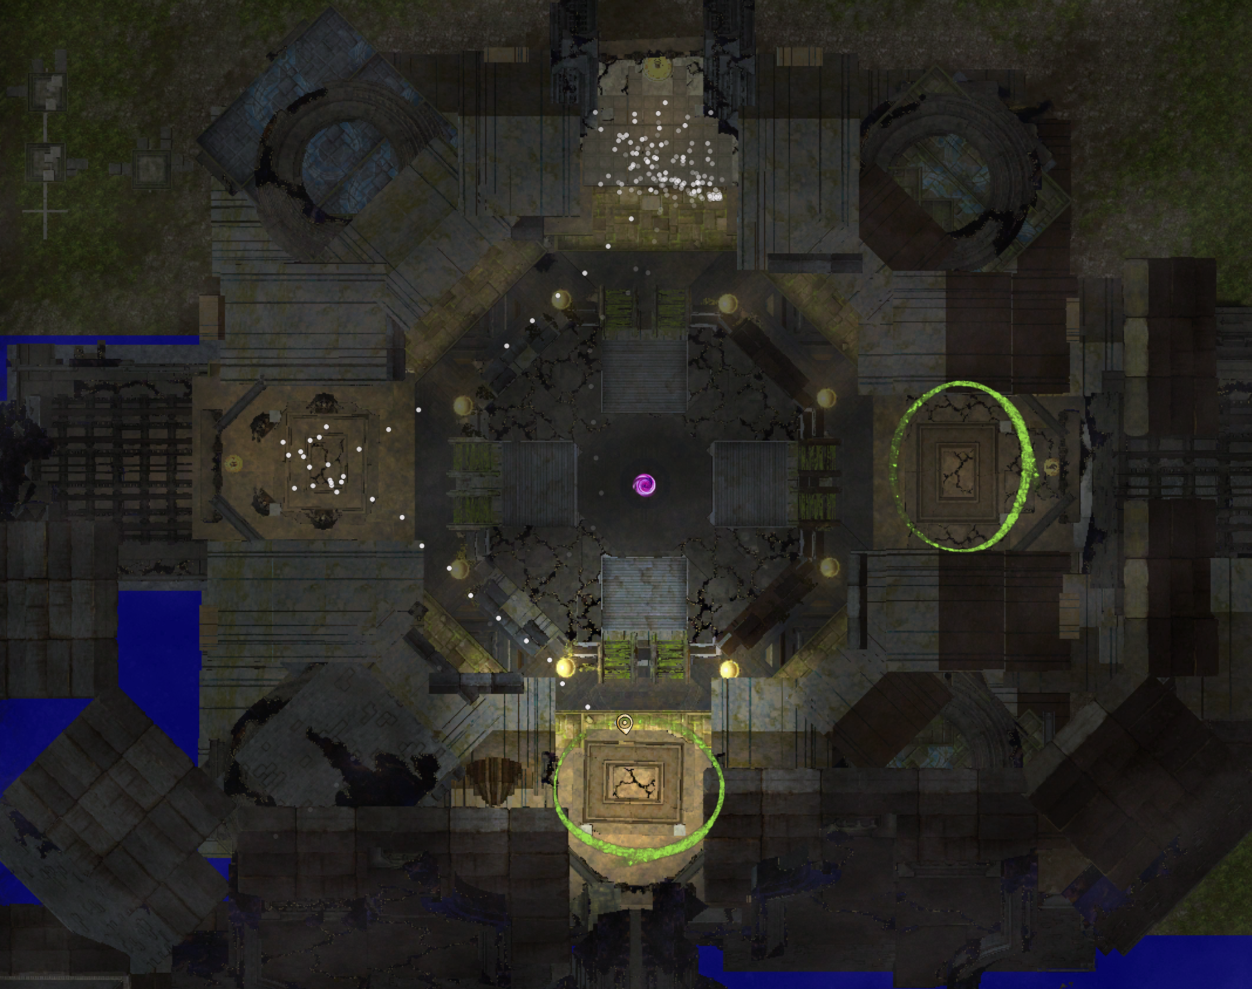
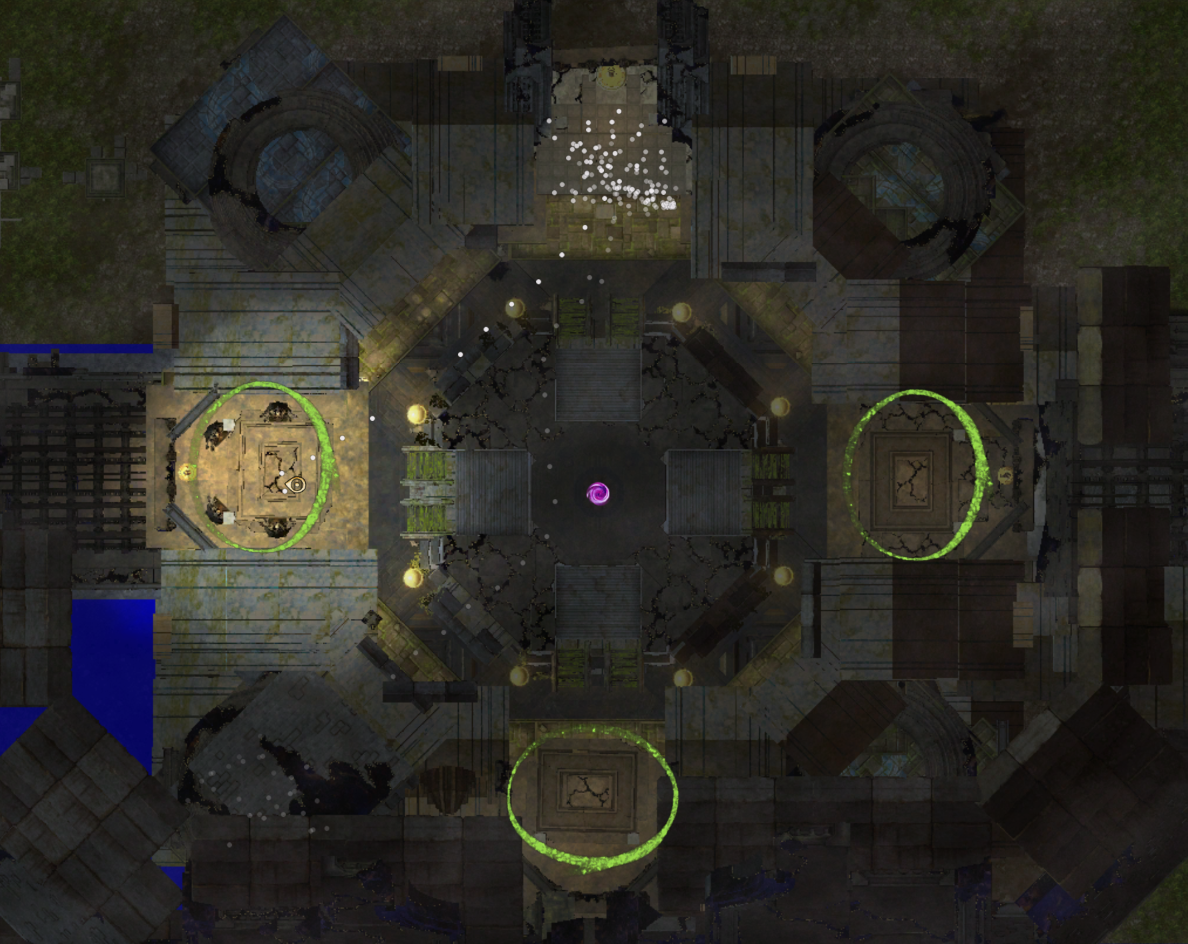
Trial of Dexterity: Carry the power nodes across the floor without becoming frozen
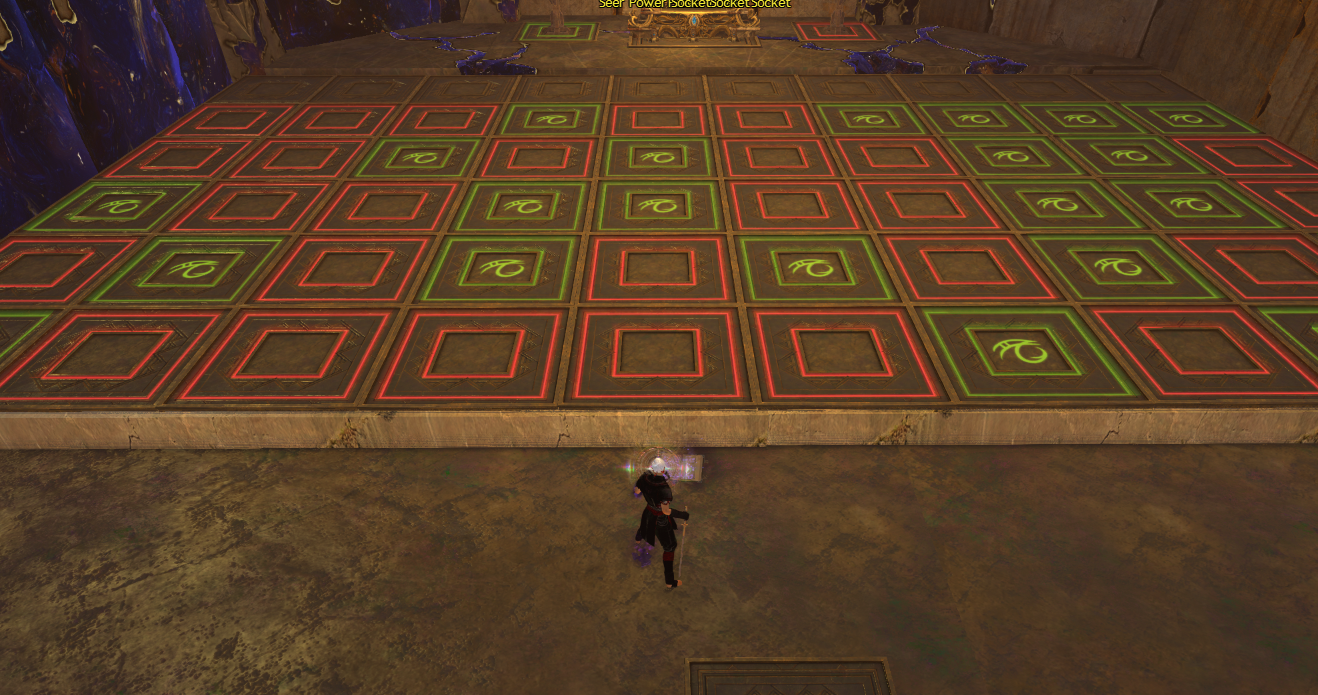
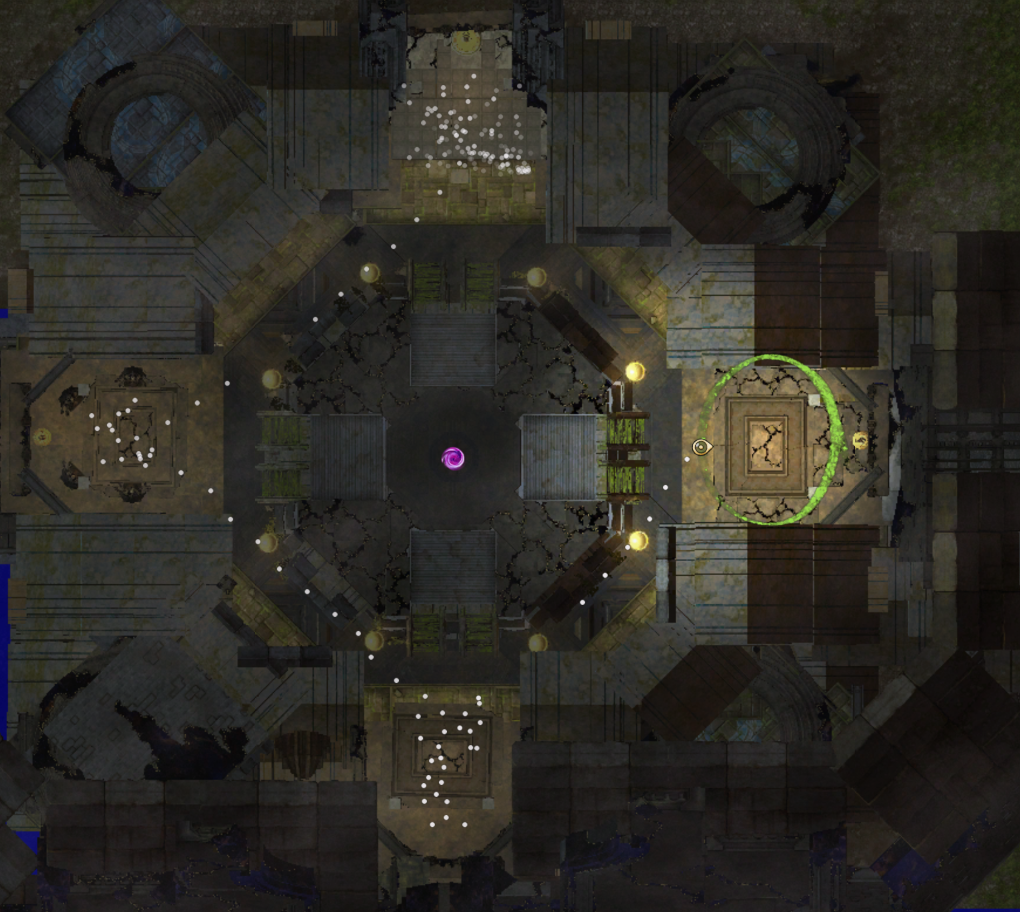
You will need to carry the Seer Power Nodes across just the green tiles - you can jump diagonally but the hit box is very sensitive so you will risk touching the red and losing out on the achievement completely
The tiles will randomly switch every few seconds so if you are going for the achievement you should wait until there is a fairly clear path ready for you to not risk touching a red tile
Trial of Endurance: Carry the power nodes across the floor without being downed
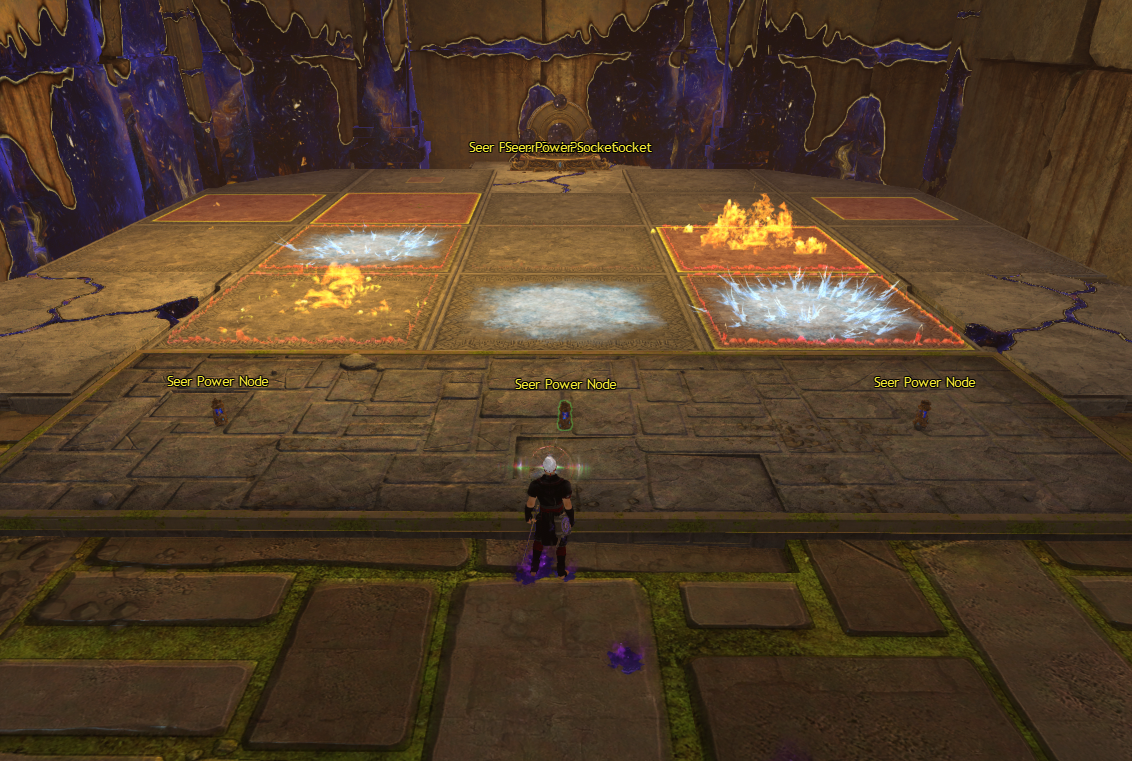
Get the power nodes across the floor without getting downed, this can be done by bringing gear with Vitality, using skills that provide super speed, or even swiftness
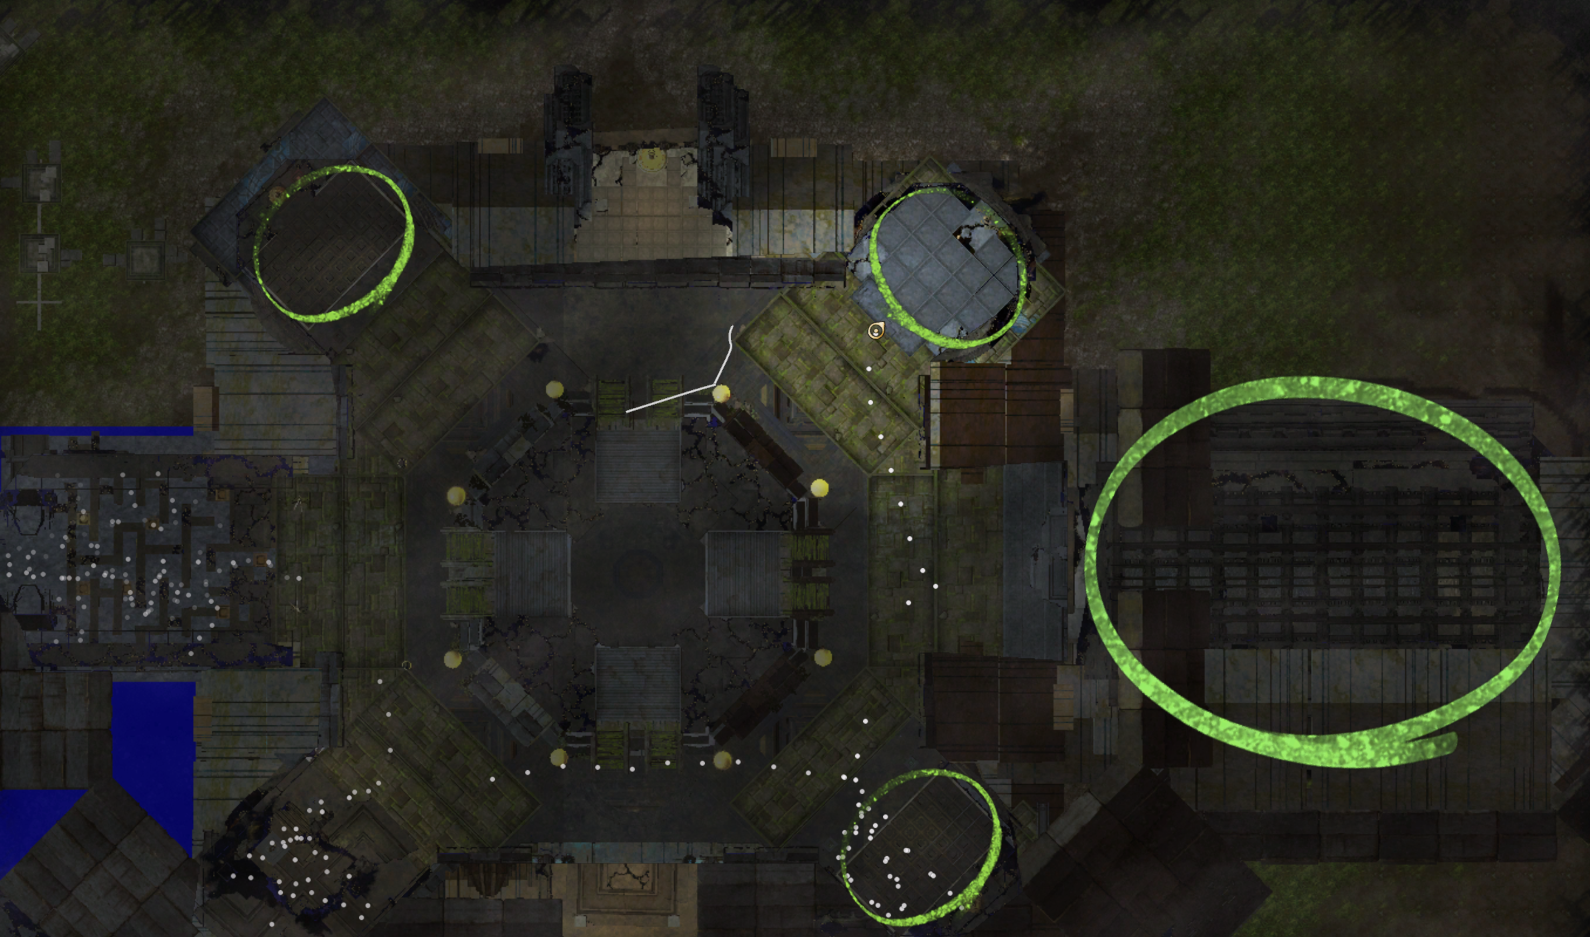
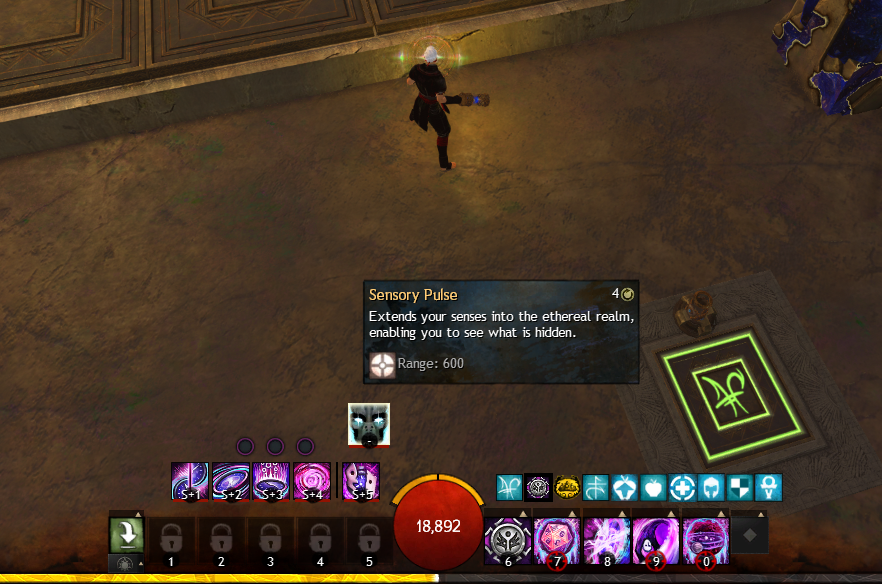
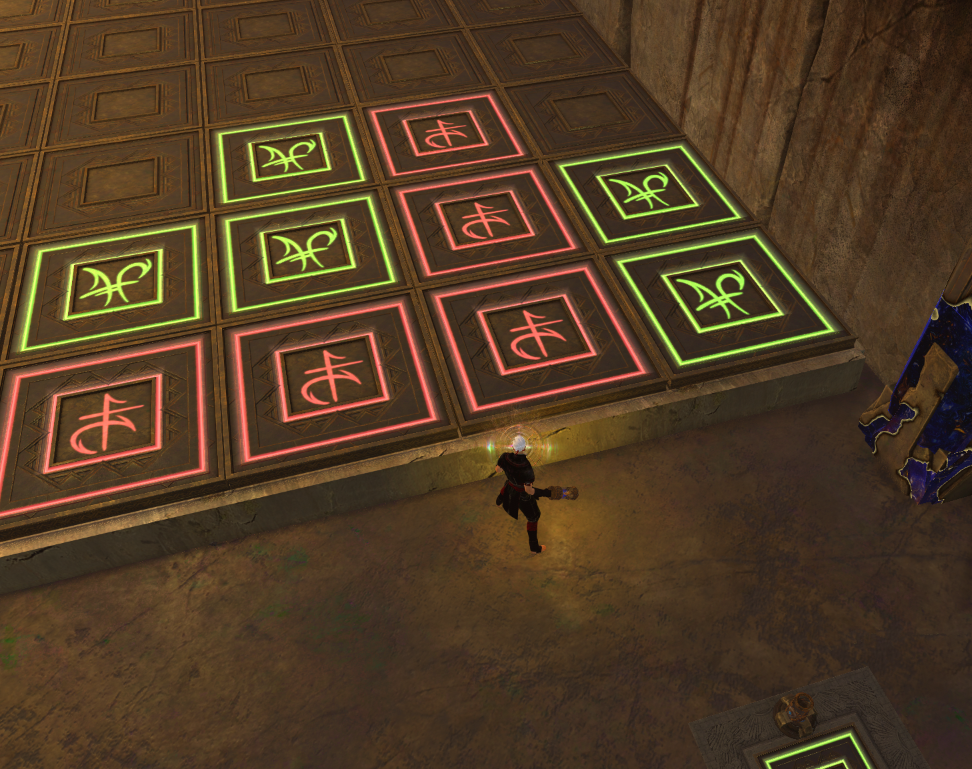
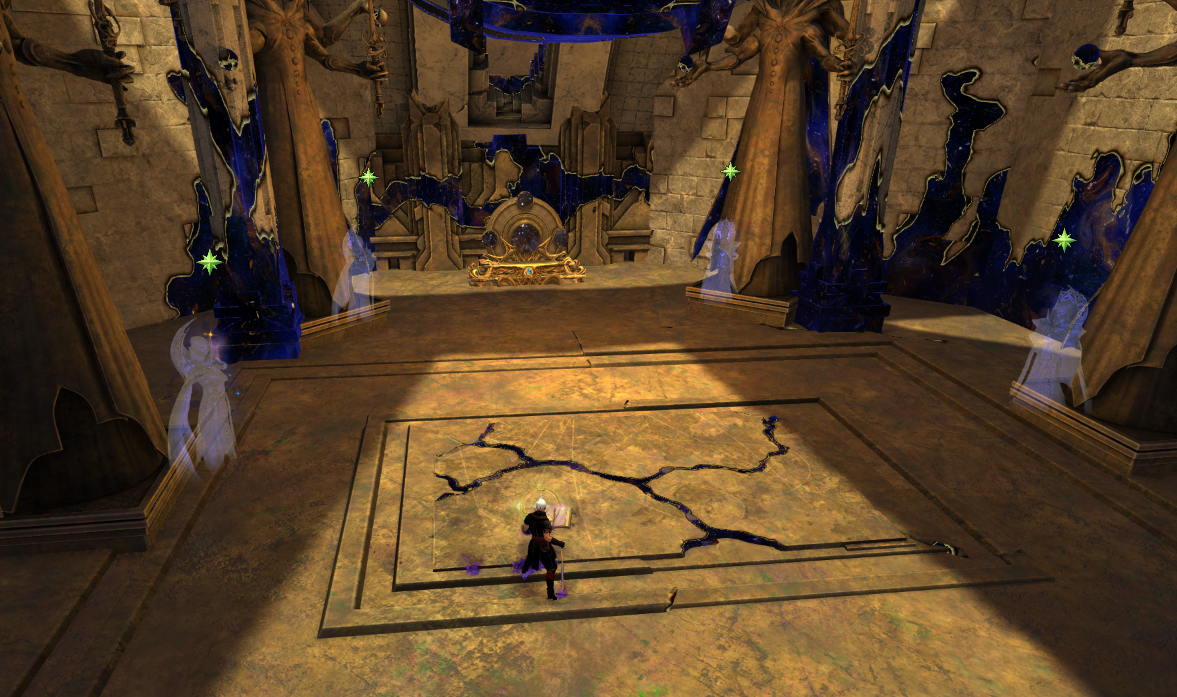
Trial of Sense: Carry the power nodes across the floor only on matching symbols
Use your Special Action Key (SAK) to reveal the floor, try not to rush ahead
When running back from the Seer Power Sockets you must still follow the trail that is safe or it will cancel the acheivement for you
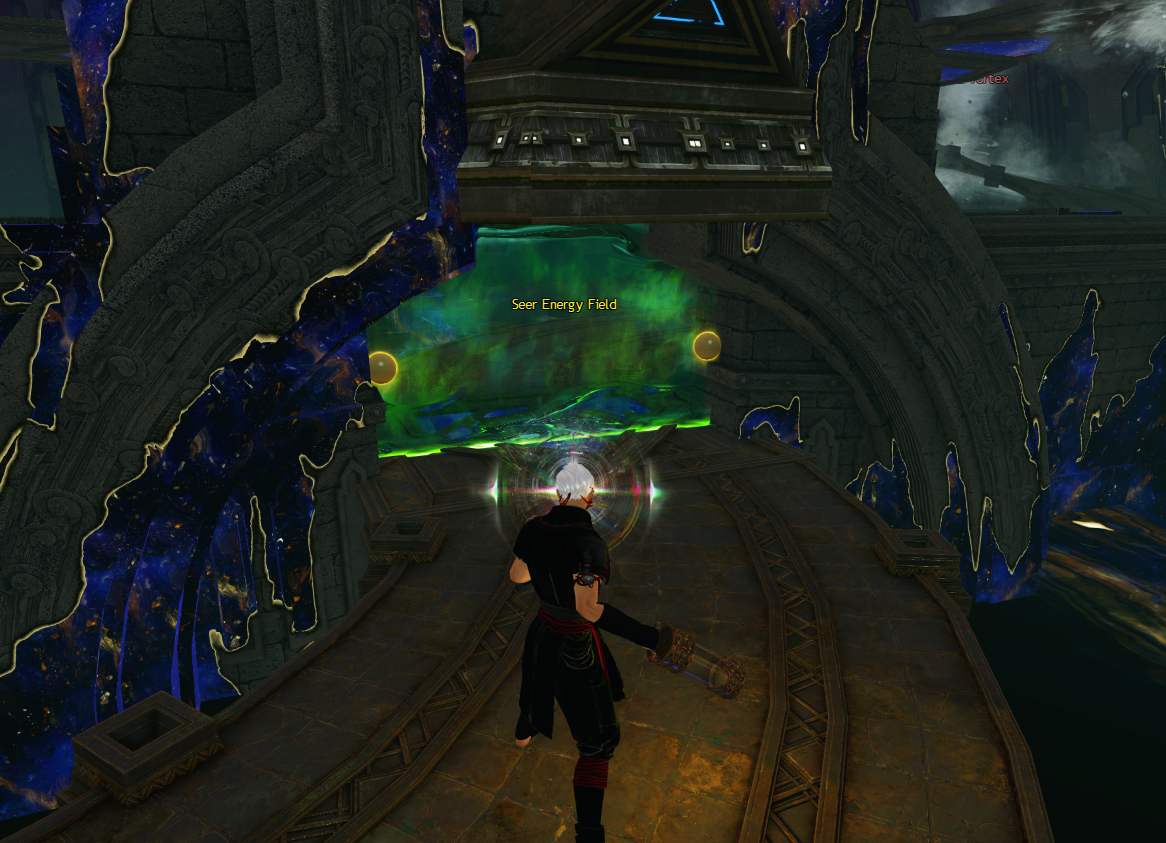
Trial of Speed: Carry the power nodes to the socket without dropping it

You will need to pass through a green energy barrier to charge the battery half way through - When you get to the top panel turn east first until you find that barrier
Trial of Strength: Carry all power nodes to their sockets without dropping them
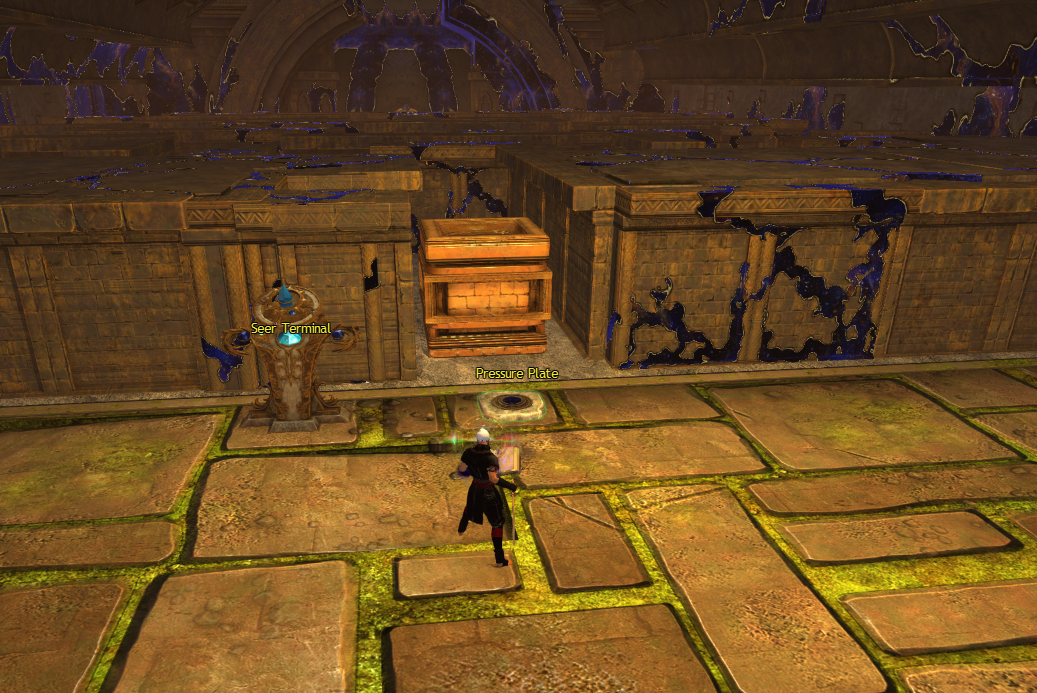
The Seer Terminal will give you heavy stones to place on the Pressure Plates - Put the heavy stones on all of the Pressure plates before taking any nodes to reduce the risk of needing to put down a Seer Power Node
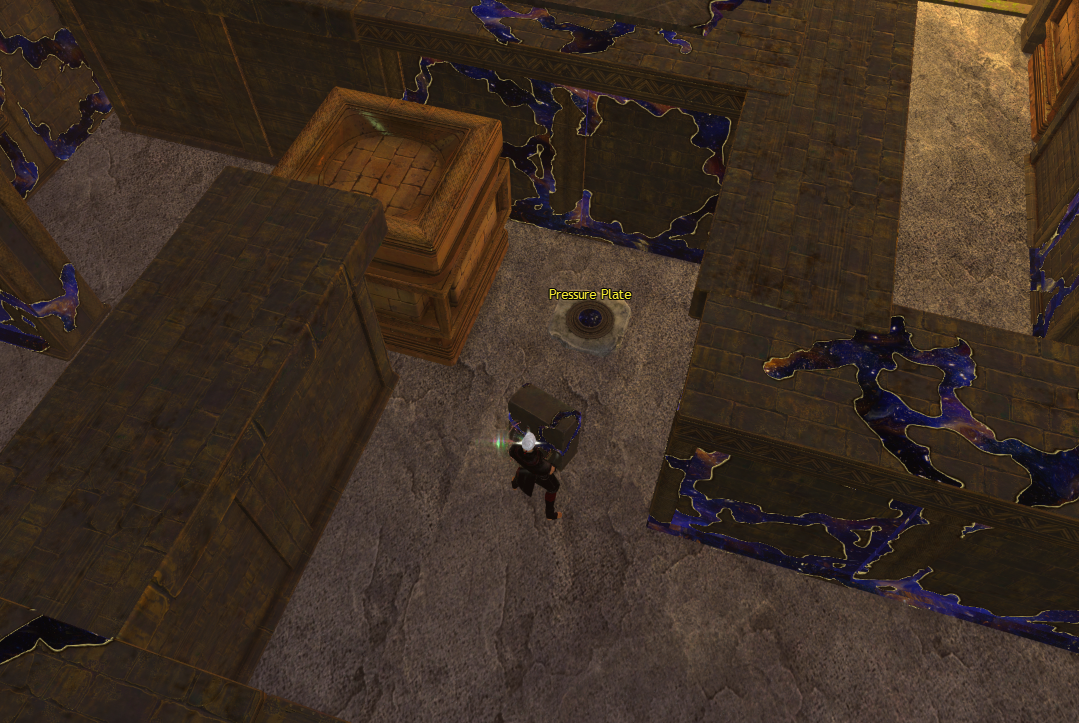
I completed this with four heavy blocks from the Seer Terminal and three heavy blocks from in the maze - but there was one extra loose rock at the end for me so there would be different ways to complete this
Astute Candidate
Pass all of the mental trials without failing any of the tests
Trial of Intellect: Place the curved pipe segments only where they are meant to go
Repairing a pipe with a curved segment in hand will fail the achievement
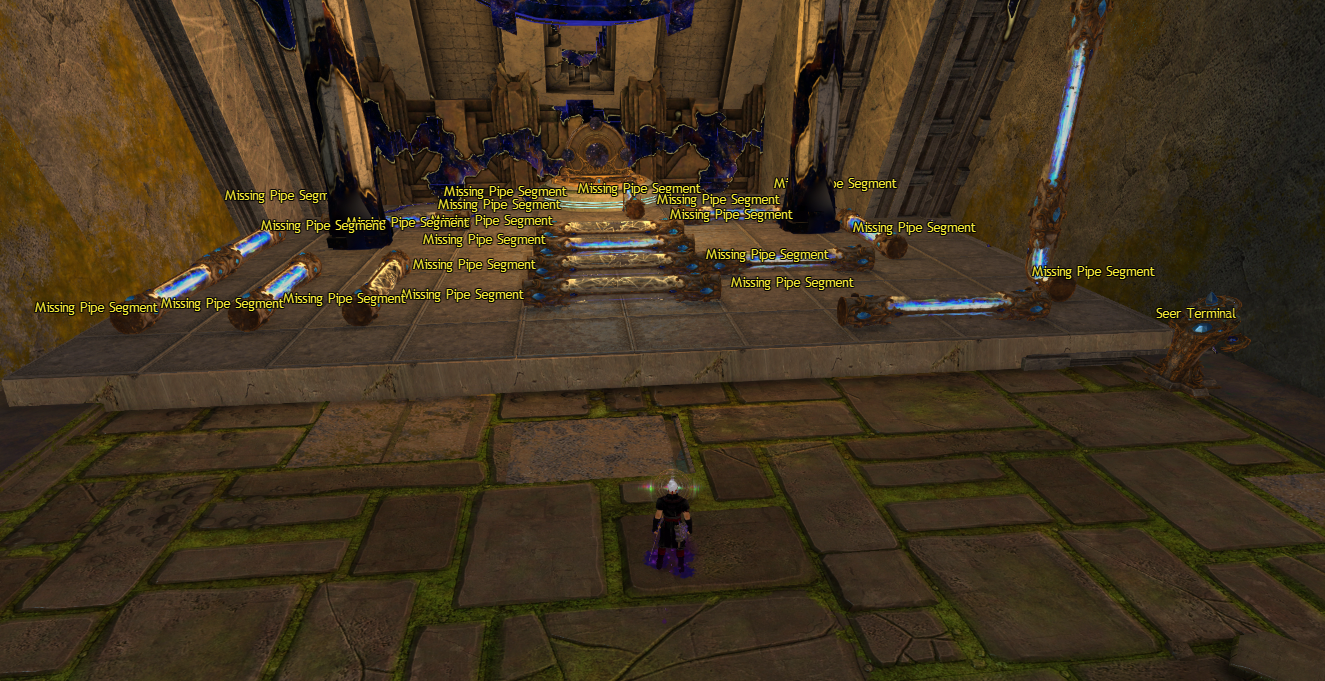
For this trial just put a curved segment in every single spot marked with a Missing Pipe Segment and the achievement should complete
Trial of Memory: Unlock all of the power nodes without messing up the symbol-matching games
You will need to play a mini game of matching up colours above your head with your 1-5 skills that have the same design
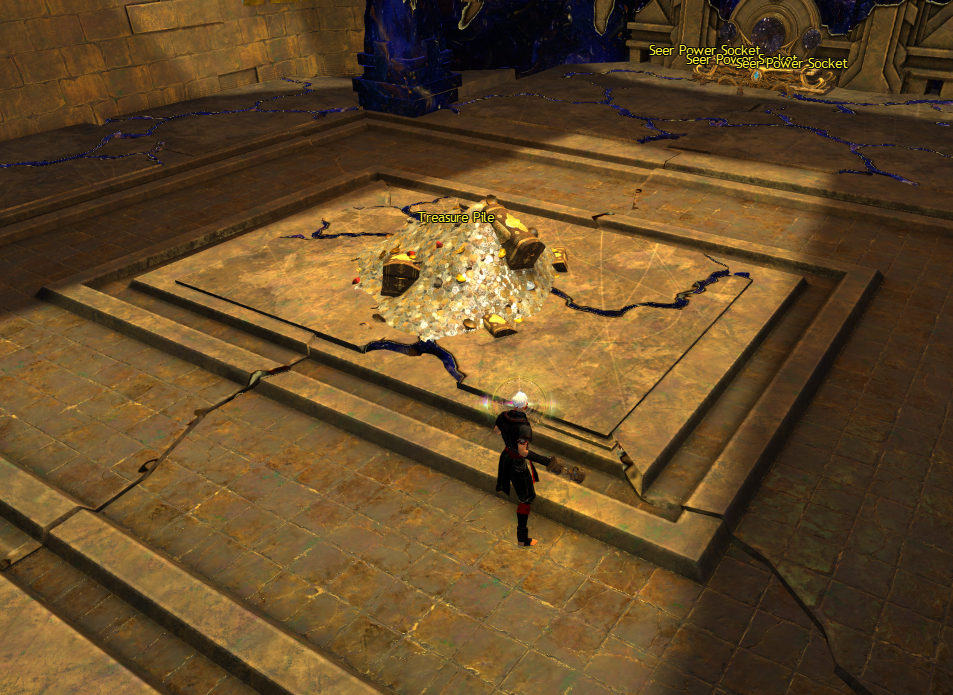
Trial of Willpower: Carry the power nodes to the sockets without succumbing to temptation
Ignore the Treasure Pile that grows in the middle as you pick up the Seer Power Nodes
Trial of Wit: Answer all of the seer patron’s questions correctly
There will be four seer spirits with different questions for you to answer - the question answers shift in position if you get one wrong or you back out of the conversation
Conundrum Answers - Aeming
What is it that has the power to both heal you as well as kill you, but without touching you
The answer is time.
What is it that can deafen your ears, quicken your steps or slow you, and even knock you over, all while remaining unseen?
That would be the wind
During out mortal lives, there are two moments that happen to each soul that said soul will not remember. What are they?
Our first breath and our last
Syllogism Answers - Destro
Before you stand three doors; behind one is great power, behind the other two, deadly traps. You must pick one, then you will be offered a second choice
I pick the third door
Your host, knowing the contents of each, reveals one of the trapper doors and offers you the chance to switch your closed door for the other closed door. Is it wise for you to do so?
Yes, the odds favor it.
Intuition Answers - Reatalle
You must enter one of three rooms. In the first, fire traps line the floor. The second has beasts that haven’t eaten for months. The thief is a emply room that emits a noxious smell. Which room do you enter?
The room of beasts
A human is stranded alone on a small island, with a larger island nearby. Without transportation, swimming, or assistance, he gets to the larger island. How?
He waited for the tide to go out so he could walk to the other island
A farmer maintains a den of twelve beasts. One night, a great chill comes and kills all but nine of the beasts. How many beasts will he find in the den the next morning?
Twelve
Disputation Answers - Pugine
The last fifteen candidates for the rite have failed, but this is no cause for concern, as that makes the next more likely to succeed.
That is the gambler’s fallacy
Power must be shared with the other people of Tyria, because this will probably be good unless you can demonstrate that it will be bad
This is shifting the burden of proof
The idea that out enemies could ever truly threaten us is preposterous. Such a thing is unimaginable.
You’re arguing from personal incredulity, not logic
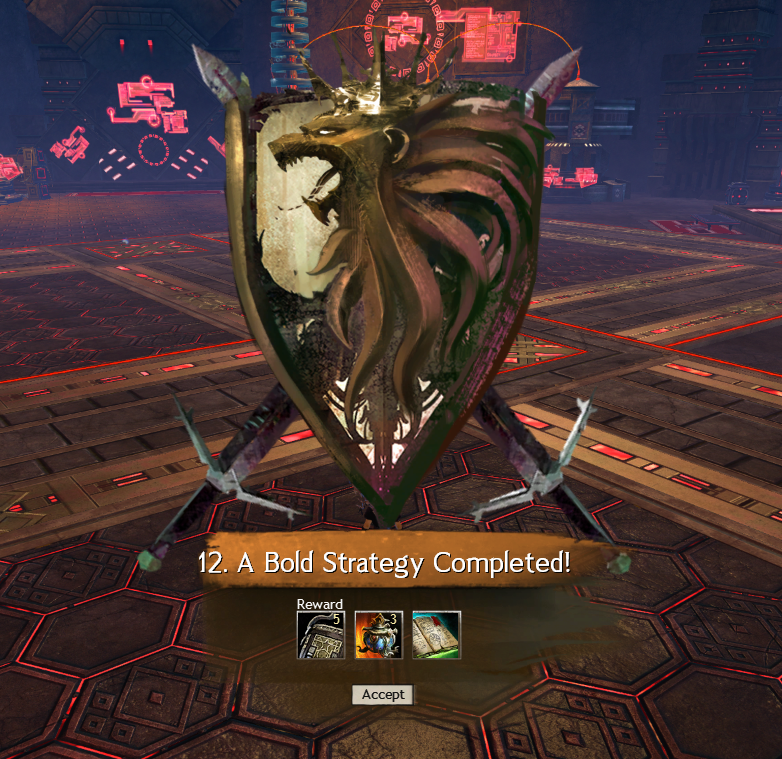
A Bold Strategy
A Bold Strategy
Parley with an adversary
Twist The Knife
Talk to the lieutenant after defeating him in the story chapter A Bold Strategy
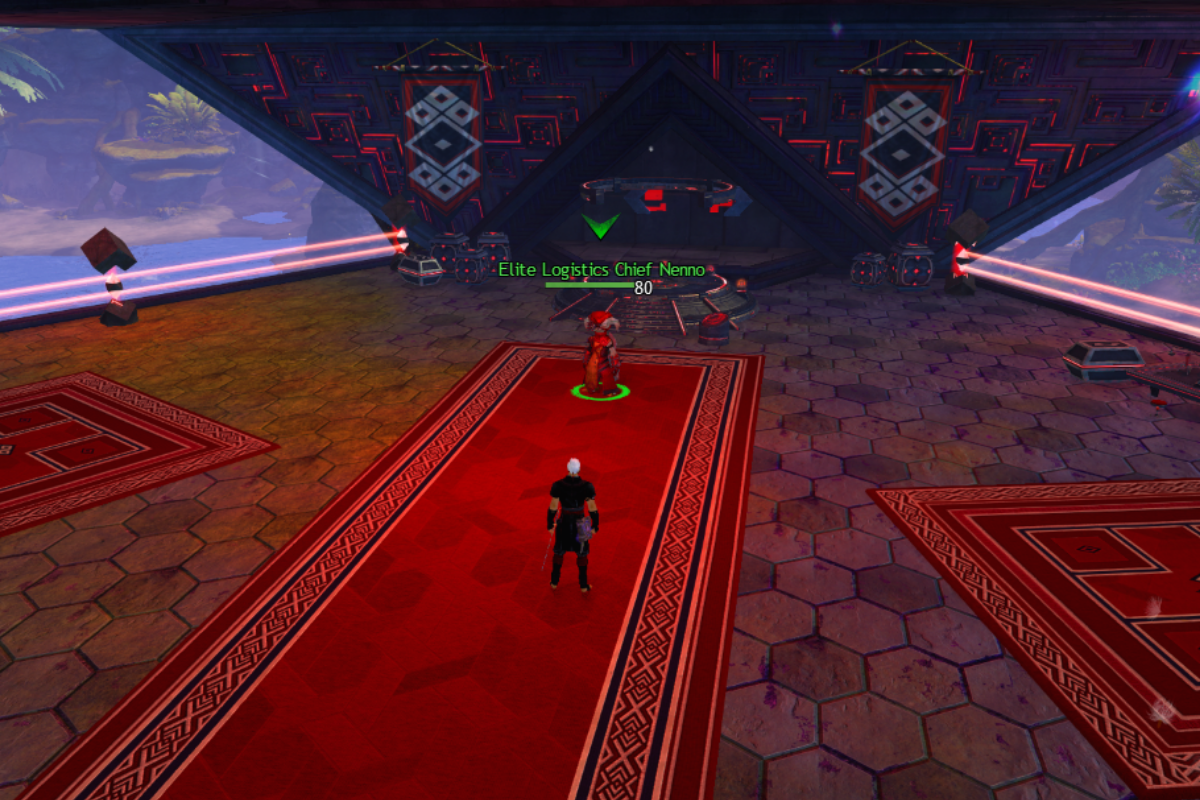
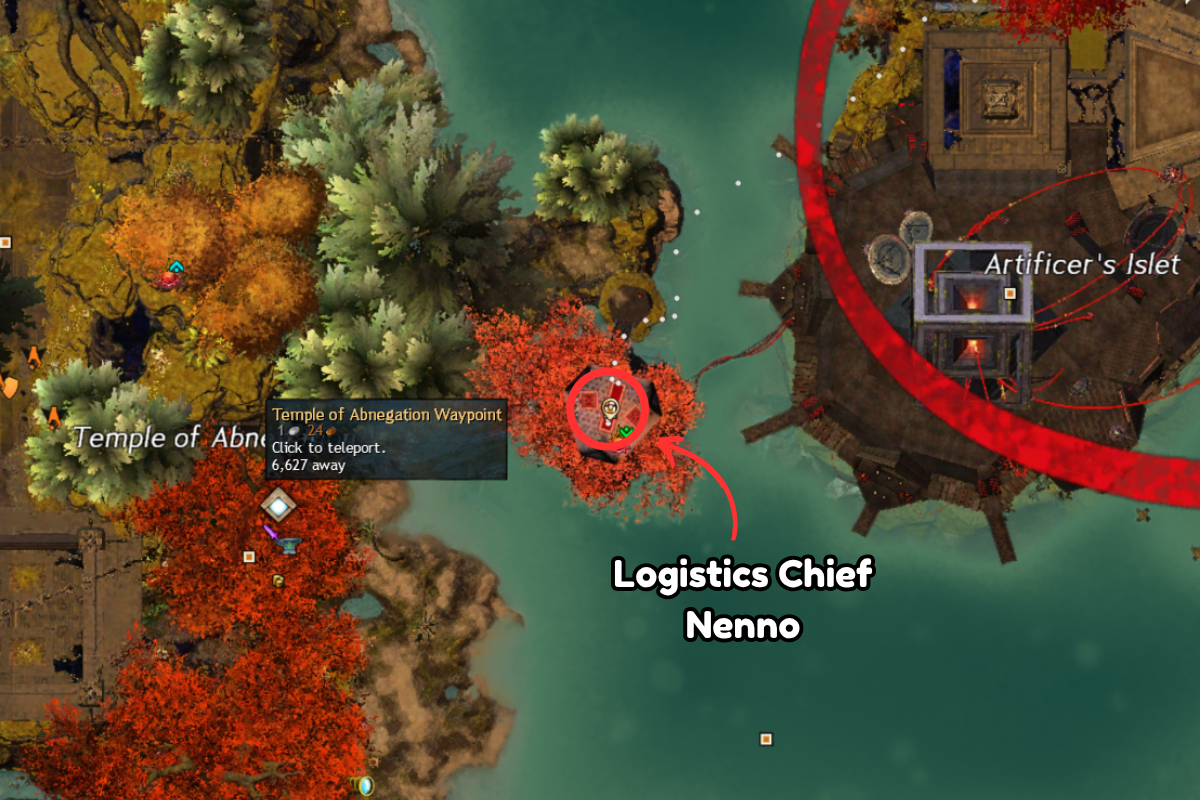
After defeating Chief Nenno go back and talk to him at the Logistics Depot Point of Interest — [&BPsPAAA=]
A Question of Trust
Ensure Canach doesn’t go down while he’s handling the seer defenses
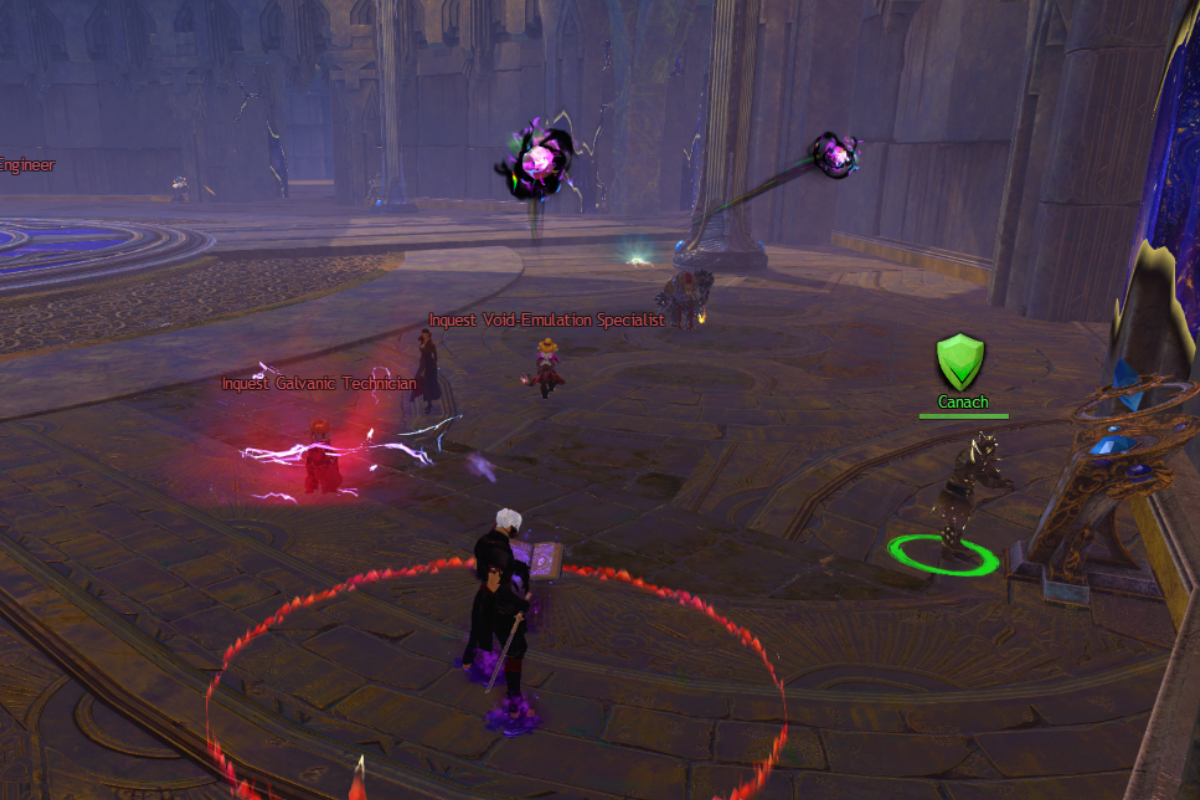
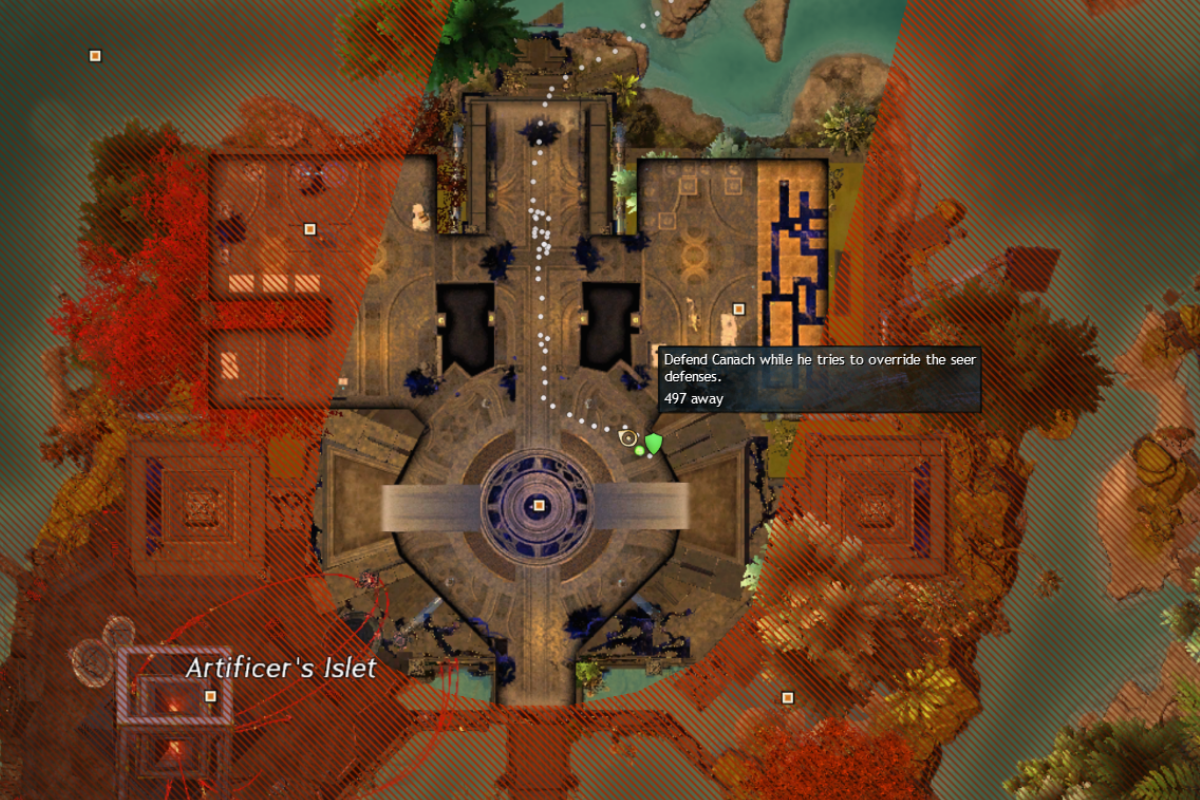
Canach will immediately start running off to the Seer Stations so stay with him until he is done so he doesn’t go down
DIY Enthusiasts
Find and use the Inquest spanner to bypass the barrier to Kuda’s fortress
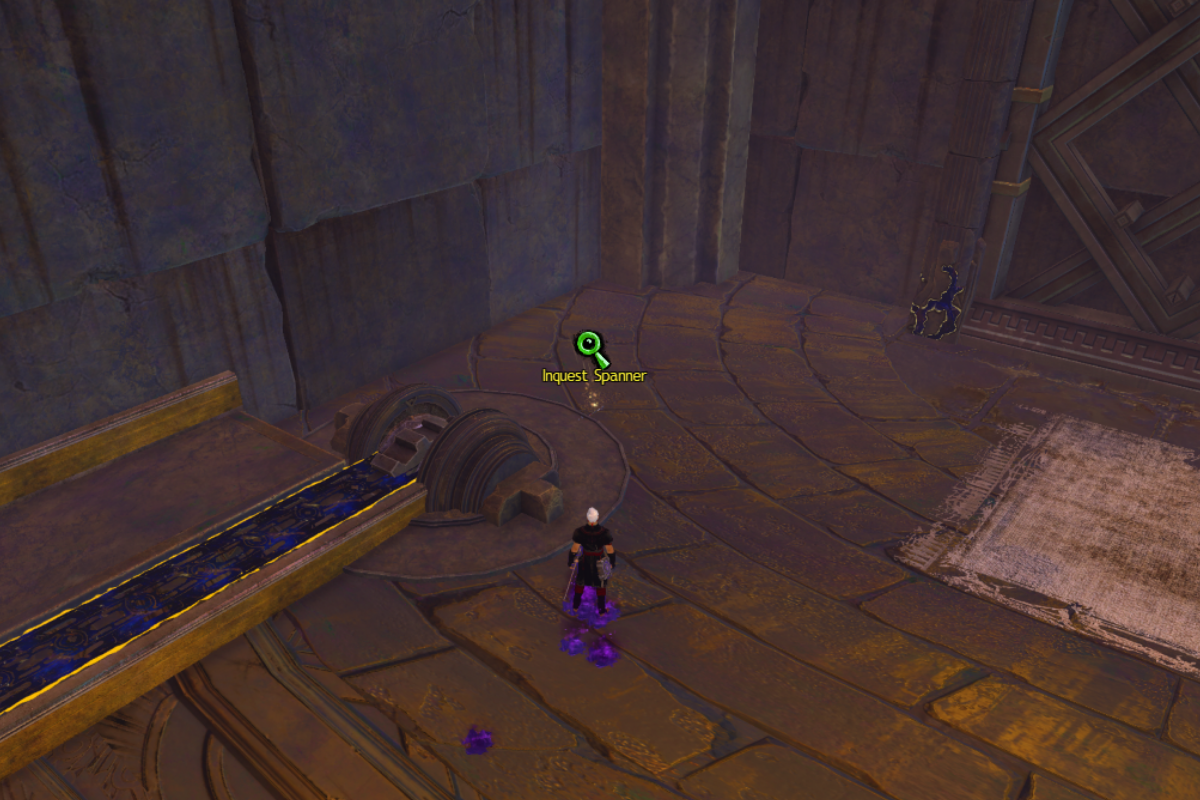
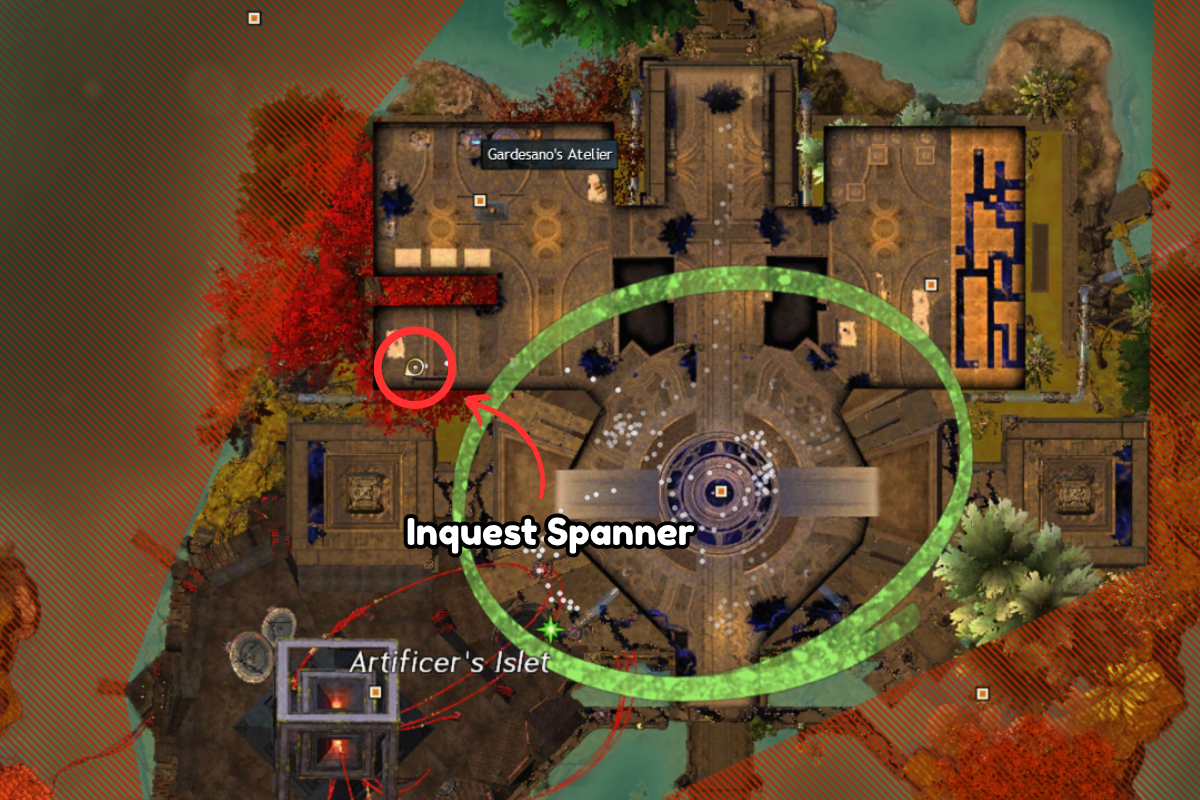
Find the Inquest Spanner in the room down the ramp and to the north and bring it back to the panel to get through
Scouting Report
Find all of the journals related to Kuda’s Omega Team in the Inquest bases
Project Omega Self-Evaluation Report II: Zipp

In the room with the Arcanological Survey Station Point of Interest — [&BOUPAAA=]
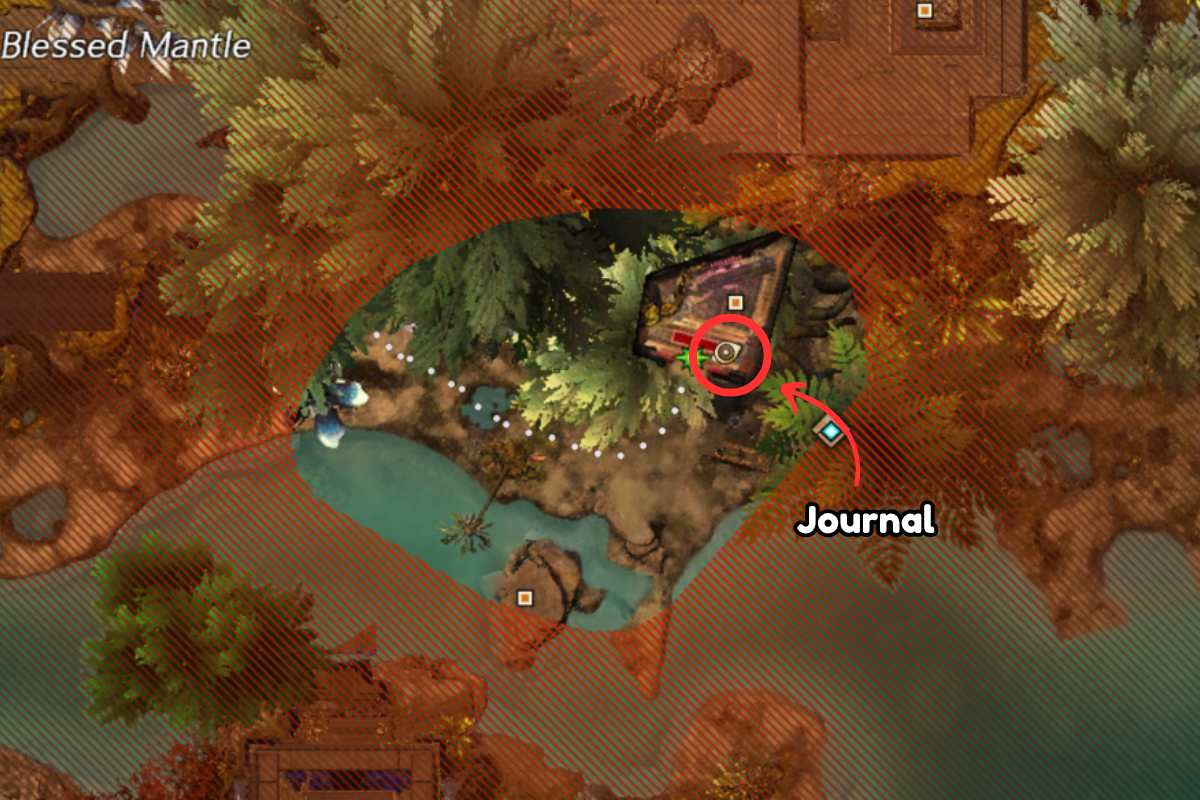
Omega Team: Status Report
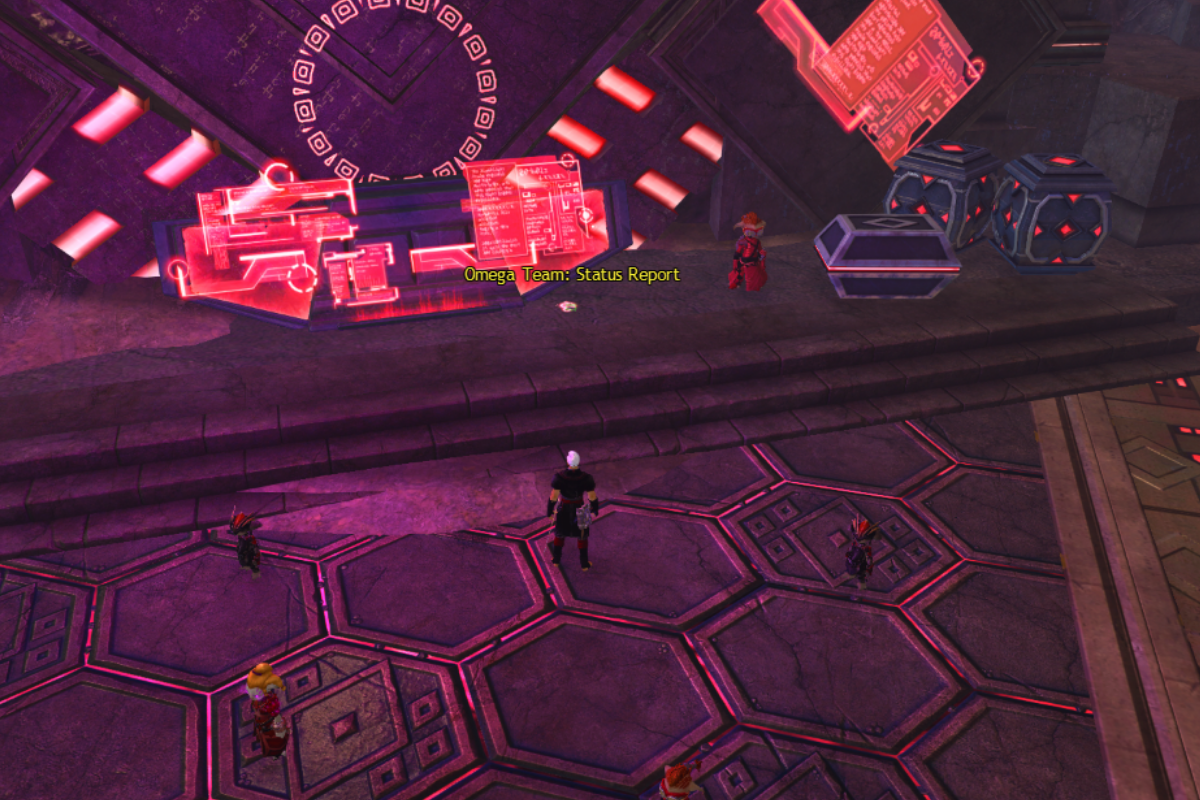
In the room with the Arcanological Survey Station Point of Interest — [&BOUPAAA=]
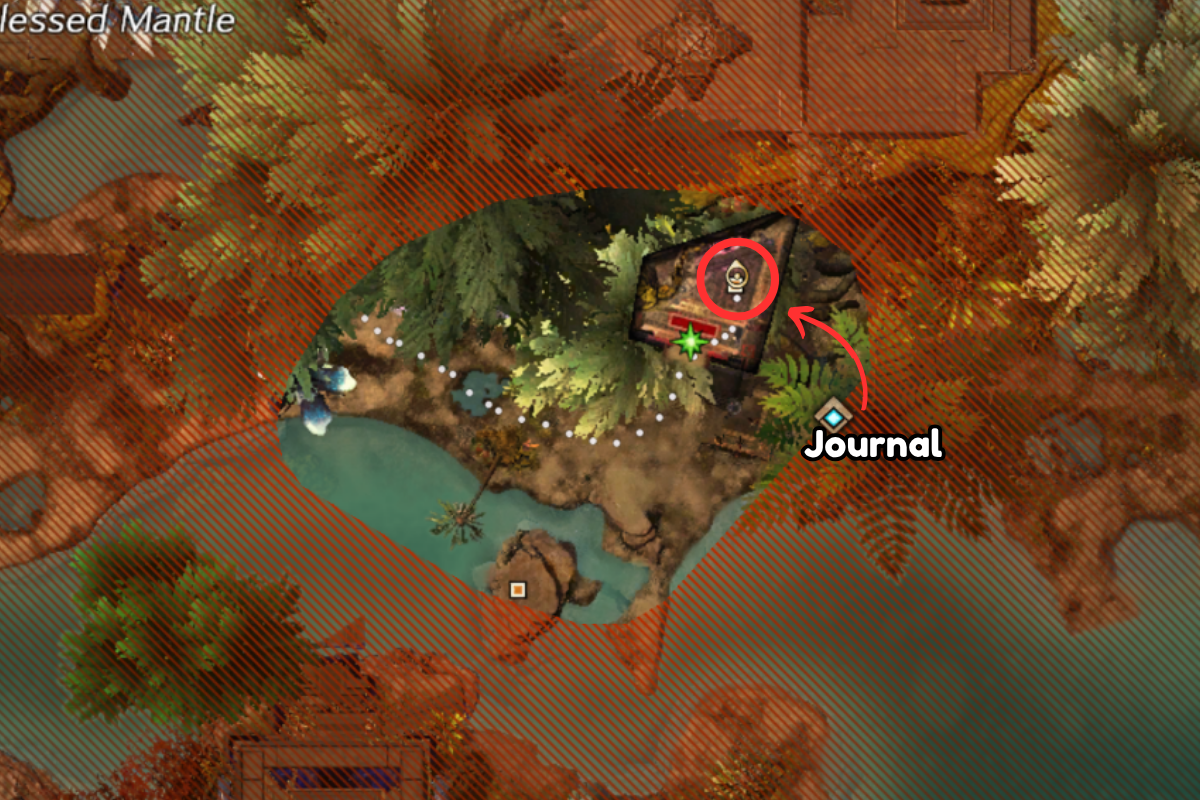
Project Omega Self-Evaluation Report II: Plokk
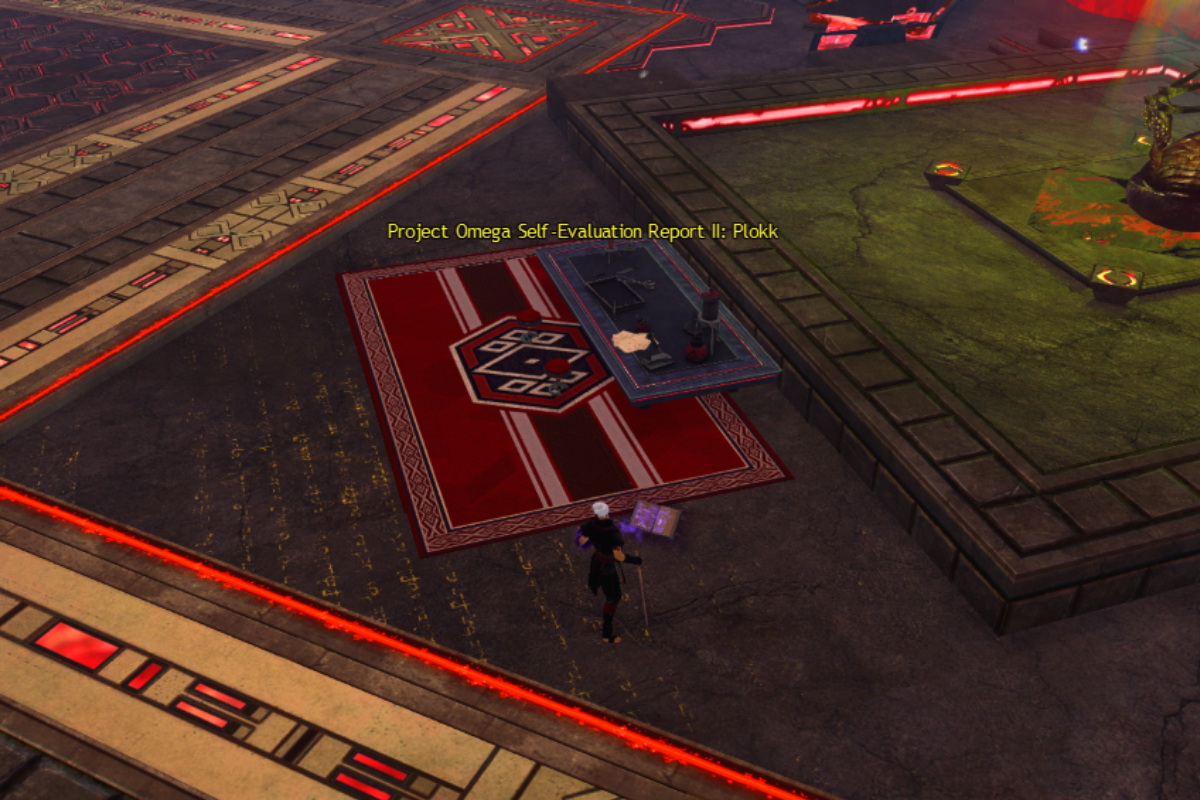
In the room with the Supra Fortis Point of Interest — [&BOEPAAA=]
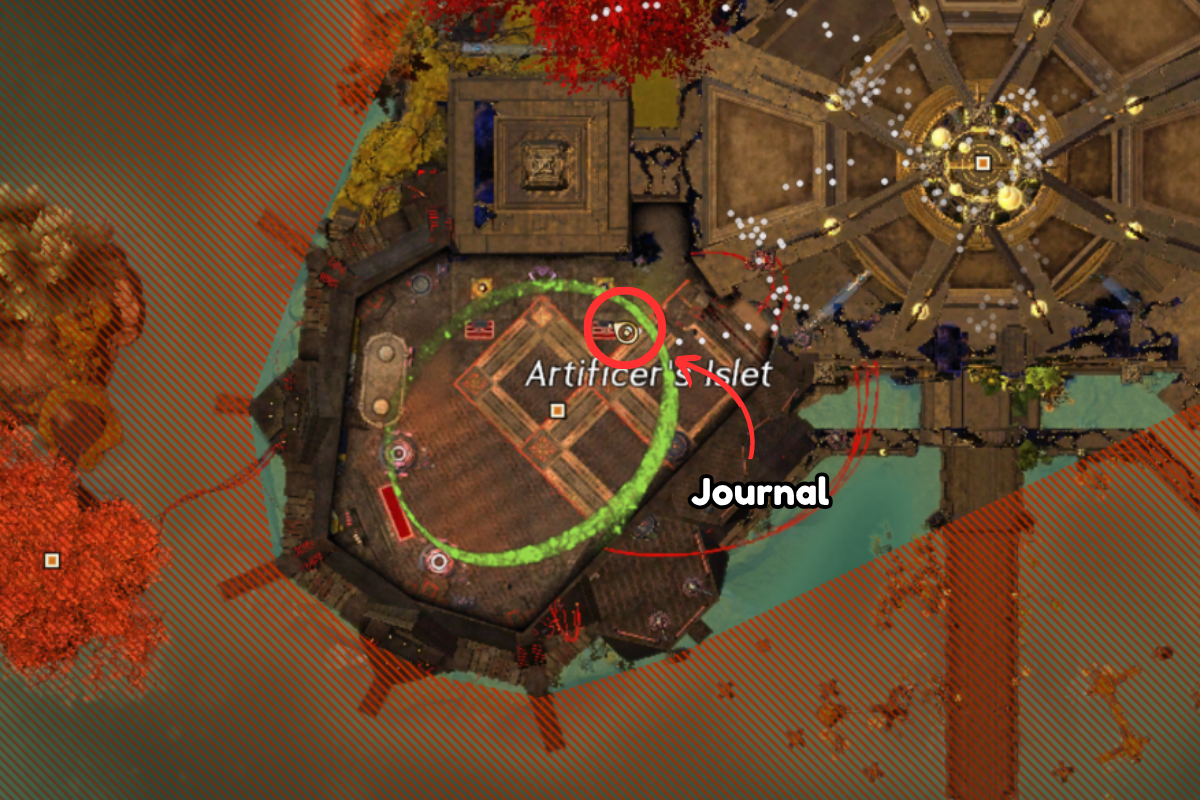
Omega Team: After-Action Report
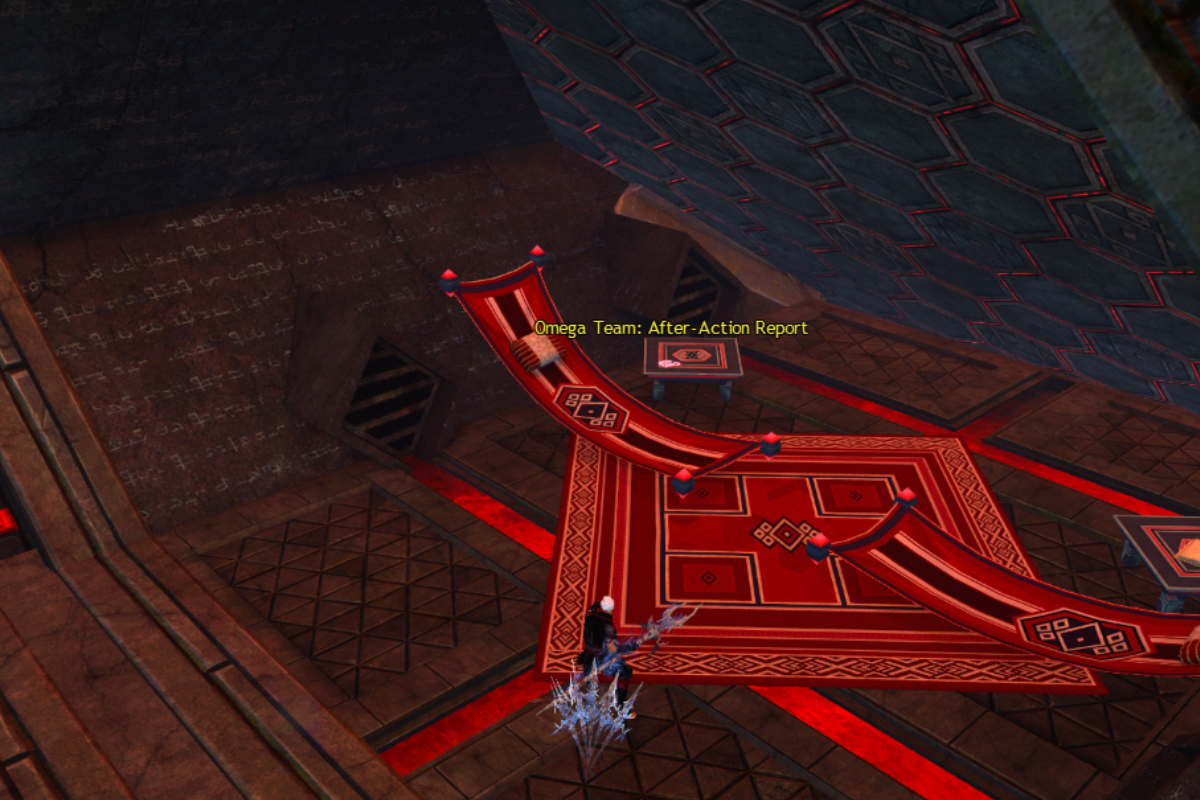
In the room with the Supra Fortis Point of Interest — [&BOEPAAA=]
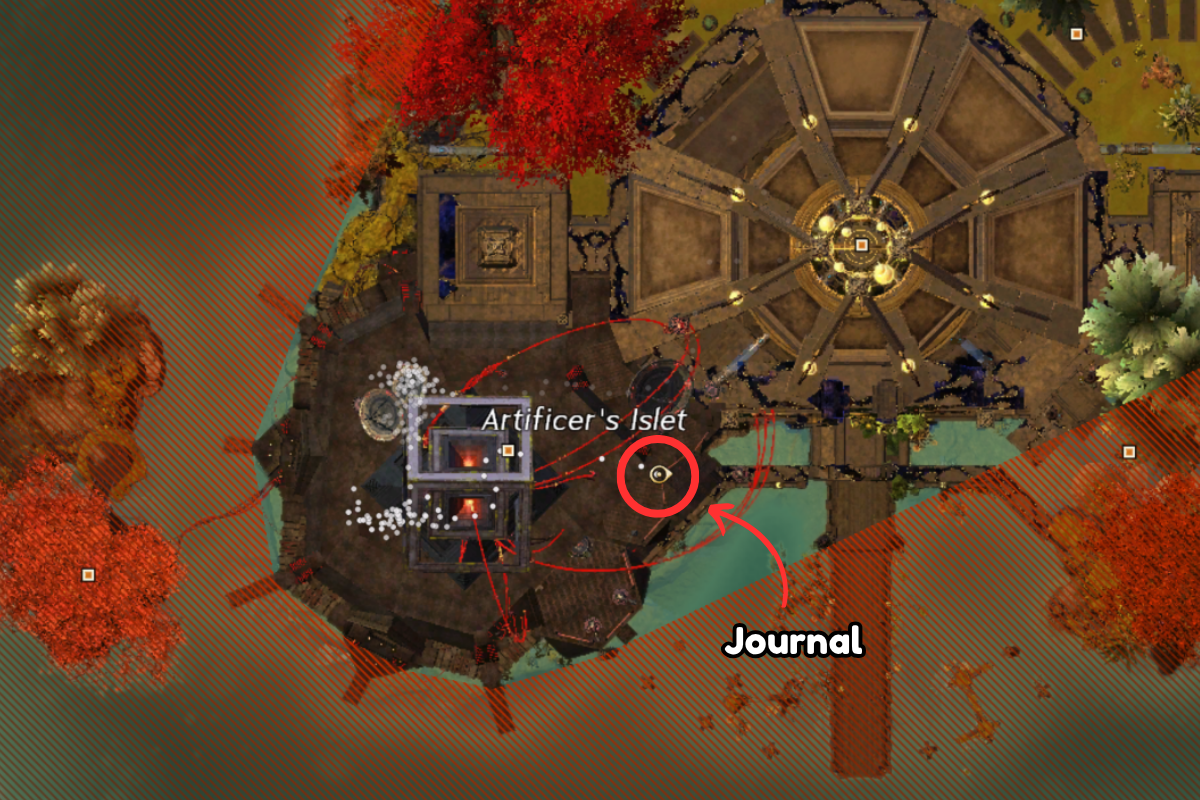
Omega Team: Future Plans
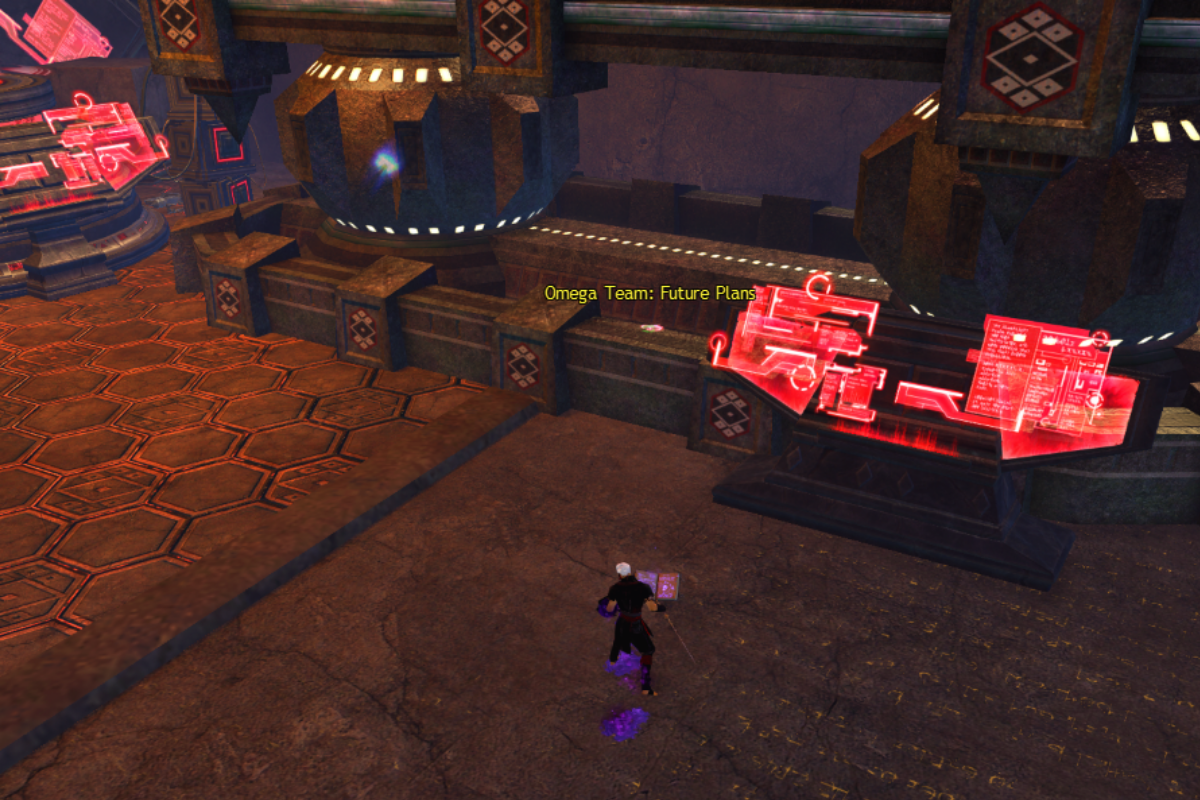
In the room with the Supra Fortis Point of Interest — [&BOEPAAA=]
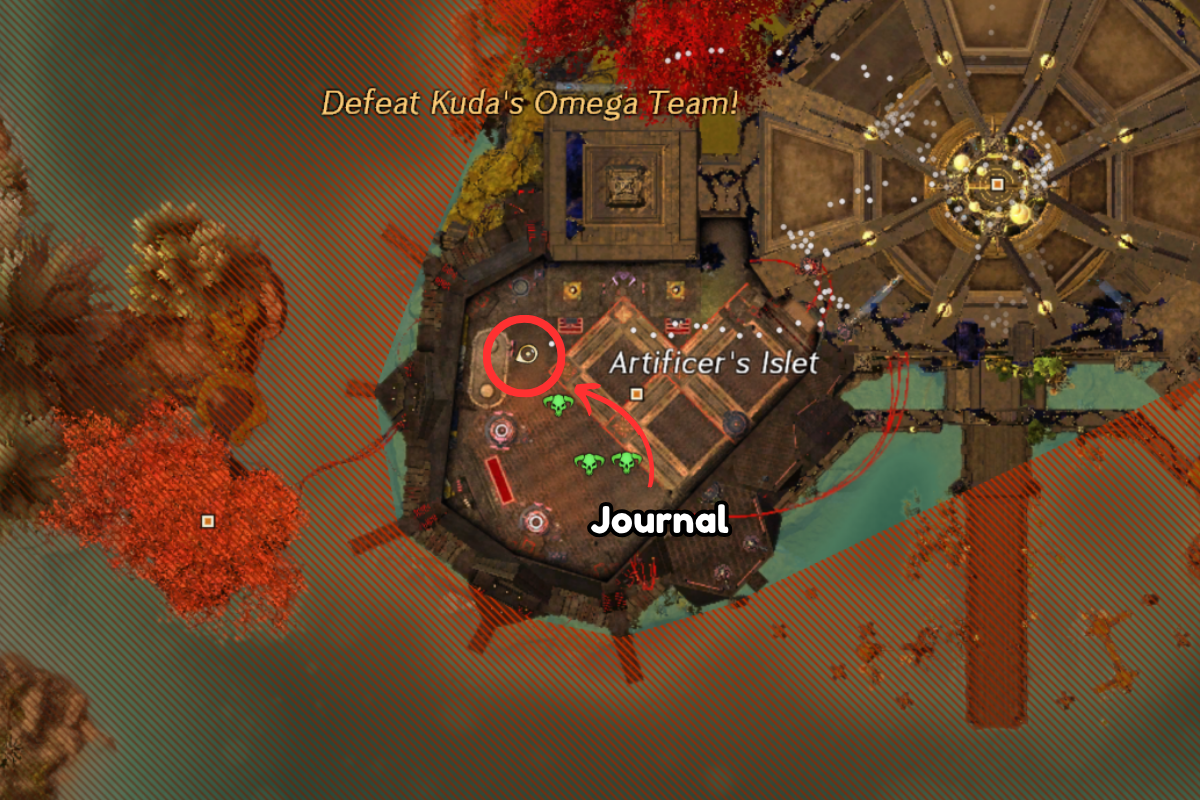
Project Omega Self-Evaluation Report II: Naati
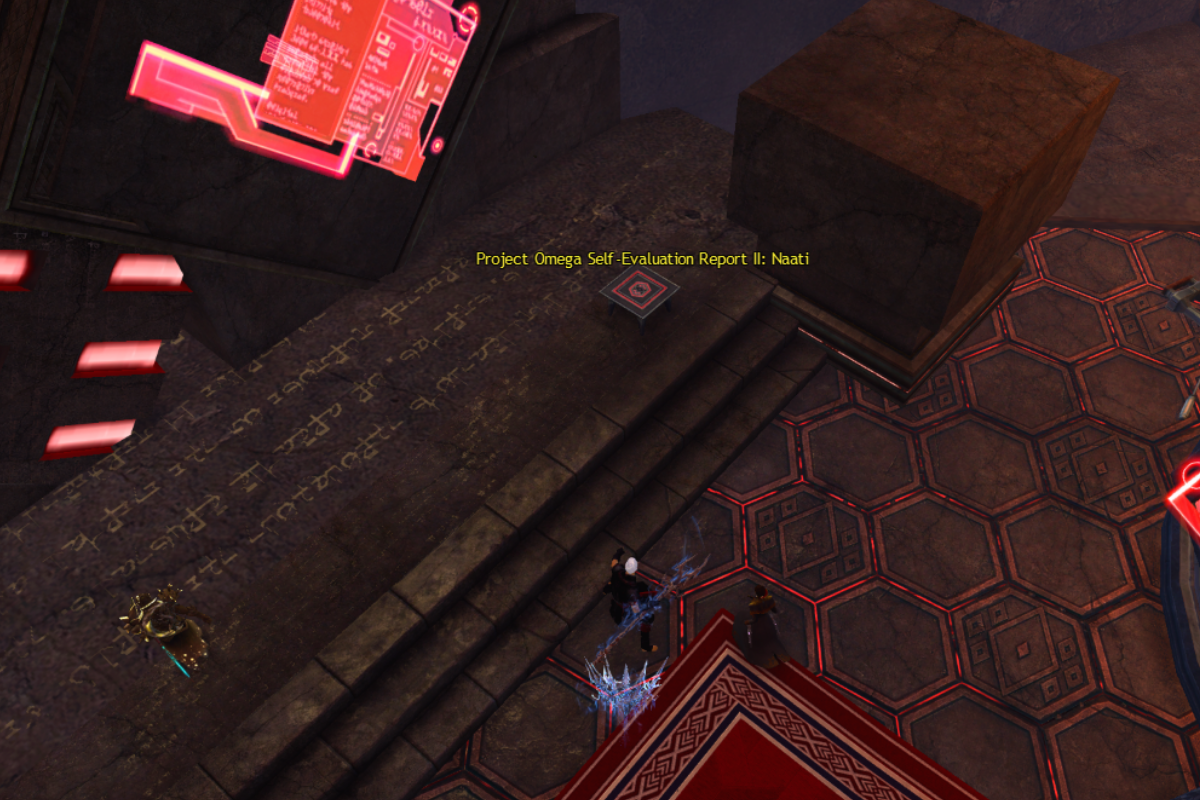
In the room with the Supra Fortis Point of Interest — [&BOEPAAA=]
So It Is Written
So It Is Written
Welcome an ally back to the field
The Storm Ahead
Check in with all of your allies after the curse-breaking ritual
Rytlock
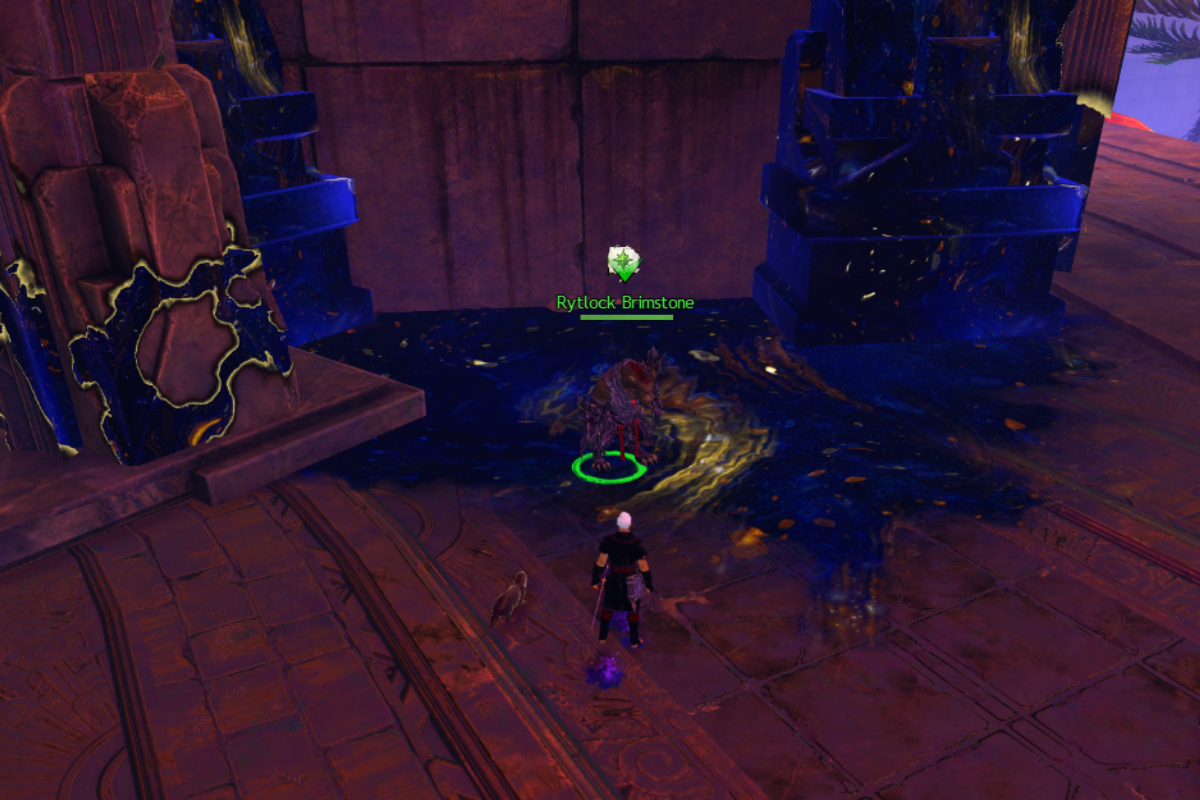
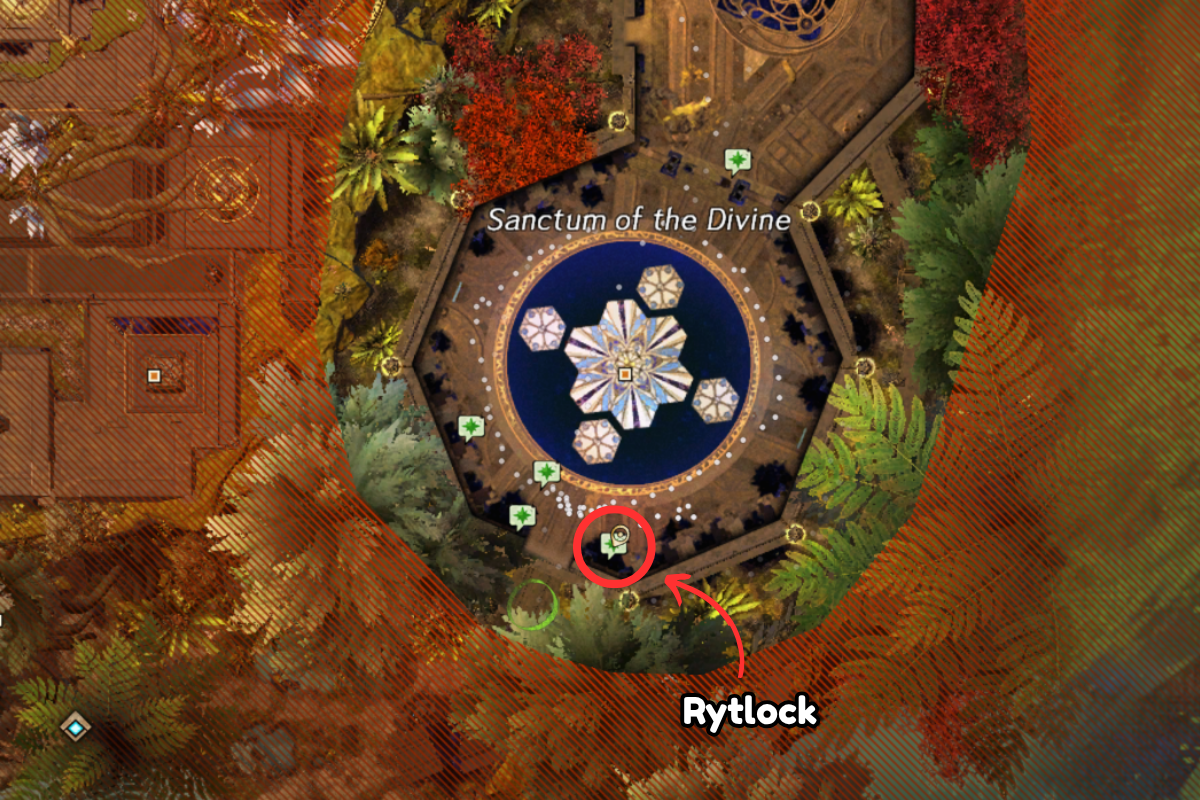
Canach
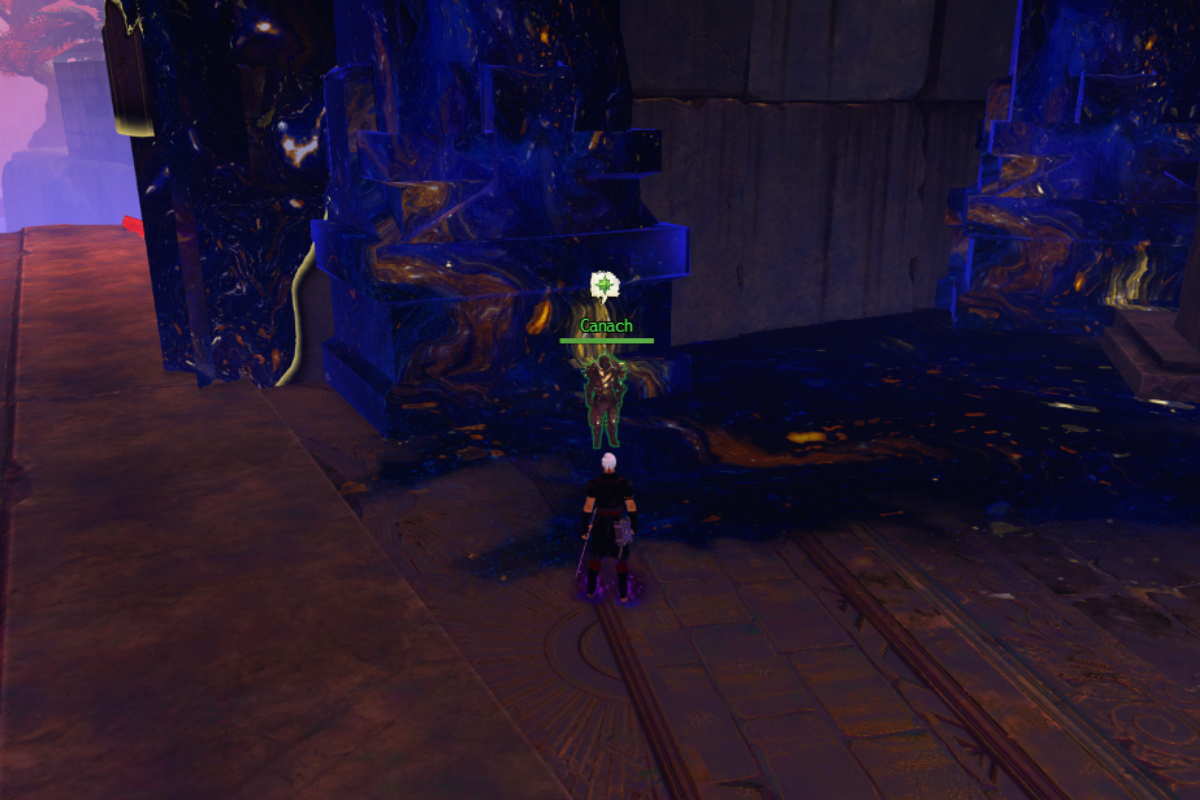
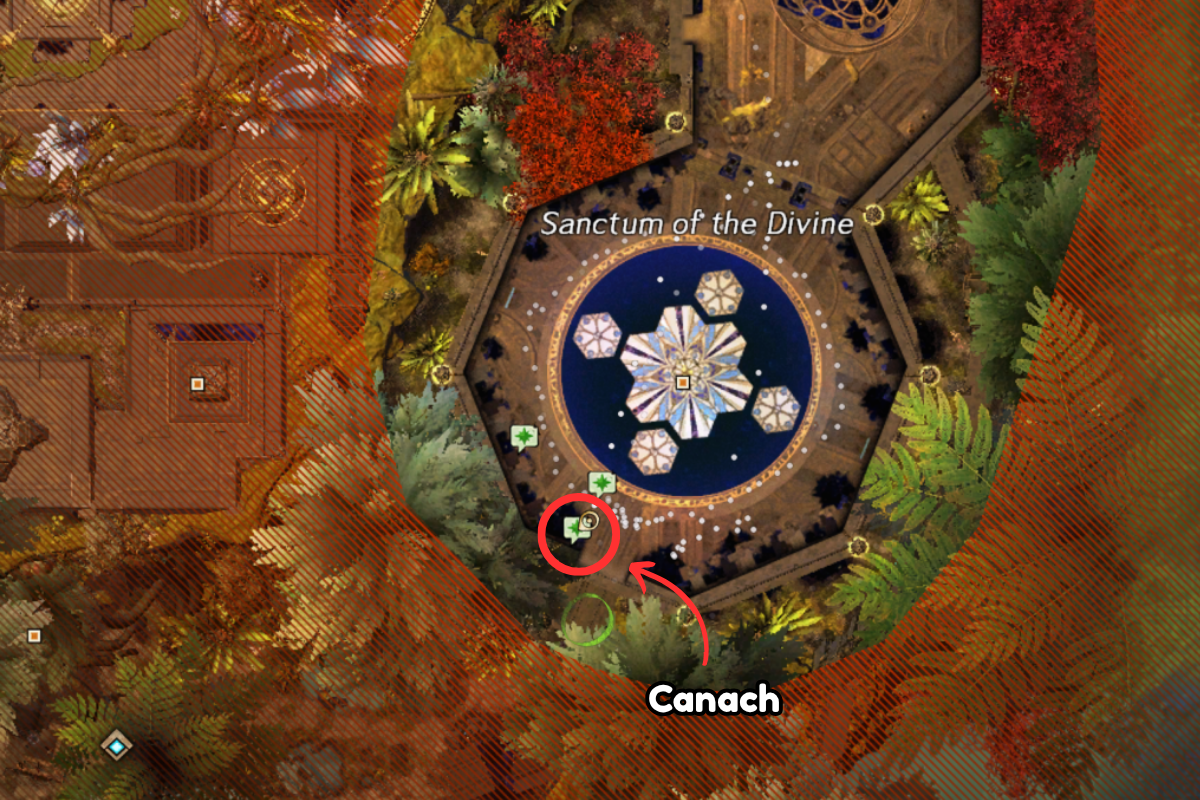
Isgarren
Sayida
Historian Minna

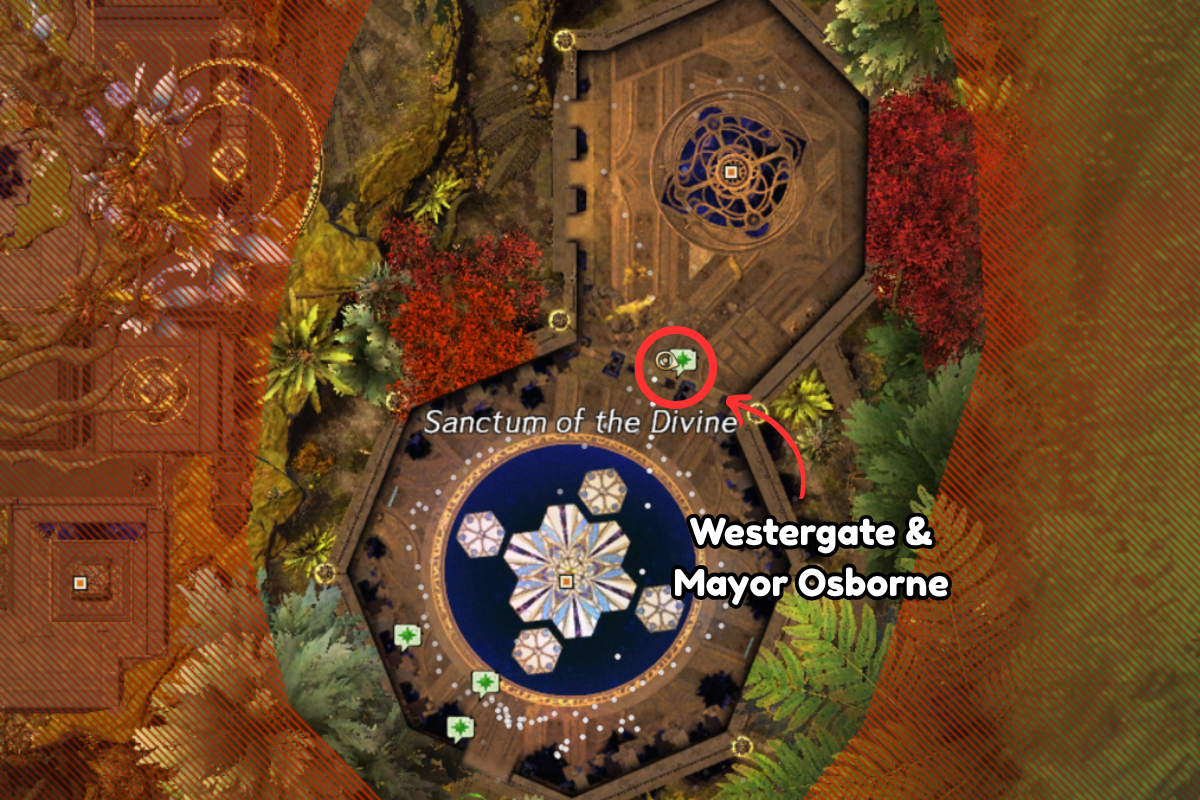
Westergate & Mayor Osborne
Honored Guests
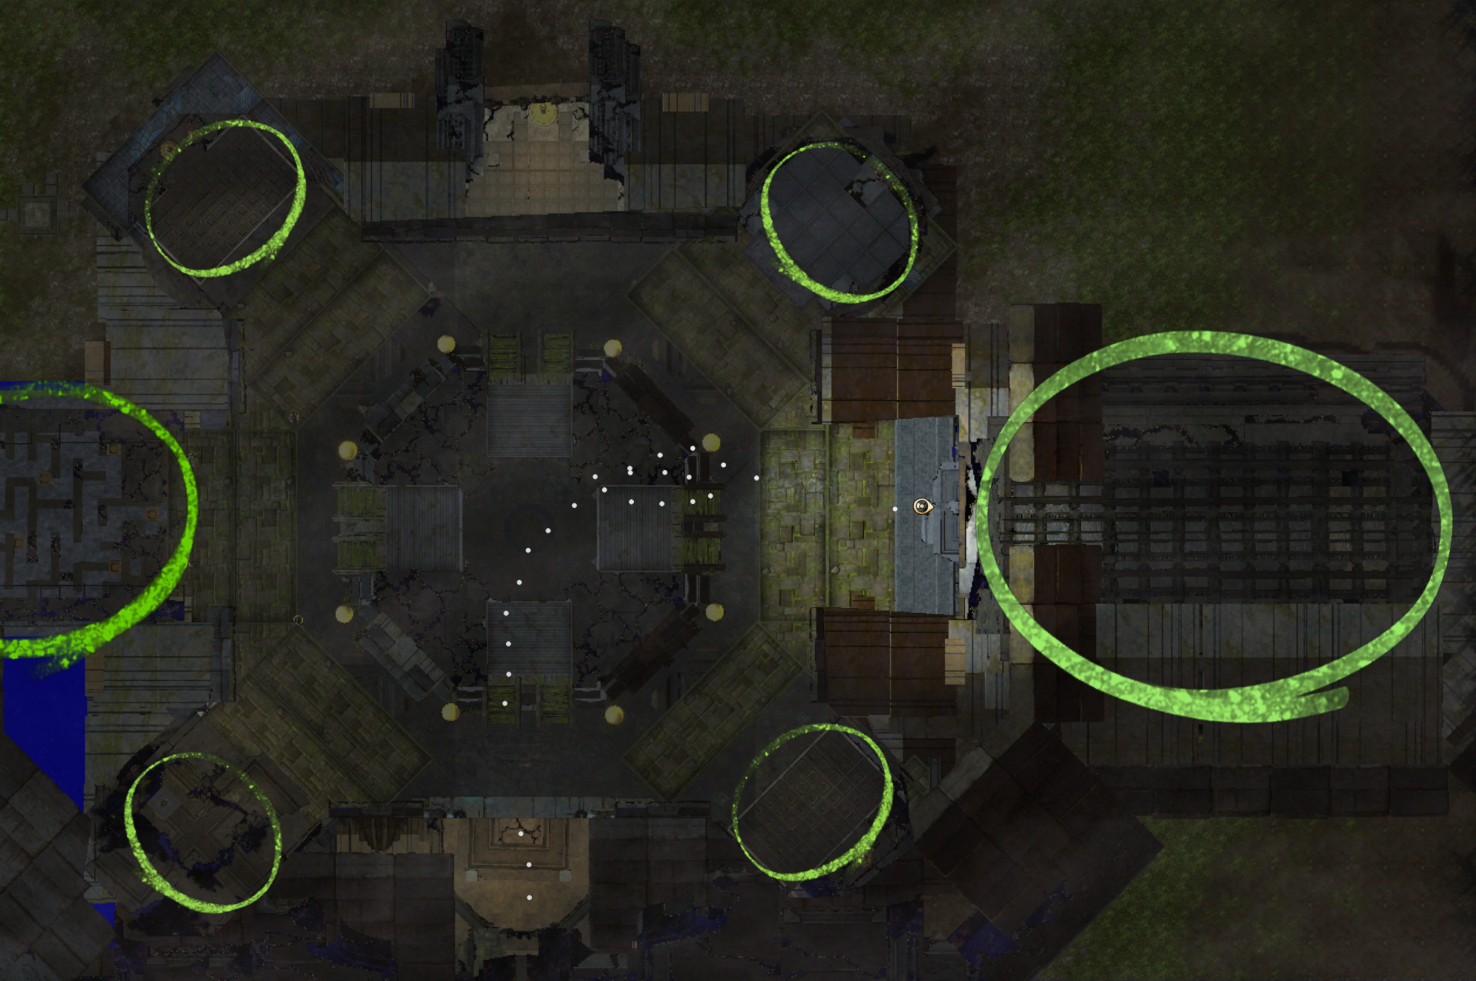
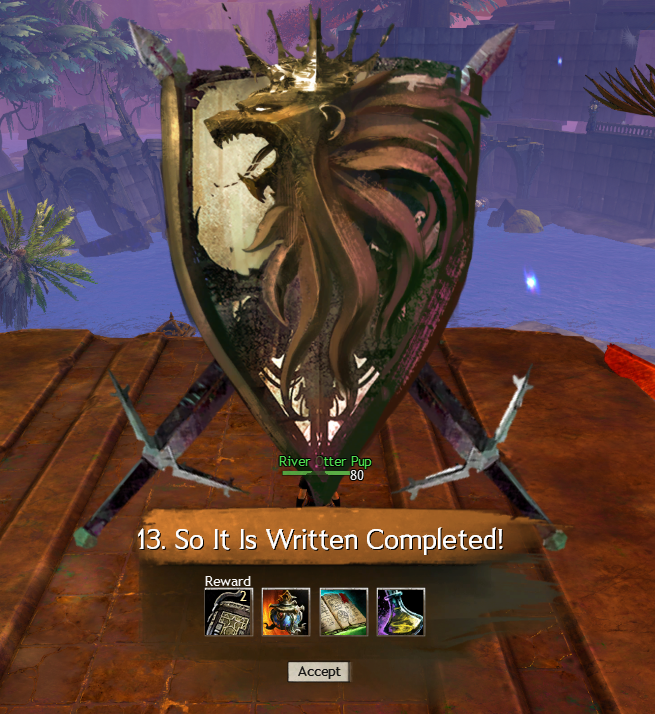
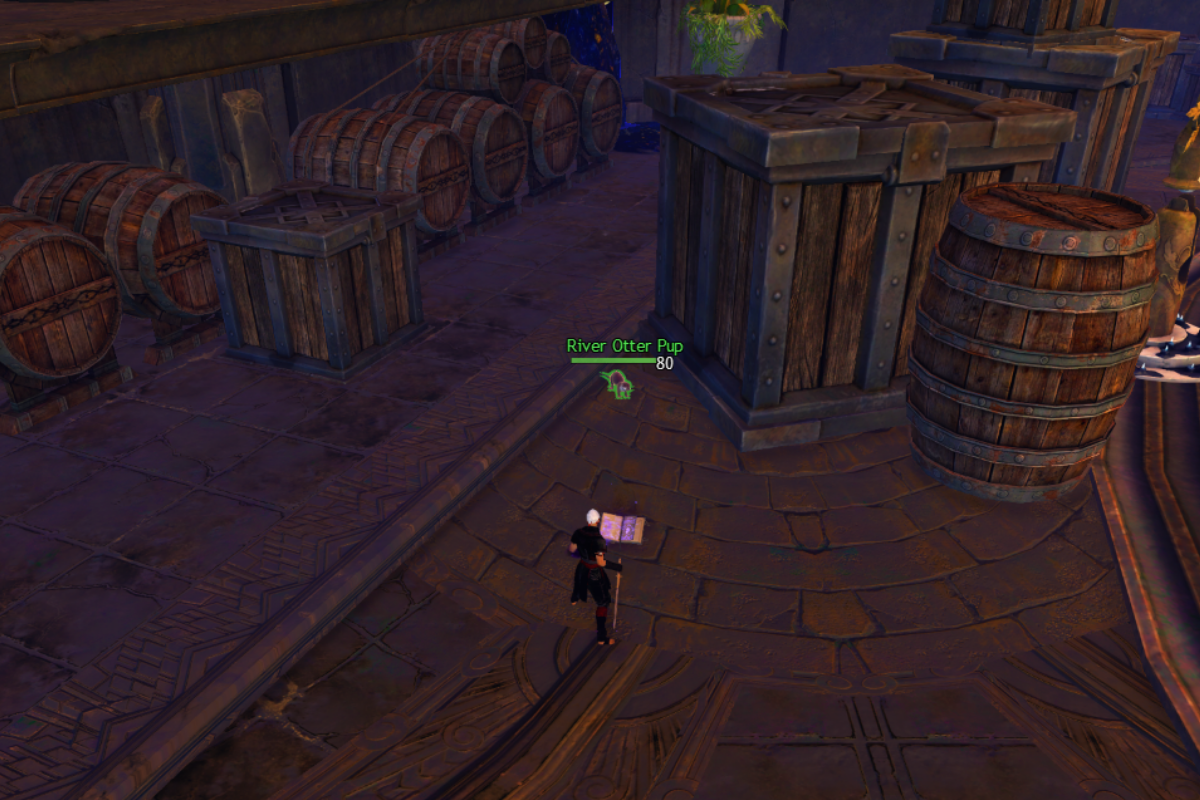
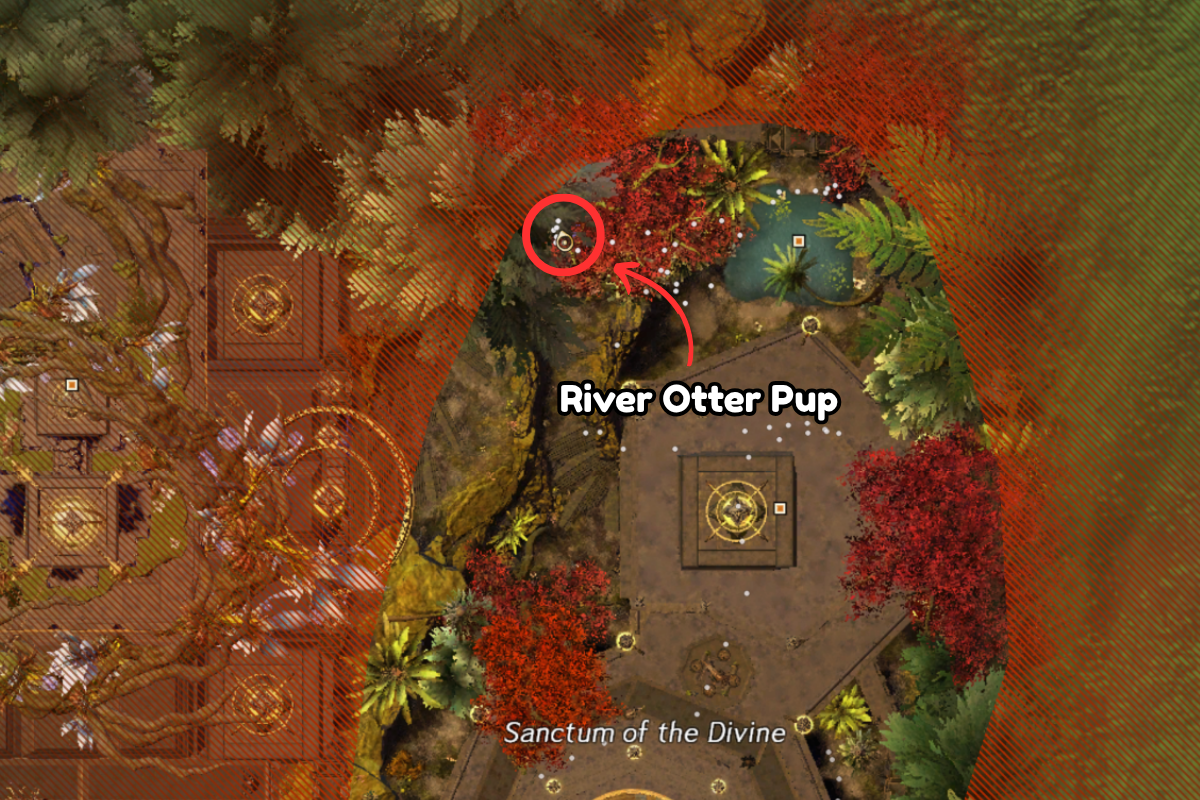
Invite five furry otter friends to witness the curse-breaking ritual
You will need to use your Special Action Key (SAK) on the River Otter Pups to make them follow you - this achievement is tracked in your buff bar
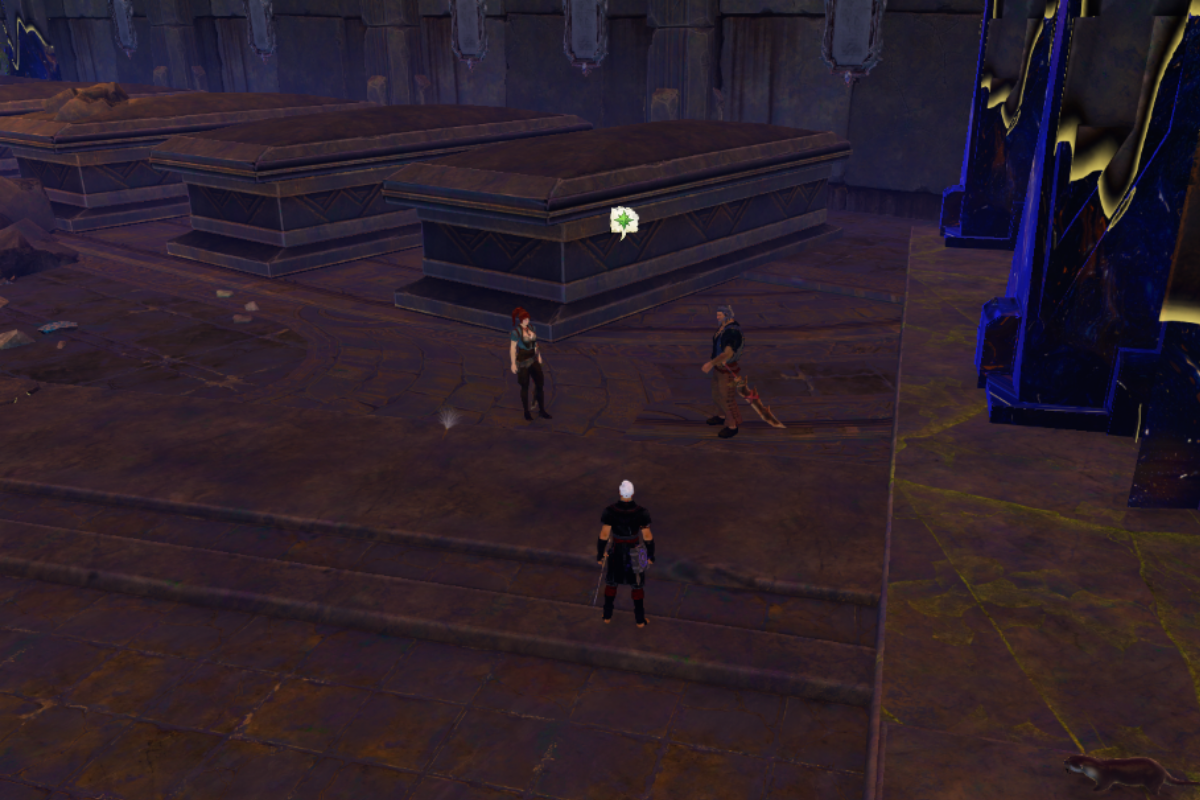
River Otter Pup 1

In the north room behind some boxes
River Otter Pup 2
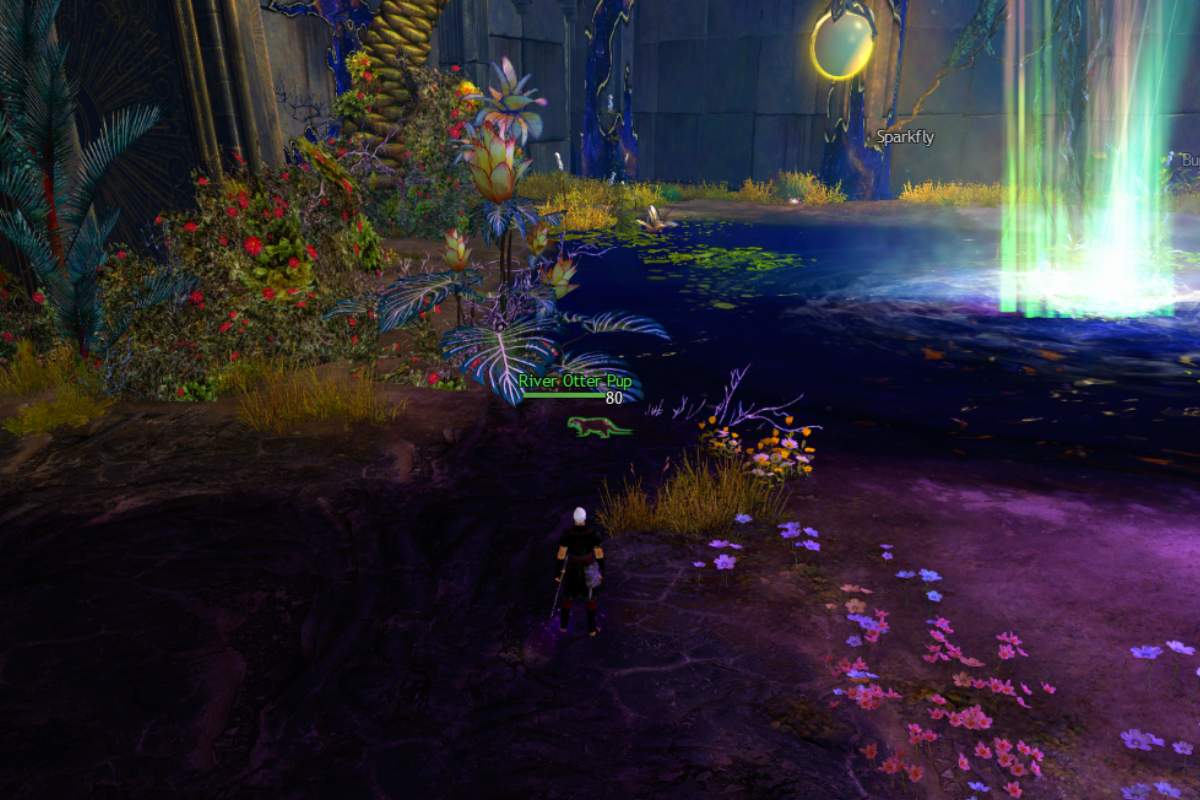
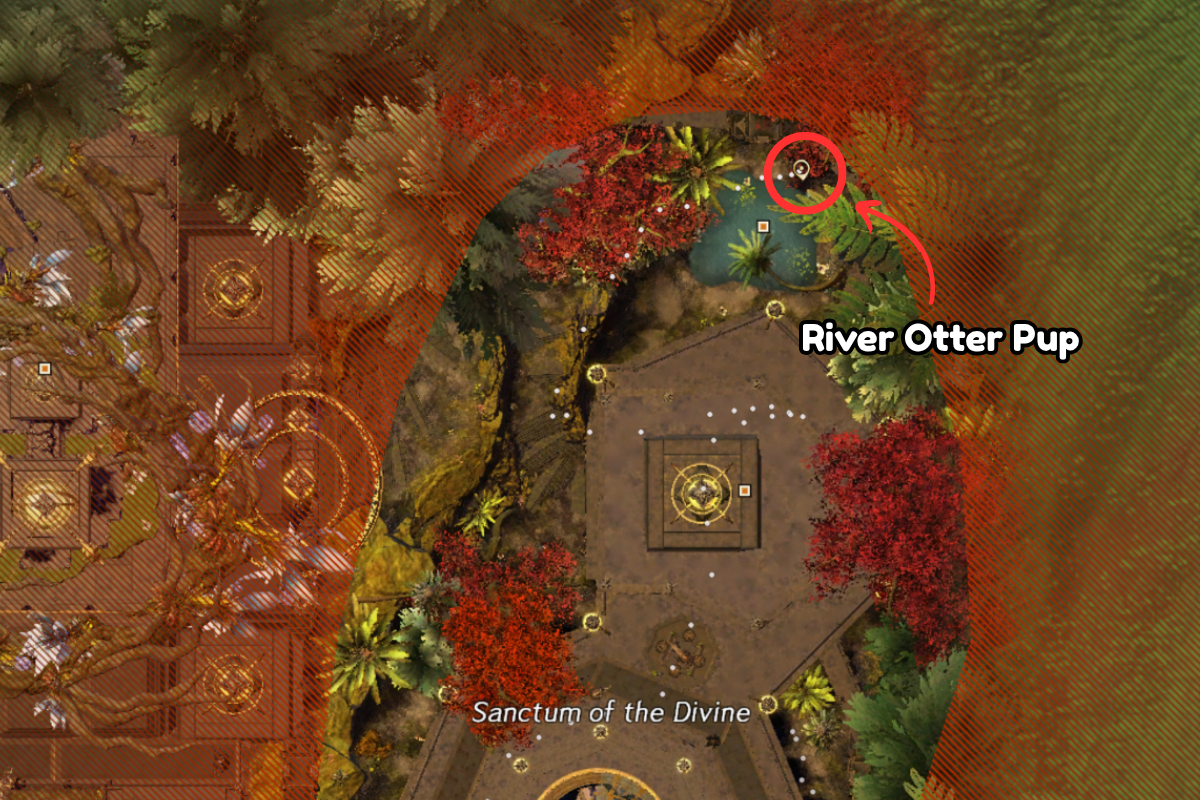
Out the north side of the building - just behind near the seer magic pool
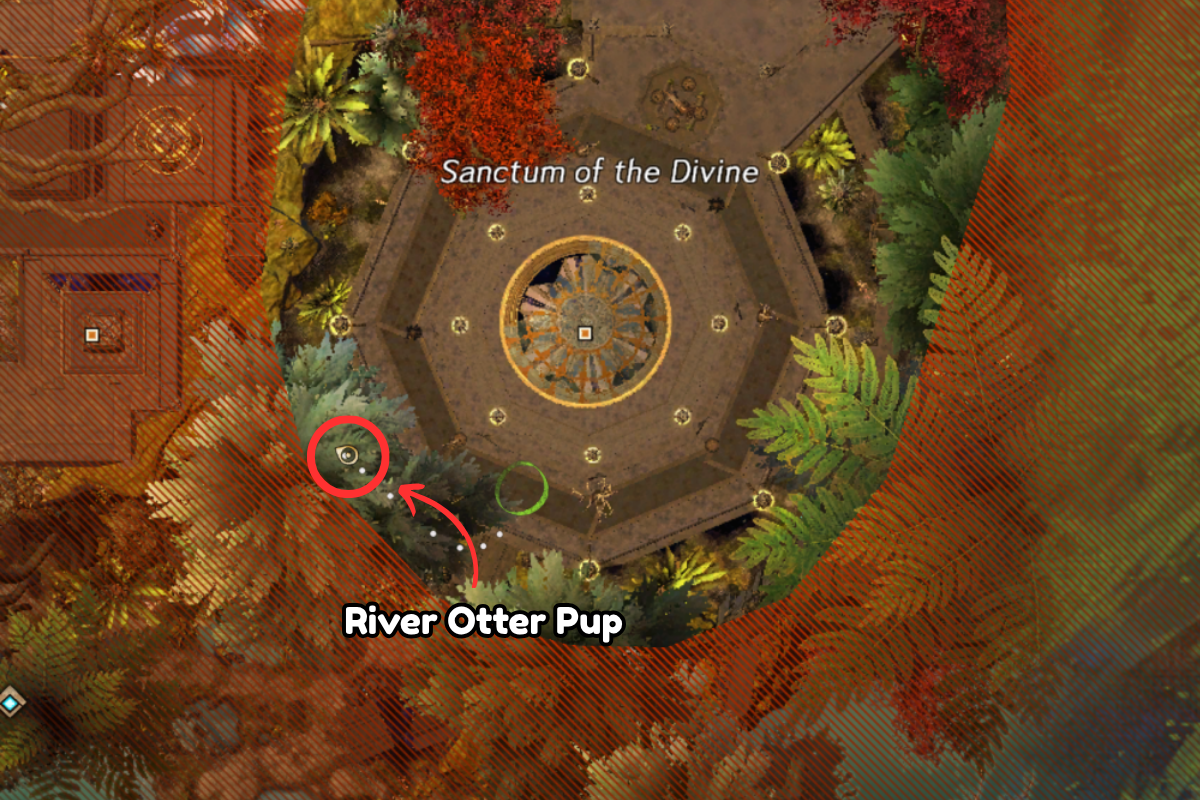
River Otter Pup 3
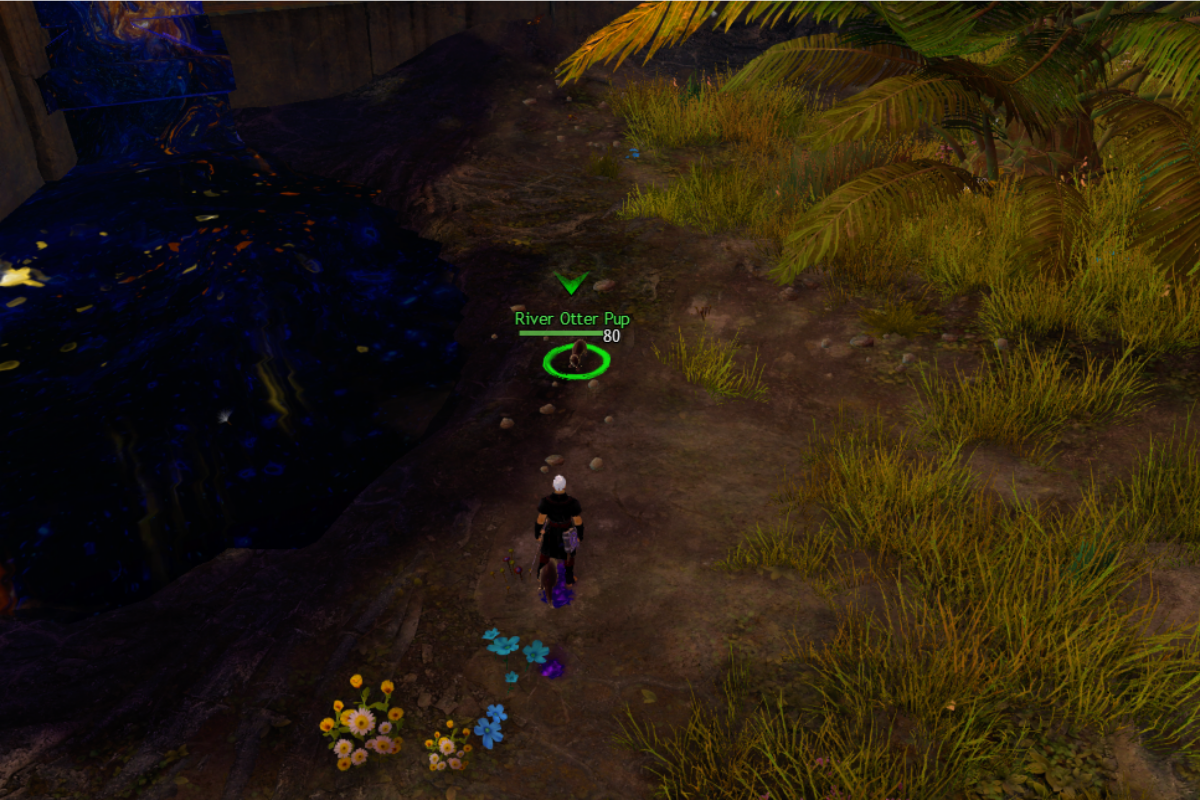
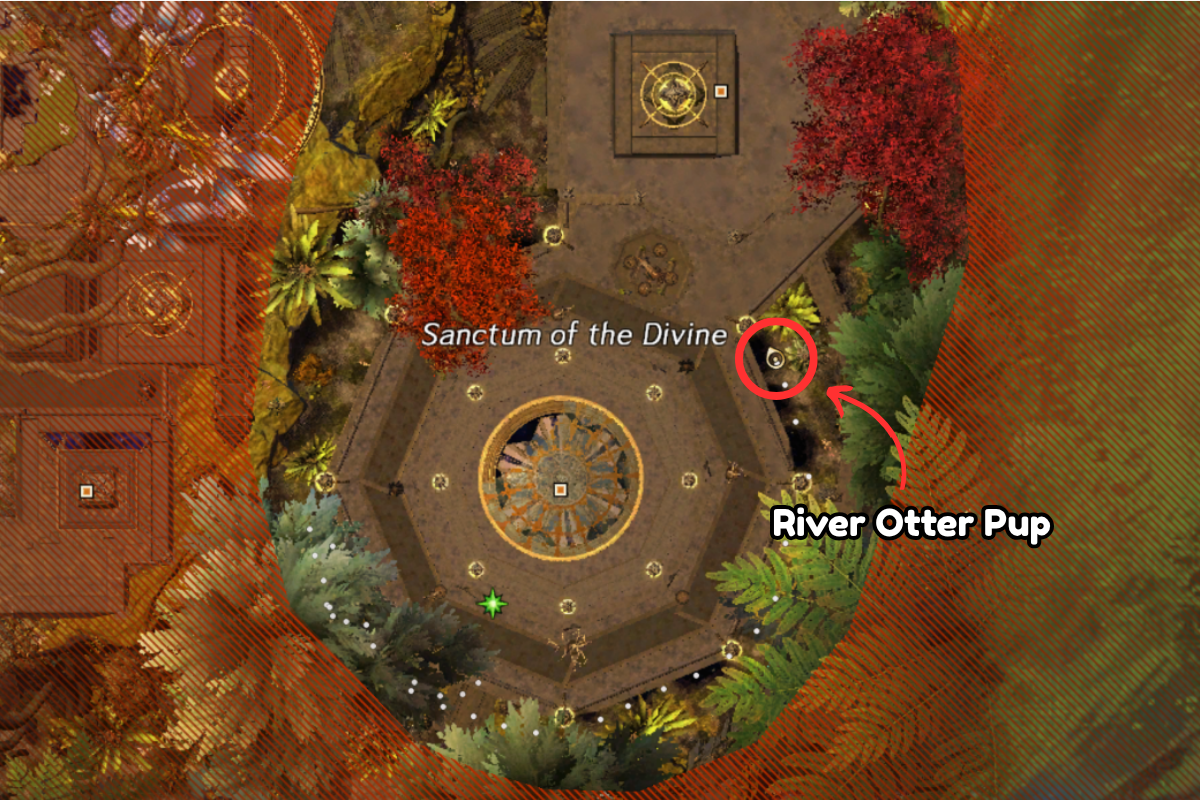
Out the south exit on the east side before entering the Sanctum of the Divine
River Otter Pup 4

Near the northeast side behind a large glowing pool with a ley line
River Otter Pup 5
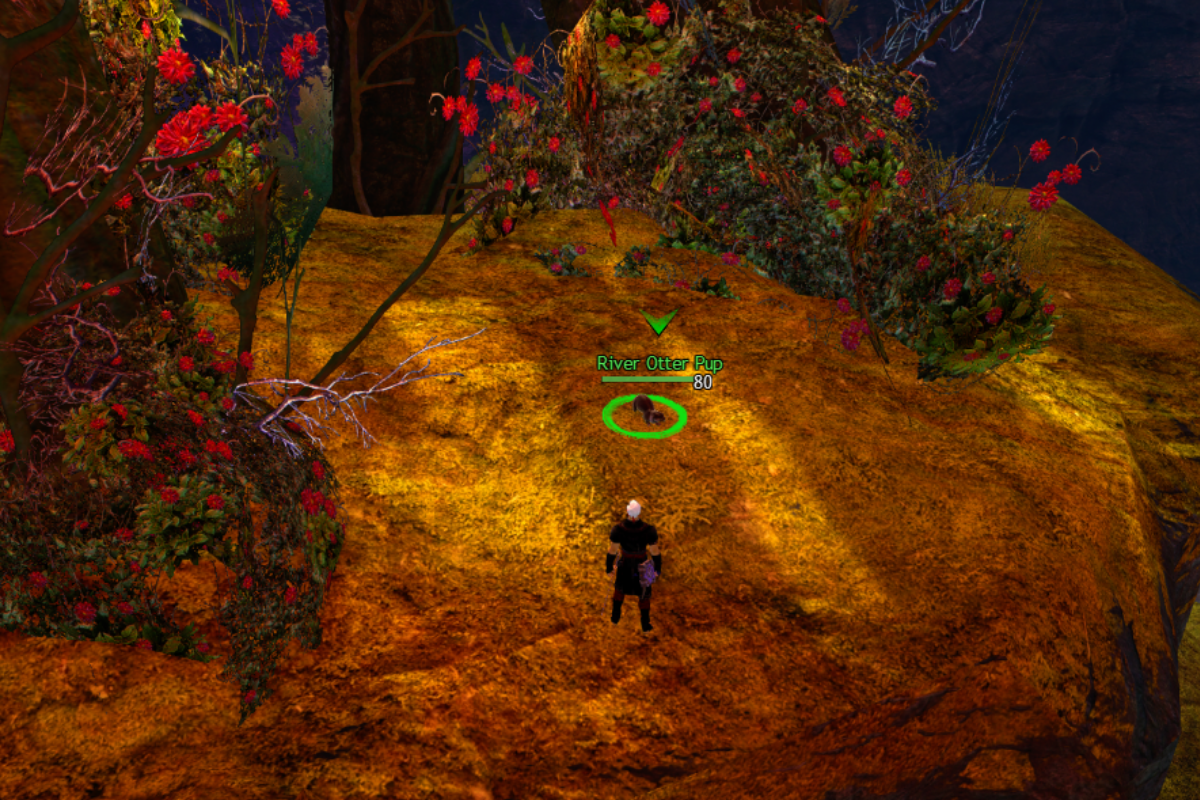
High up on a cliff outside the south entrance to the Sanctum of the Divine
More Guides